

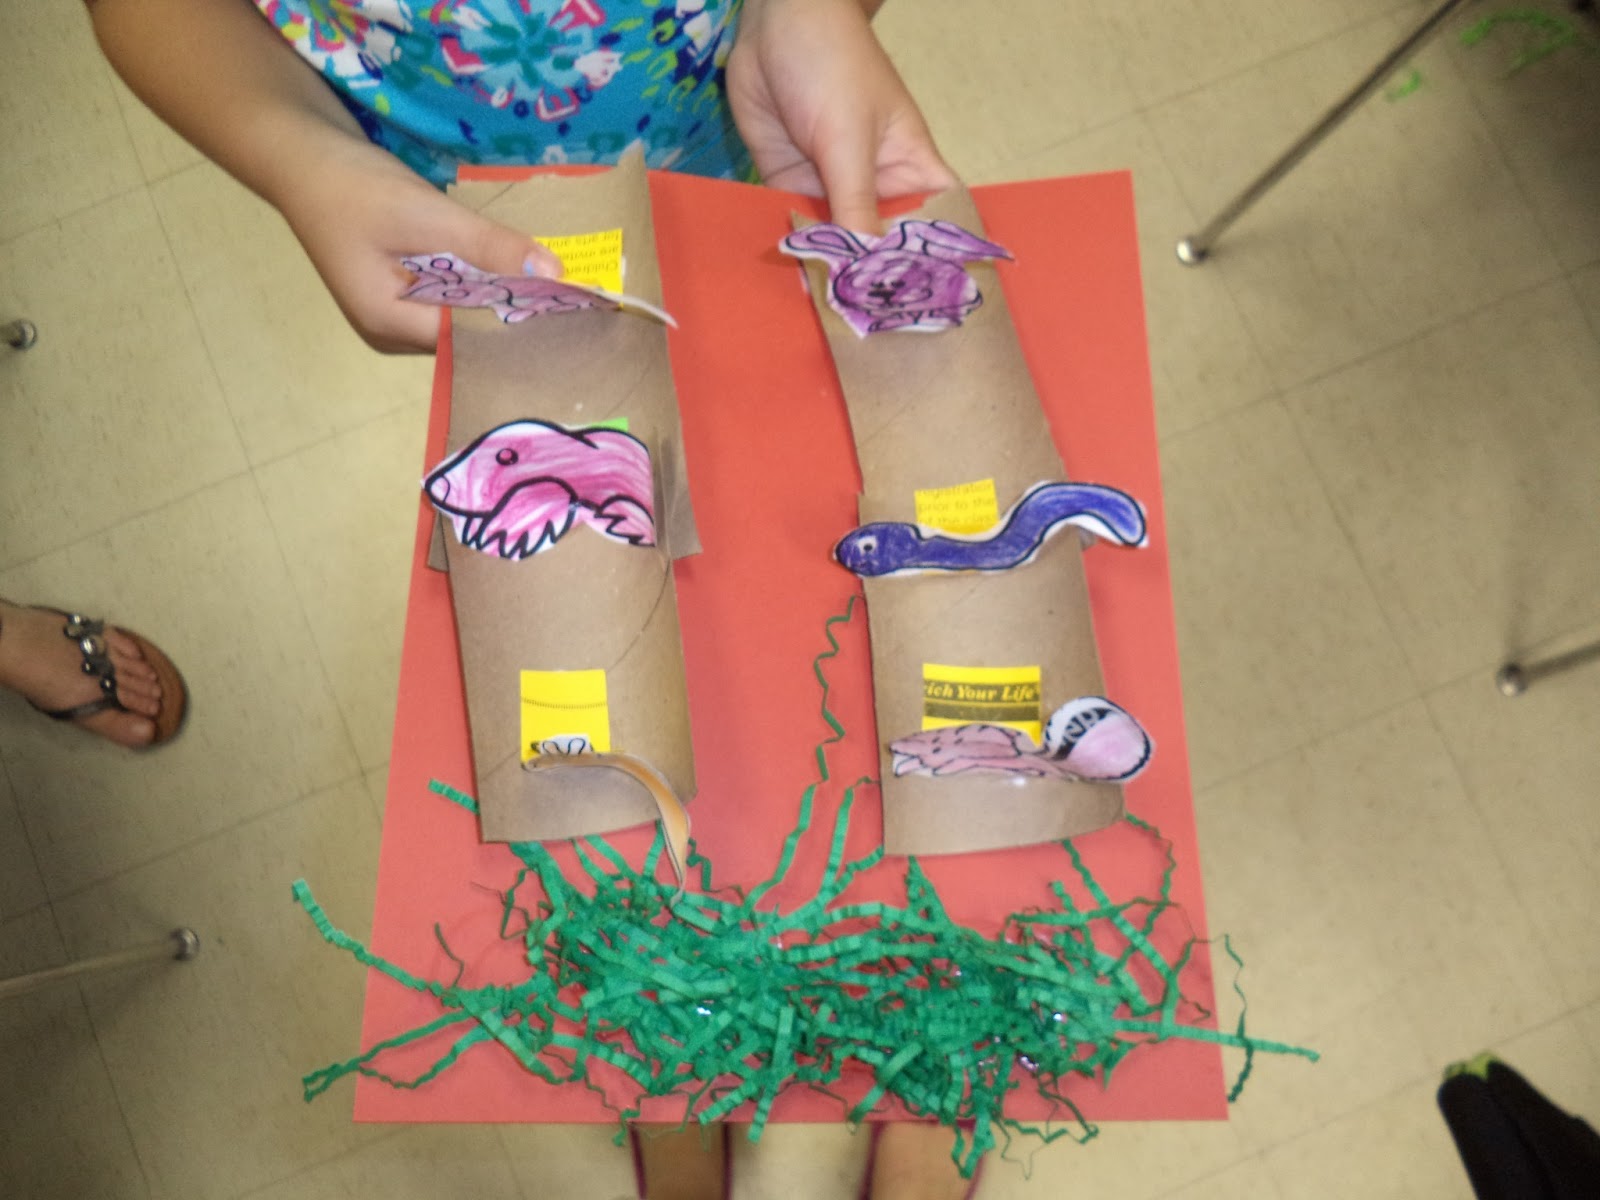
Digging Creatures Diorama

Supplies Needed: One letter-sized piece of card stock (any color), paper green grass, toilet paper or paper towel tubes, pictures of animals either hand drawn or downloaded from the Internet, scissors, glue/tape and crayons/markers.
1. Either draw or download from online pictures of small animals that usually dig in the ground, such as moles, chipmunks, earthworms, slugs, rabbits, ants, etc.
2. If you download off the Internet, then using crayons/markers, color in the pictures of the animals or print them out on a colored printer (whichever you prefer).
3. Take 2-3 cardboard tubes (toilet paper or paper towel tubes) and cut them in half using scissors. Fold each half in half to make the tubes more narrow. Those will be your underground tunnels that the animals will dig or crawl through.
4. Take your tube halves, paper animals and paper green grass and glue/tape all of them onto the piece of letter-sized card stock. Preferably, the grass should be on top and the tube tunnels should be placed below.
5. Place the animals anywhere in the grass or in or around the tubes.
6. Using crayons/markers, you may embellish the diorama by coloring in vegetables or roots as well. You may also create a shovel that people use for digging by cutting out a square from a piece of card stock and sticking it to a wooden stick.
Below are the underground worlds created by the children at the library!


Now that you saw animals dig in the ground for food, it is now time to enjoy some fun food at McDonald's! Let's dig into a happy meal!
McDonald's Happy Meal!

Supplies Needed: A paper plate, card stock, tissue paper, fabric, a glittery pipe cleaner, fake green grass, crayons/markers, glue/tape and scissors.
1. Wrap up a paper plate in tissue paper of any color of your choice. Then set the paper plate down on a table.
2. Cut out 2 big circles from light brown colored fabric and set aside. (Those 2 big fabric circles will be your hamburger buns.)
3. Using scissors, cut out round red shapes and a round dark brown shape out of card stock or fabric to resemble a burger and tomato slices.
4. Cut out bright yellow strips from fabric to resemble cheese.
5. Take one fabric bun and lay it flat on a surface, then tape or glue the burger, tomato, cheese and fake green Easter grass for lettuce on top of the bun. Then place the other bun over everything and glue/tape everything together to assemble the hamburger.
6. Glue/tape the hamburger onto the paper plate.
7. Cut out a shape from red card stock that resembles a french fries container. Fold a half inch of the bottom of the red card stock shape backwards.
8. Cut out strips from bright yellow card stock using regular scissors or squiggle cut craft scissors for a different effect.
9. Glue/tape the yellow strips behind the back of the red card stock but make sure you can see the tops of the strips. This will all be your french fries! (If you wish, you may draw smiley faces on the french fries, it's up to you.)
10. Glue/tape the folded bottom part of the french fries design onto the paper plate to make it all stand up.
11. Cut out 2 small arch shapes out of bright yellow card stock and attach them together to resemble the "M" for McDonald's and glue/tape them onto the fries.
12. Wrap a toilet paper tube in construction paper and decorate using crayons/markers and stickers. Glue the bottom of the tube onto the plate.
13. Cut out a circle from card stock or construction paper and punch a hole towards the center of the circle. Glue the circle onto the top of the tube and then stick a pipe cleaner through the hole to resemble a soda with a straw.
14. Enjoy the Happy Meal from McDonald's!
Below are the McDonald's Happy Meals created by the children at the library! Enjoy!


Now that we enjoyed our happy meals, it's time to go
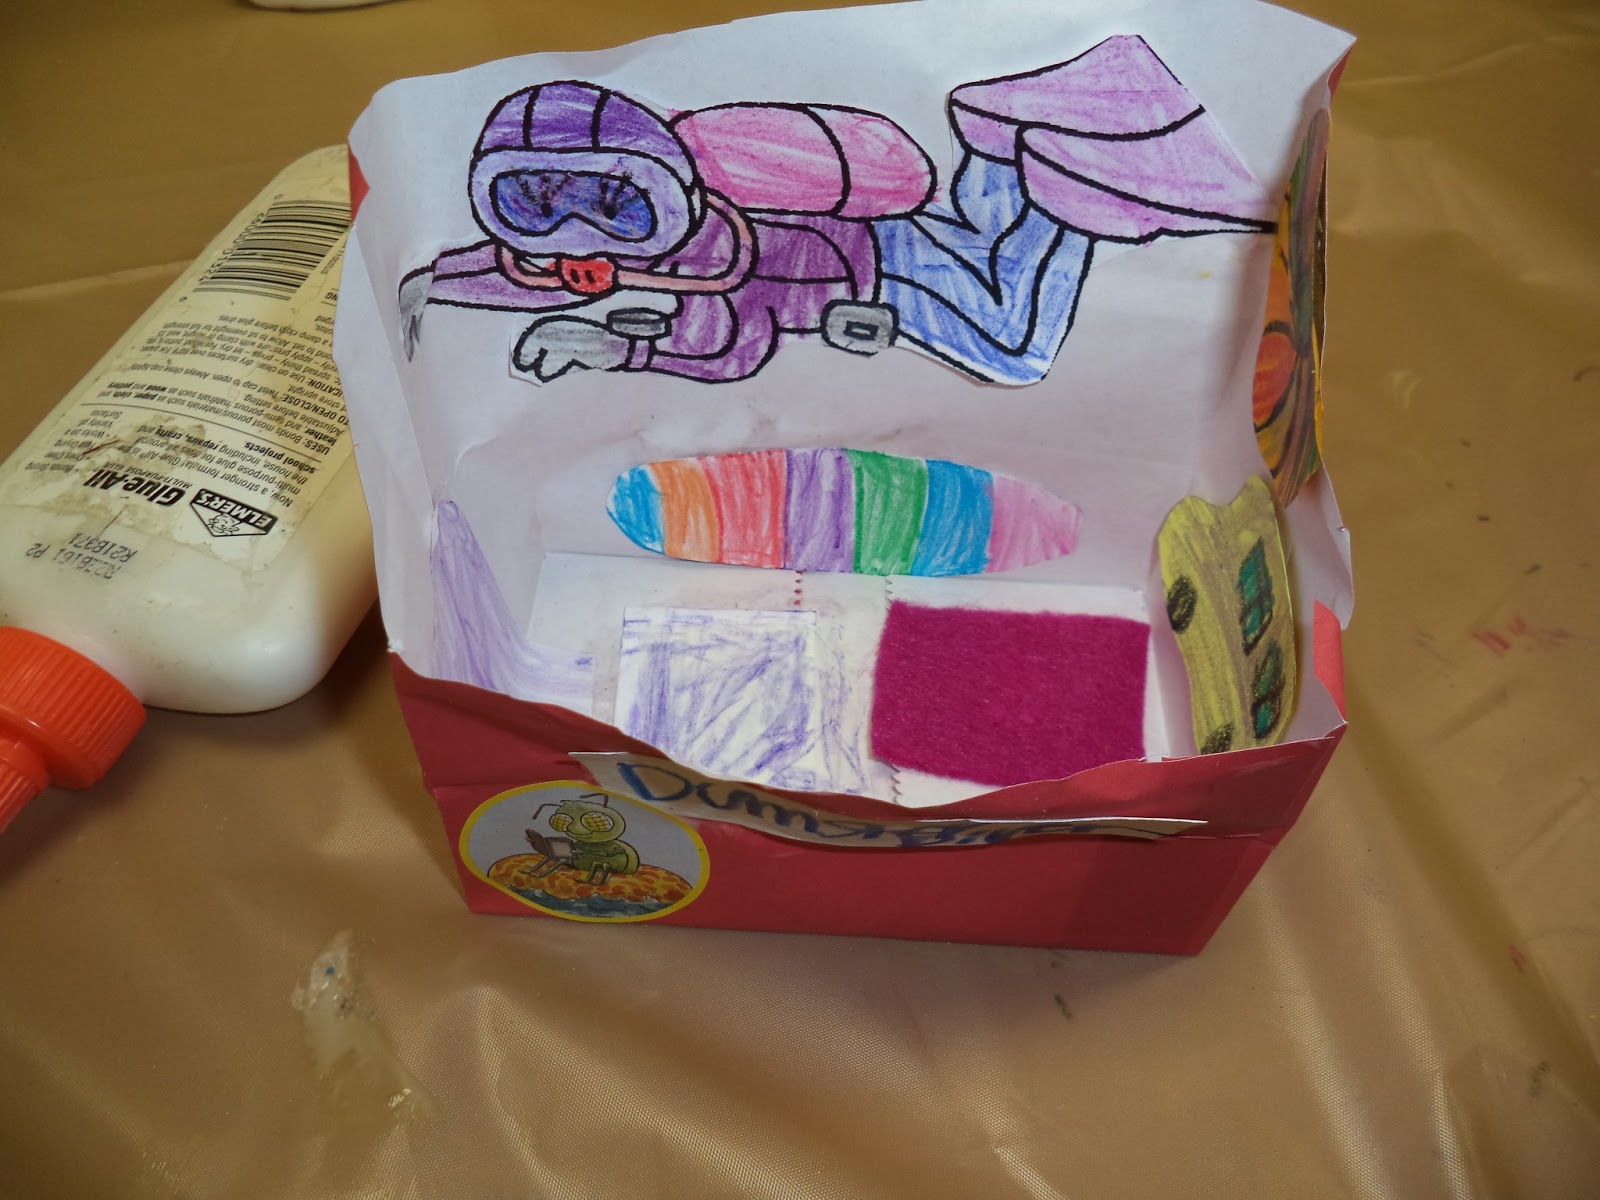
dumpster diving!

Supplies Needed: A paper bag, scissors, crayons/markers, glue/tape, card stock, construction paper, fabric and pieces of cardboard.
This craft is based on the children's picture book "The Dumpster Diver" by Janet Wong.
1. Take a paper bag in any color of your choice and cut down a portion of the top of the bag at an angle so that the bag is shorter and the top part is at a slant.
2. Place pieces of cardboard inside the bottom of the bag and along the bottom sides of the bag to make the bag sturdy. Now you have your paper dumpster!
3. Color a picture of a scuba diver (the picture can be drawn, photocopied or downloaded from online) and glue/tape the scuba diver onto the inside of the top part of the dumpster to make it seem as if someone is diving into a dumpster.
4. Using card stock or construction paper, cut out shapes of objects that you would like in your dumpster (bag) such as a ball, a chair, a surfboard, a lamp, etc. Color the objects as you wish and attach them inside or outside of the dumpster.
5. Cut out shapes from fabric to resemble clothes, mats, scraps, etc. and place them in or attach them onto the dumpster.
6. Feel free to make a sign with the word "DUMPSTER" written on it and attach it to the front of the dumpster if you wish.
Have fun! Enjoy browsing through the dumpsters designed by the children below! See what treasures you may find!


Now that we dove into dumpsters and found some treasures, we can now dive into the ocean and enjoy swimming with sea creatures and more treasures!
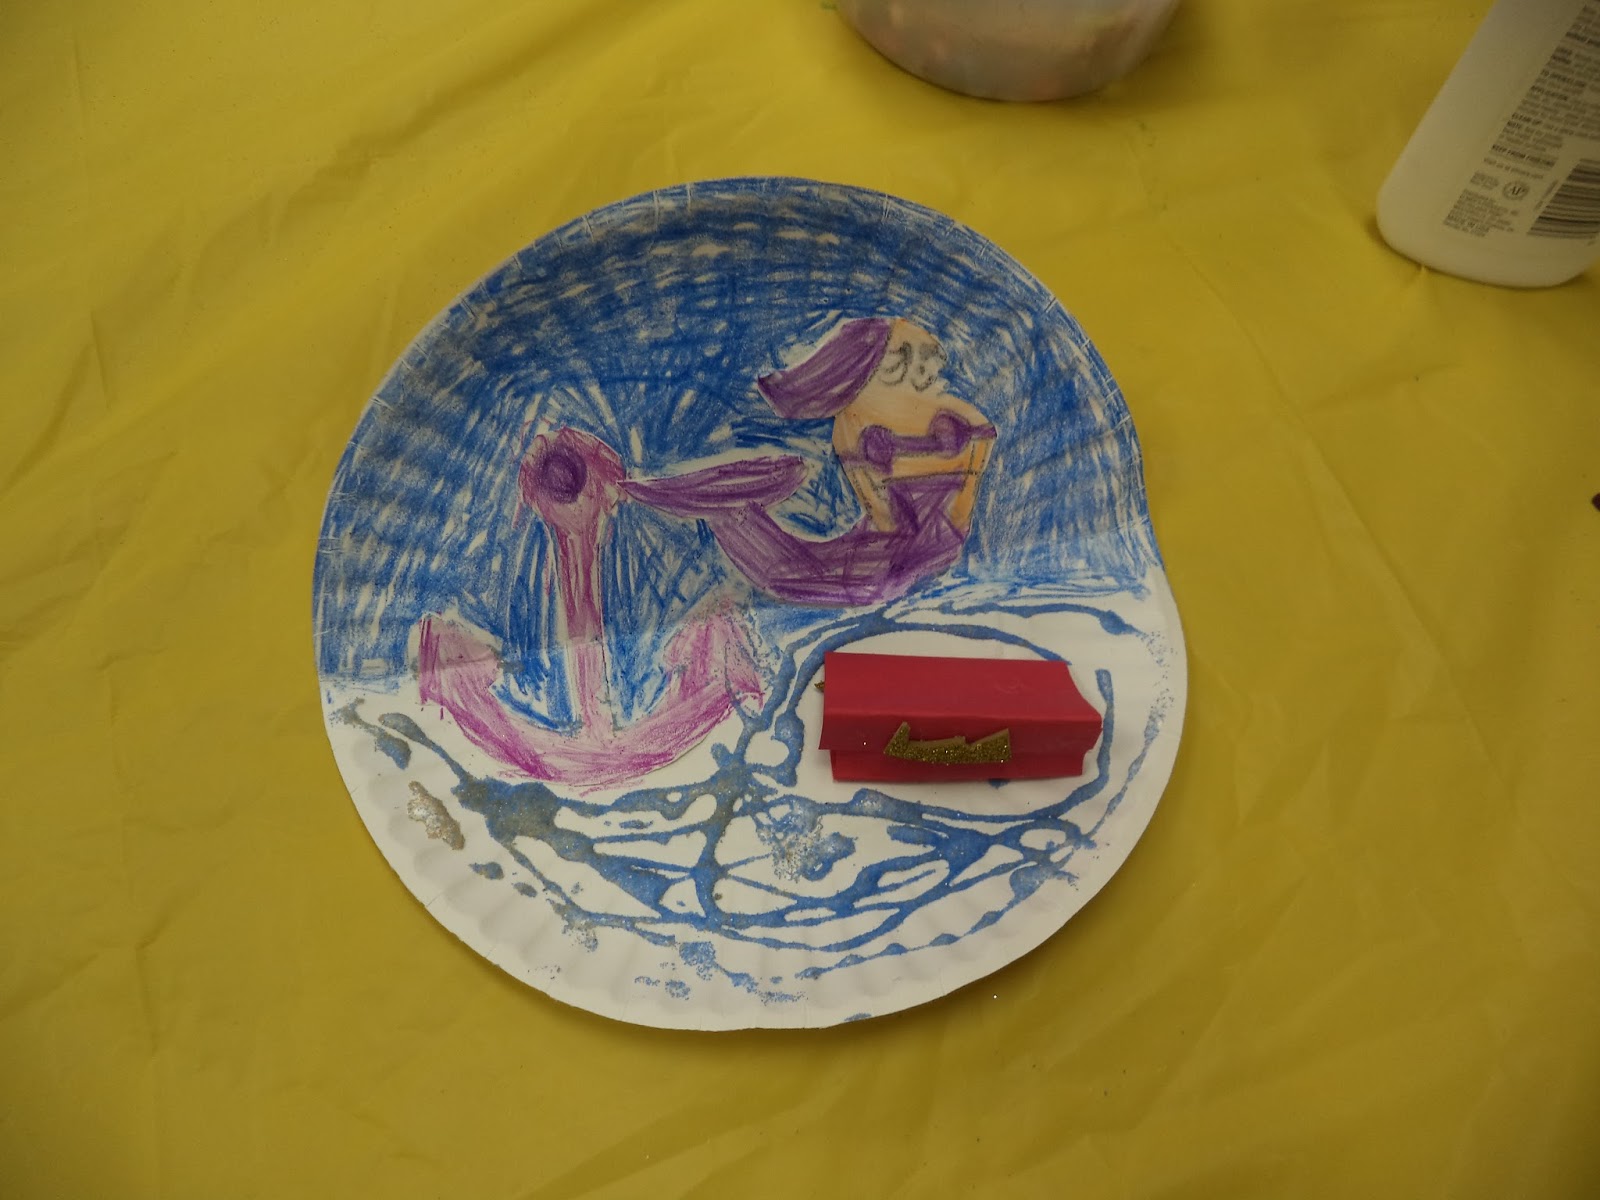
Under the Ocean!

Supplies Needed: A paper plate, card stock or construction paper, scissors, crayons/markers, glue/tape, a picture of a mermaid, gold glittery foam shape stickers, sand, fake grass and blue or aqua tissue paper.
1. Cover the front of a paper plate with blue or aqua tissue paper and fasten the tissue paper with glue or tape. This will be your ocean water!
2. Fold the paper plate in half so that half of the plate can stand up in a vertical position.
3. Using scissors, cut out fish shapes, star fish shapes and an anchor out of card stock or construction paper. Color and decorate with crayons/markers and glitter foam sticker pieces.
4. Download a picture or outline of a mermaid and cut the mermaid out and color it as you wish.
5. Cut out a piece of card stock in the shape of a square. Fold the card stock in half and fold down the top end and the bottom end by less than half of and inch. This will be your treasure box. (You may fold it in any way of your choosing if you wish.)
6. Squirt glue around on the bottom of the plate and drizzle sand over the glue. Let it dry for a minute.
7. Glue or tape the fish, starfish, mermaid and anchor along the top half of the plate.
8. After the sand dries, glue down the treasure box and embellish with small gold glittery foam sticker pieces.
9. Glue down fake grass to resemble kelp or seaweed.
10. Feel free to glue or attach anything else that you would like in your ocean! Have fun!
Enjoy some ocean worlds created by the children at the library!


After a swim in the ocean, let's play in the yard and dig in the sandbox!
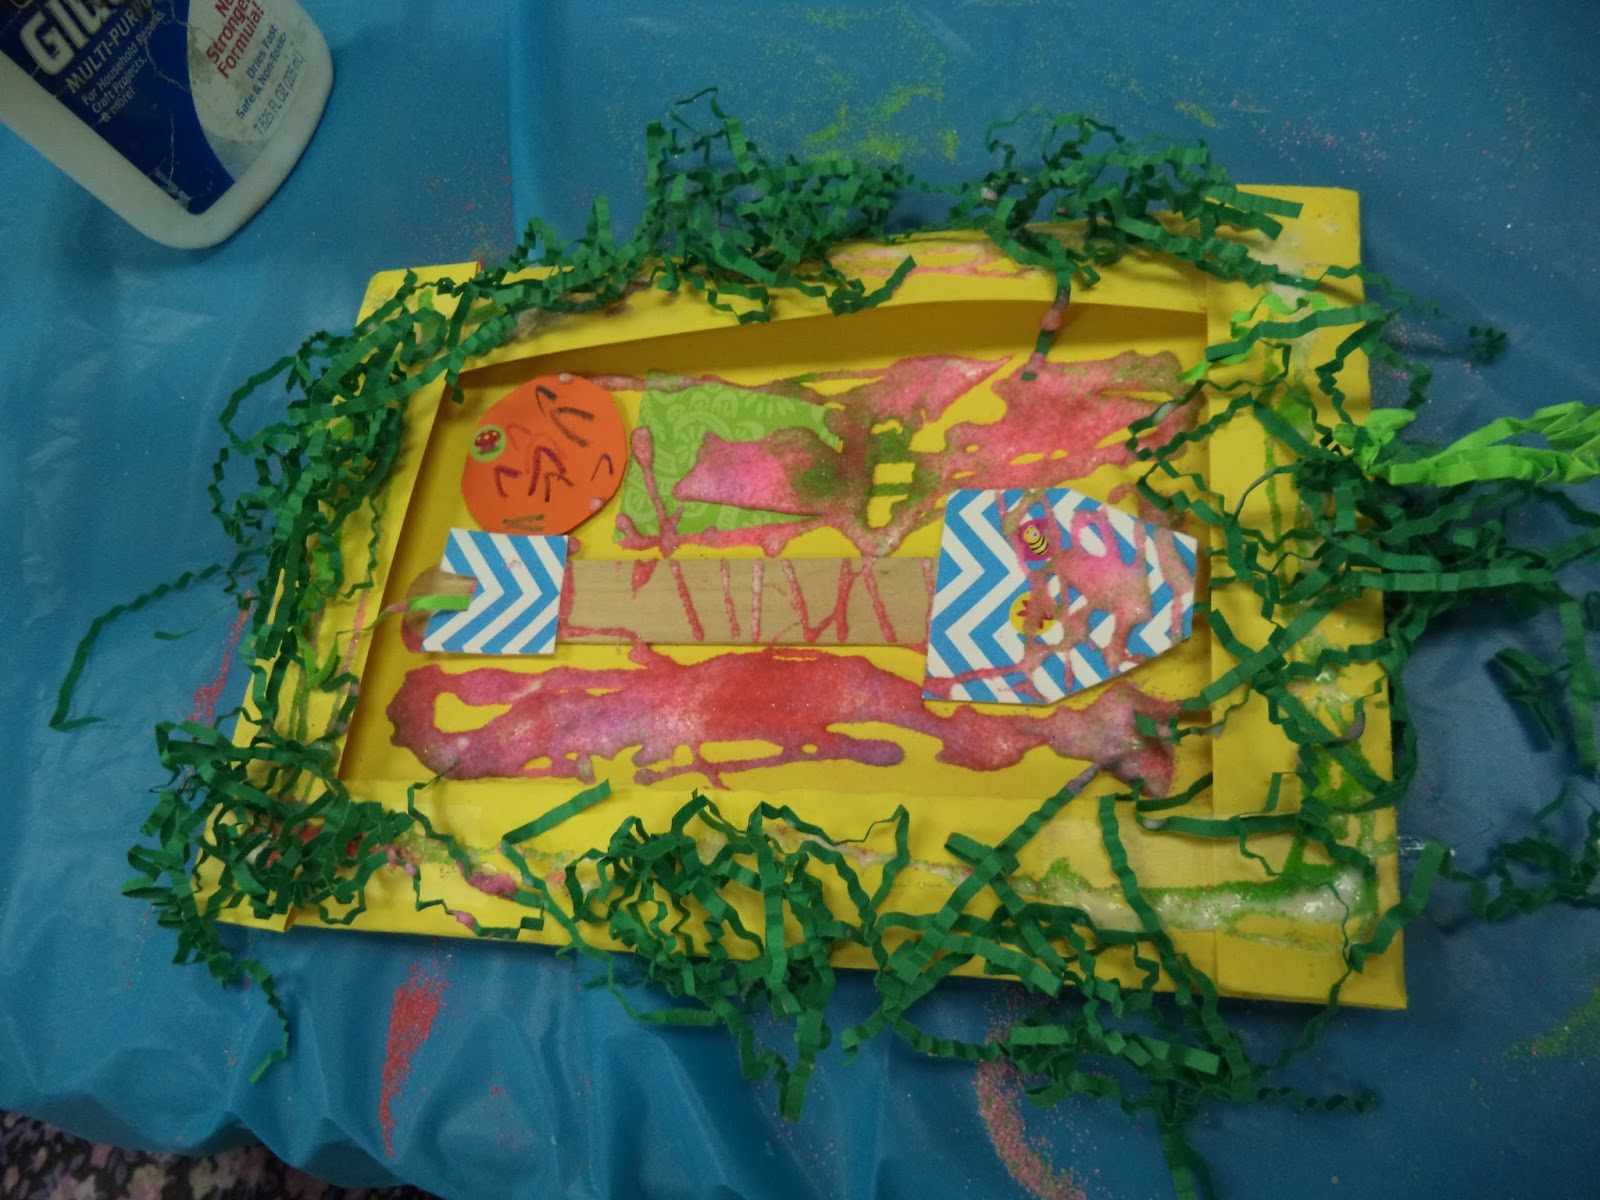
Paper Sandbox

Supplies Needed: One sheet of construction paper, glue, tape, card stock, fake grass, a popsicle stick crayons, stickers, scissors and sand.
1. Take a letter sized sheet of construction paper in any color and lay it down flat. Fold each edge over and inward an inch and tape down the folded edges. This should resemble a flat sandbox.
2. Sprinkle glue around inside the edges of the sandbox and throughout the center.
3. Sprinkle sand onto the glue and let it dry.
4. Glue or tape fake grass around the edges of the sandbox.
5. Cut out small shapes from pieces of card stock to resemble toys in a sandbox, such as a pail, ball, shovel, etc.
6. If you wish, cut out a small square from card stock and glue/tape it onto the bottom of a popsicle stick to resemble a shovel.
7. If you wish, you may color the pieces of card stock to give the paper toys a design and you may use stickers if you wish to embellish them as well.
8. Shake off excess sand from the sandbox after the glue and sand are dry. Then glue your toys and shovel into the sandbox. Enjoy digging into the sandbox!
Enjoy the paper sandboxes created by the children at the library below!


Enjoy the rest of the summer! Have fun shopping for
school supplies!