

The library is a great place to visit in the summer! There are awesome books and activities! Libraries Rock!
Emoji Musical!


Supplies: Card stock, 4 emoji faces, 4 images of musical equipment (microphone, guitar, keyboard, etc.), glue/tape, crayons/markers, scissors and stickers.
Instructions:
1. Cut out a musical note shaped book from card stock. It's basically 2 musical notes attached together and folds open and closed like a book.
2. Color in an emoji face and attach each emoji face onto each bottom part of the note.
3. Color in a piece of musical equipment (such as the mike, keyboard, guitar, etc.) and attach each one onto each page of the music note. (Each emoji should have an instrument.)
4. Decorate the musical note with stickers. Draw on any more decorations as you wish.
Enjoy the emoji musicals below created by the children at the library!


Seeing an emoji with a guitar makes me want to play a guitar! Let's make a guitar!

Supplies: One large oak tag guitar or paper guitar, paper, card stock scraps and pieces of paper, string, stickers, crayons/markers, glue/tape and scissors.
Instructions:
1. Cut out shapes from card stock and paper and adorn the guitar in any way you like. Color in the guitar if you wish.
2. Attach long strings vertically from the top of the guitar down the middle to make it look authentic.
Enjoy the paper guitars below designed by the children at the library!


There are books in the library about unicorns that rock!
Unicorns Rock!

Supplies: One small cardboard tube, construction paper, yarn, glue/tape, scissors, crayons/markers and stickers.
Instructions:
1. Wrap the cardboard tube in construction paper. Draw a face on one side of the tube.
2. Cut out a piece of paper into the shape of sunglasses and attach the paper sunglasses onto the face.
3. Cut out a narrow triangle from paper and attach onto the top front of the face. Cut out horse ears and attach them onto the top back of the tube. Now the unicorn has a horn and ears and a face with sunglasses.
4. Attach pieces of yarn onto the top front of the face and the back of the tube for the mane and tail.
5. Adorn the unicorn with stickers of your preference.
Enjoy the rocking unicorns below created by the children at the library!


The rocking unicorns make me want to experiment on a xylophone!
Paper Xylophones!

Supplies: One legal-sized sheet of construction paper, strips of paper in different colors, fabric, stickers, crayons/markers, glue/tape, scissors and 2 wooden ice cream sticks.
Instructions:
1. Fold all four edges of the large sized sheet of construction paper inwards and underneath. Now the sheet of paper should stand up on the edges.
2. Make an X shape with 2 strips of paper along the center of the sheet.
3. Attach strips of papers in different colors up and down the X. You now have a xylophone with bars.
4. Cut out 2 small circles from fabric and attach each circle to the end of an ice cream stick. These are your 2 mallets.
5. Attach the mallets onto the paper xylophone.
6. Color in and decorate the paper xylophone with stickers.
Enjoy the paper xylophones below created by the children at the library!


The Xylophone sounds remind me of merry go rounds. Perhaps a rocking horse will do for now.
Rocking Horses!


Supplies: One paper plate, scissors, 2 identical paper cut outs of a horse attached to each other, crayons/markers, glue/tape, google eyes, stickers and anything else of your preference.
Instructions:
1. Cut out the inside of a paper plate and discard the edge. Fold the inside of the paper plate in half. Cut out a big hole in the center of the paper plate so that you just have the edges of the center of the paper plate left. Now you have a round paper circle.
2. Stand up the folded circle so that it stands by itself.
3. Cut out 2 horse shapes and make sure they are attached together by the head or back.
4. Color in a face, mane, tail and hooves on both sides of the horse. If you have google eyes, attach one on each side of the face.
5. Attach the hooves onto the paper plate circle so that the horse is attached to the circle by the hooves and it rocks back and forth when you push it.
6. Cut out a paper saddle and attach onto the top back of the horse.
7. Adorn the horse with stickers and anything else of your preference.
Enjoy the rocking horses below created by the children at the library!


Riding on the rocking horse makes me hungry for a doughnut. Wow, the doughnuts in the shop look dazzling with all the colors.
Dazzling Doughnuts!
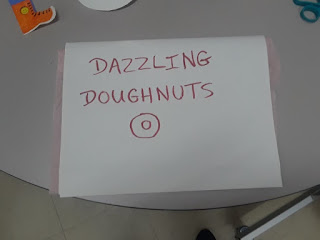


Dazzling Doughnuts!


Supplies: One large legal sized piece of construction paper, smaller sheets of construction paper, scissors, glitter, glue, crayon/markers, some tissue paper and anything else of your preference.
Instructions:
1. Fold a legal sized sheet of construction paper in half. Fold the edges inward for an inch. Now you have your doughnut box.
2. Place a sheet of tissue paper inside the doughnut box.
3. Cut out 6 circles from construction paper and cut a small hole in the center of each circle. These are your doughnuts.
4. Attach the doughnuts inside the paper box.
5. Draw designs on the doughnuts and decorate with glitter, smaller pieces of paper and anything else of your preference.
Enjoy the dazzling doughnuts below created by the children at the library!


Does Pete the Cat like doughnuts? He likes to play the guitar and rock in his shirt with buttons and shoes!
Pete the Cat Puppet!

Supplies: Blue construction paper, yellow construction paper, white construction paper, an image of a guitar, glue/tape, crayons/markers and stickers.
Instructions:
1. Cut out a "Pete the Cat" head and body shape from blue construction paper. Cut out strips of blue paper for the arms and legs.
2. Put the head and body together and now you have "Pete the Cat".
3. Cut out 2 white ovals for the eyes and a small triangle for the nose. Cut out 6 thin strips of paper for the whiskers. Attach the eyes, nose and whiskers onto the head of "Pete the Cat" so that he has a face.
4. Cut out a small pair of sunglasses shape and attach on top of the head so that Pete the Cat is wearing his sunglasses on his head to look cool.
5. Cut out a yellow shirt shape from yellow paper and attach onto the body. Make sure Pete's arms are sticking out.
6. Cut out 4 small circles from paper and attach onto the shirt. These will be the buttons.
7. Cut out a pair of shoes for Pete the Cat and attach each shoe onto the bottom of each leg and color in the shoes and draw on laces as well.
8. Color an image of a guitar and attach the guitar onto one end of a long, thin strip of paper. Attach the other end of the strip onto the back of the guitar as well. Now the guitar has a guitar strap. Place the guitar with the strap around the front of Pete the Cat so that he can play his guitar.
Enjoy the Rock and Roll Pete the Cats below created by the children at the library!


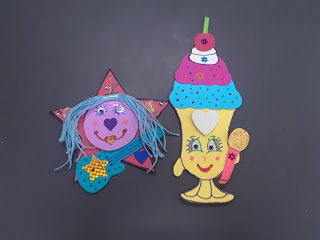
Pete the Cat makes me feel like a rock star!
Let's make a rock star or a heart star!

Supplies: Card stock or construction paper, yarn, stickers, glitter, glue and google eyes.
Instructions:
1. Cut out a heart or star shape from card stock or construction paper.
2. Cut out a circle shape that will fit into the middle of the heart or star.
3. Attach the circle onto the middle of the heart or star and draw a face on it.
4. Attach stickers and google eyes onto the face. If you don't have google eyes, then just draw on the eyes.
5. Attach yarn on top and around the sides of the circle face. This will be the hair.
6. Cut out a guitar shape from paper. Attach the guitar under the face. Color in a design on the guitar and decorate with stickers.
7. Draw a design on the rock heart or star with glue and pour glitter over the glue design. After it dries, shake off the excess glitter.
8. If you wish, cut out a small strip of paper and attach the ends together so that you have a loop. Attach the loop onto the back of the rock heart or star and then place your finger/s through the loop so that you can hold it like a puppet.
Enjoy the rock hearts and rock stars below created by the children at the library!


Wow, these rock hearts and stars make me feel sparkly!
Sea creatures may look sparkly at times in the sun!
Sparkly Sea Creatures!


Supplies: Blue construction paper, card stock of different colors, crayons/markers, yarn, glue, glitter, scissors and stickers.
Instructions:
1. Cut a blue letter-sized sheet of construction paper in half the long way. Save one half and use the other half for this craft.
2. Fold the half of blue paper in 3 sections and then unfold.
3. Cut out different shapes of sea creatures from card stock and attach onto the sections of the blue paper.
4. Draw faces on the sea creatures. If one of the sea creatures is a jellyfish, then attach pieces of yarn onto the bottom of the jelly fish shape so that it looks authentic and 3D. If another sea creature is a narwhal, then attach a long thin triangle on the top of its' head for the tooth.
5. Using a green crayon/marker, draw kelp/seaweed on the bottom.
6. Using glue, draw a design and then pour glitter on the glue design and shake off excess glitter. Now your sea creatures sparkle! Adorn the craft with stickers if you wish.
Enjoy the sparkly sea creatures below created by the children at the library!


Seeing these sparkling see creatures have a party makes me hungry for a sundae!
Singing Suzy Sundae!

Supplies: Card stock or construction paper in bright colors, google eyes, crayons/markers, glitter glue, glue/tape, scissors and stickers.
Instructions:
1. Using scissors, cut out a sundae dish shape. Draw a face on it and place google eyes on the face. Make sure the sundae dish has a little arm sticking out on each side.
2. Cut out 2 ice cream scoop shapes from brightly colored paper. One scoop should be slightly bigger than the other. Place the larger scoop on the top part of the dish and then place the smaller scoop on top of the bigger scoop.
3. Cut out a small shape from white paper that resembles a dollop of whipped cream. Attach that onto the top of the smaller scoop.
4. Cut out a small red circle and a small thin green strip of paper. Attach the green strip of paper on top of the red circle. This will be the cherry that goes on top. Attach the paper cherry on top of the whipped cream.
5. Cut out a microphone shape and draw a design on it. Attach the microphone onto one of the small arms on the sundae dish. Now it looks as if the sundae is singing with a microphone.
6. Draw designs on the sundae, such as sprinkles and dots and adorn the sundae with stickers and glitter glue.
Enjoy the singing sundaes below created by the children at the library!


I hear some disco music in the background of the ice cream shop. I see some mechanical toy dinosaurs moving to the music.
Disco Dinosaurs!

Supplies: Card stock, paper cut outs of dinosaurs, glue, string, glitter, crayons/markers, stickers, hole puncher and scissors.
Instructions:
1. Cut out a disco ball shape from card stock. Cut out a small dome-shaped handle shape from card stock as well.
2. Attach the handle shape onto the top of the disco ball shape and punch a hole in the center of the dome handle. Place a string through the hole and tie the ends of the string together. Now you can hold your disco ball by the string and twirl it around.
3. Cut out images of dinosaurs and color them in. Attach the dinosaurs onto the disco ball on both sides.
4. Make a design on the disco ball with glue and pour glitter on the glue design. After it dries, shake off excess glitter.
5. Adorn the disco ball with dinosaurs with stickers if you wish.
Enjoy the dancing disco dinosaurs below created by the children at the library!


It's nice to see some stars in the sky after dancing all night. It looks like a star show!
Star Show!

Supplies: One sheet of dark colored card stock, smaller pieces of card stock, fabric, tissue paper, stickers, scissors, crayons/markers, glue/tape and anything else of your preference.
Instructions:
1. Lay a dark colored sheet of card stock flat. The card stock can be a regular letter-sized sheet and should be laid flat and horizontal. This will be the background for the star show.
2. Cut out curtain shapes from fabric and attach each curtain shape on each side of the card stock sheet.
3. Cut out 3-4 star shapes from card stock of bright colors. If you don't have card stock, then regular paper is fine.
4. Attach the stars onto the dark card stock between the curtains.
5. Cut out hats and bow tie shapes for the stars. Now the stars have on costumes for the show.
6. If you wish to make one or more of the stars a shooting star, then attach 3 strips of tissue paper onto the side of the star.
7. Color in decorations and adorn with stickers.
Enjoy the star shows below created by the children at the library!


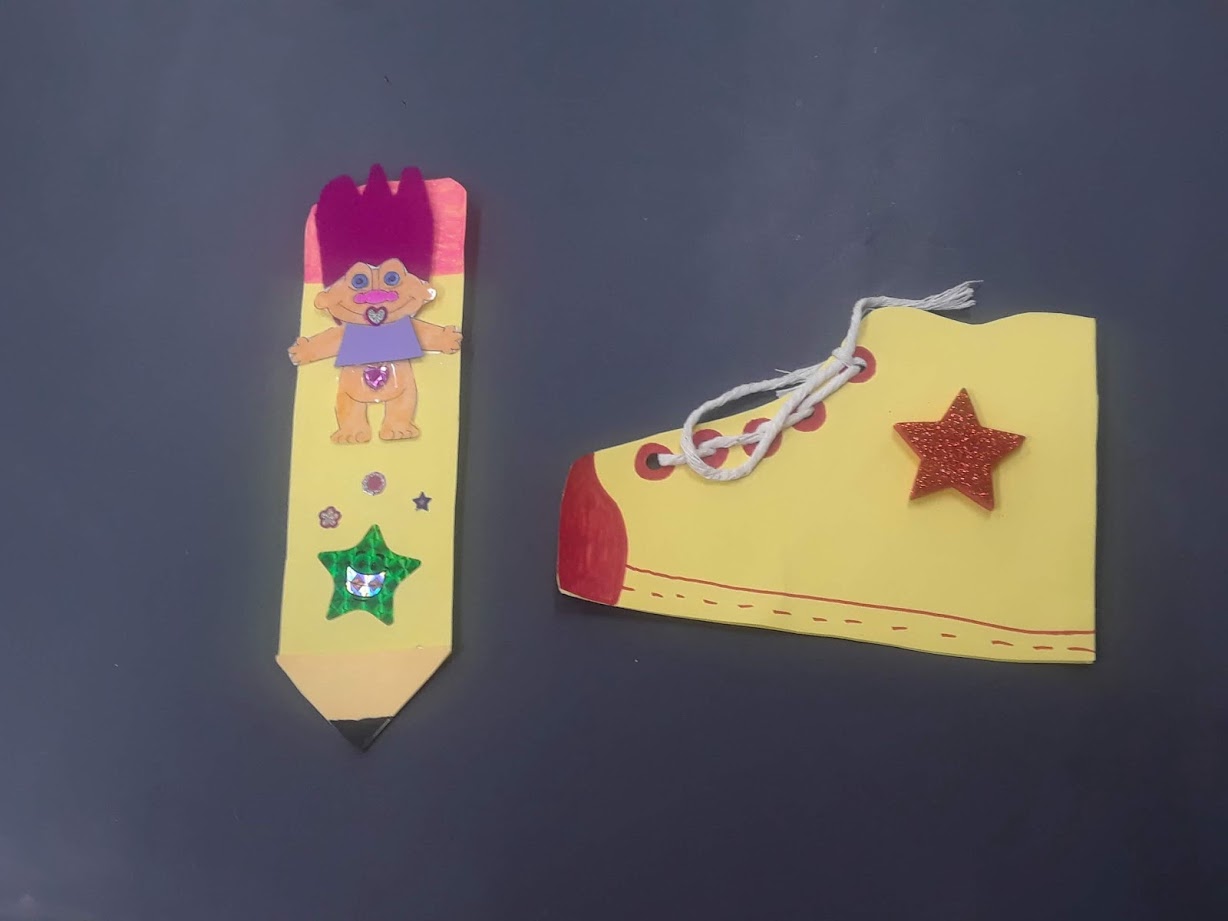
Seeing the star show reminds me of sparkling troll dolls!
Portrait of a Troll Doll!

Supplies: One sheet of construction paper or card stock, one paper print out of a troll doll, yarn, crayons/markers, glue and sparkling stickers.
Instructions:
1. Attach the paper troll doll printout onto the middle of the sheet of paper.
2. Pour or spread glue all onto the hair of the troll and then attach yarn onto the glue and now the troll has hair that you can touch and feel.
3. Color in the troll doll. If you wish, cut out a dress or shirt for the troll out of paper and attach onto the body of the troll.
4. Draw a frame at the edges of the sheet. Attach a sticker or any brightly colored or shiny stickers onto the troll for decoration.
Enjoy the portraits of trolls below created by the children at the library!


Wow, the summer went by so fast. It's time to get ready for school! Just like the trolls rock in their outfits, we can rock in our school shoes!
Rocking in our School Shoes!
Supplies: Construction paper, string, hole puncher, crayons/markers, glue/tape, scissors and stickers.
Instructions:
1. Cut out 2 shoe/sneaker shapes and attach them together by the heels and toes parts.
2. Decorate the shoe by coloring in designs and adorning with stickers.
3. Punch holes along the top of the shoe for the laces. Lace a string through and tie a bow at the top.
4. The bottom parts of the shoe should still be open and unattached to place your hand through so that you can hold the shoe/sneaker like a puppet.
Enjoy the shoes/sneakers below designed by the children at the library!


No comments:
Post a Comment