

It's the Summer of Science! Let's Fizz, Boom, Read
and Experience Science!
Let's boil some spaghetti and see how boiling hard, dry spaghetti will make it soft and edible! Let's enjoy a nice meal of spaghetti and meatballs or soyballs!
Let's create a pop art version of spaghetti and meatballs!


Ooh! There is a thunder and lightning storm outside! Perhaps we can observe the storm through the window as we are enjoying our spaghetti!
Let's create our own storms by designing a storm collage!
Storm Collage


The storm has subsided and it's a new day! Let's learn about robots by reading about robots and making our own robot books!
Bot Book!


Did you know that robots are used for outer space missions?Let's visit the planetarium, learn about the solar system and then create our own paper solar systems!
Twirling Solar System


and Experience Science!
Let's boil some spaghetti and see how boiling hard, dry spaghetti will make it soft and edible! Let's enjoy a nice meal of spaghetti and meatballs or soyballs!
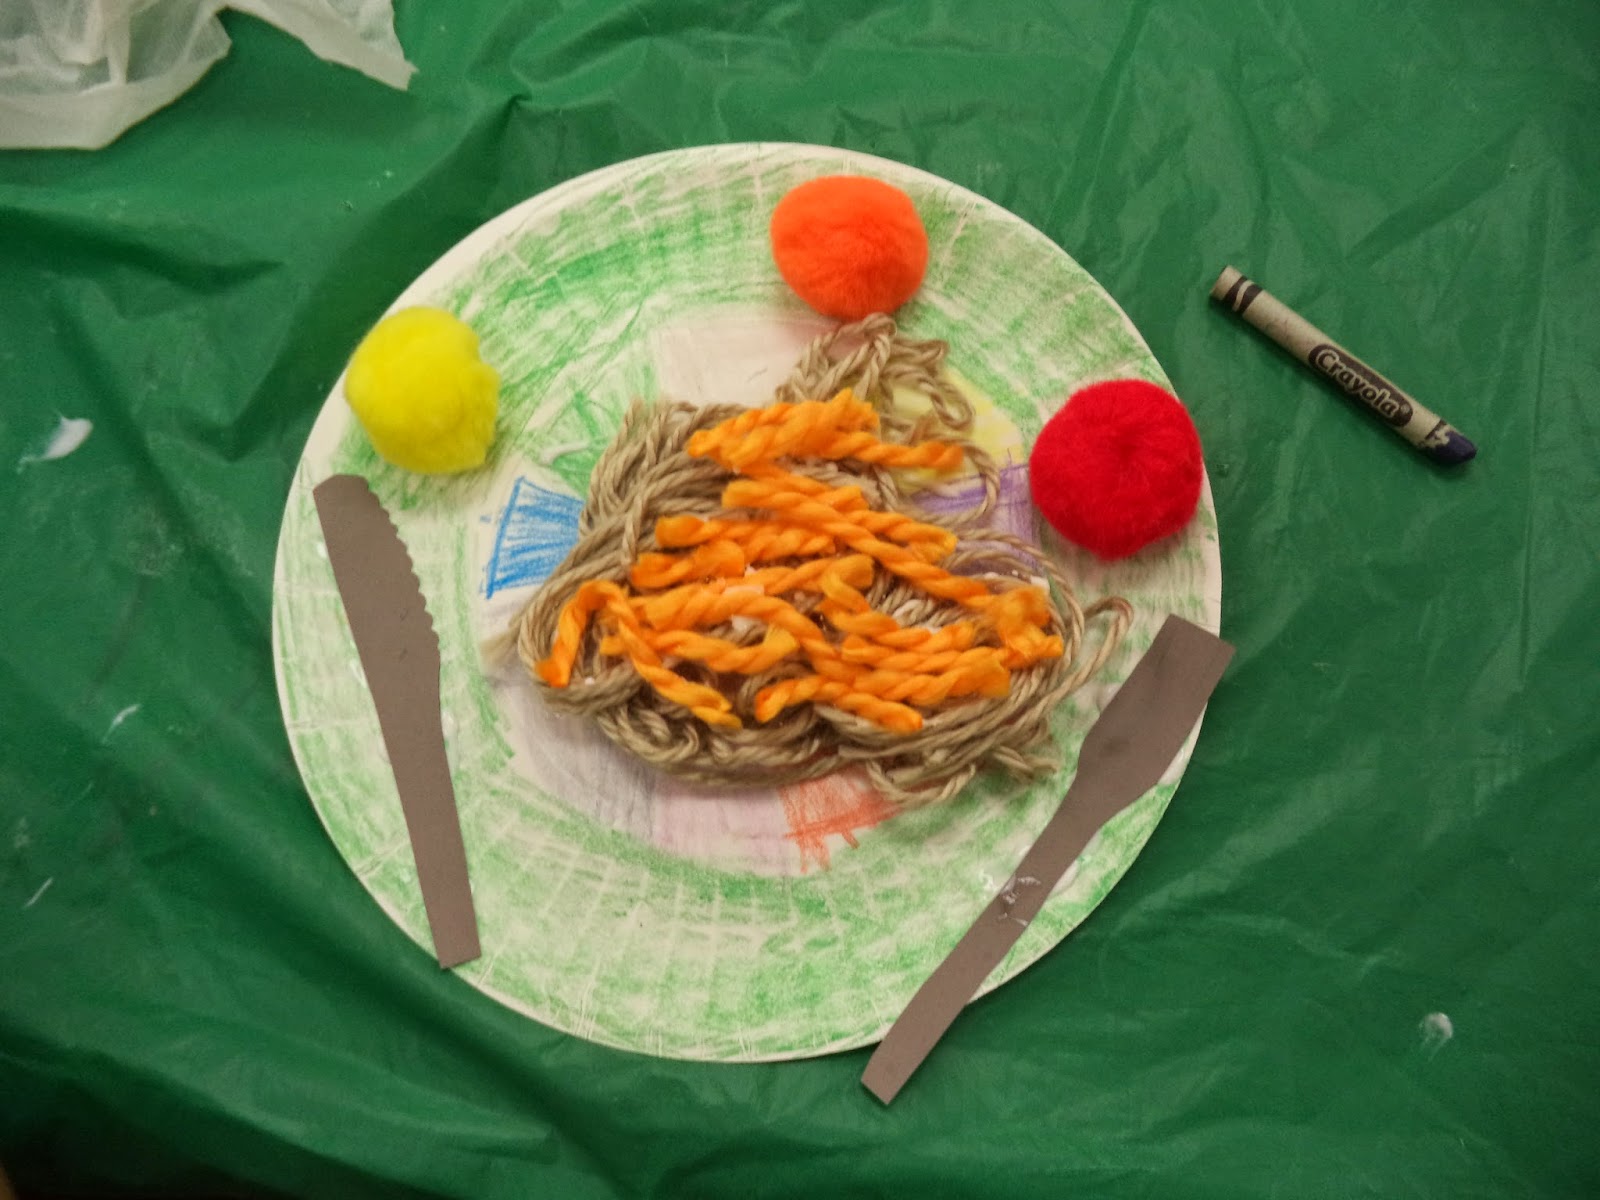
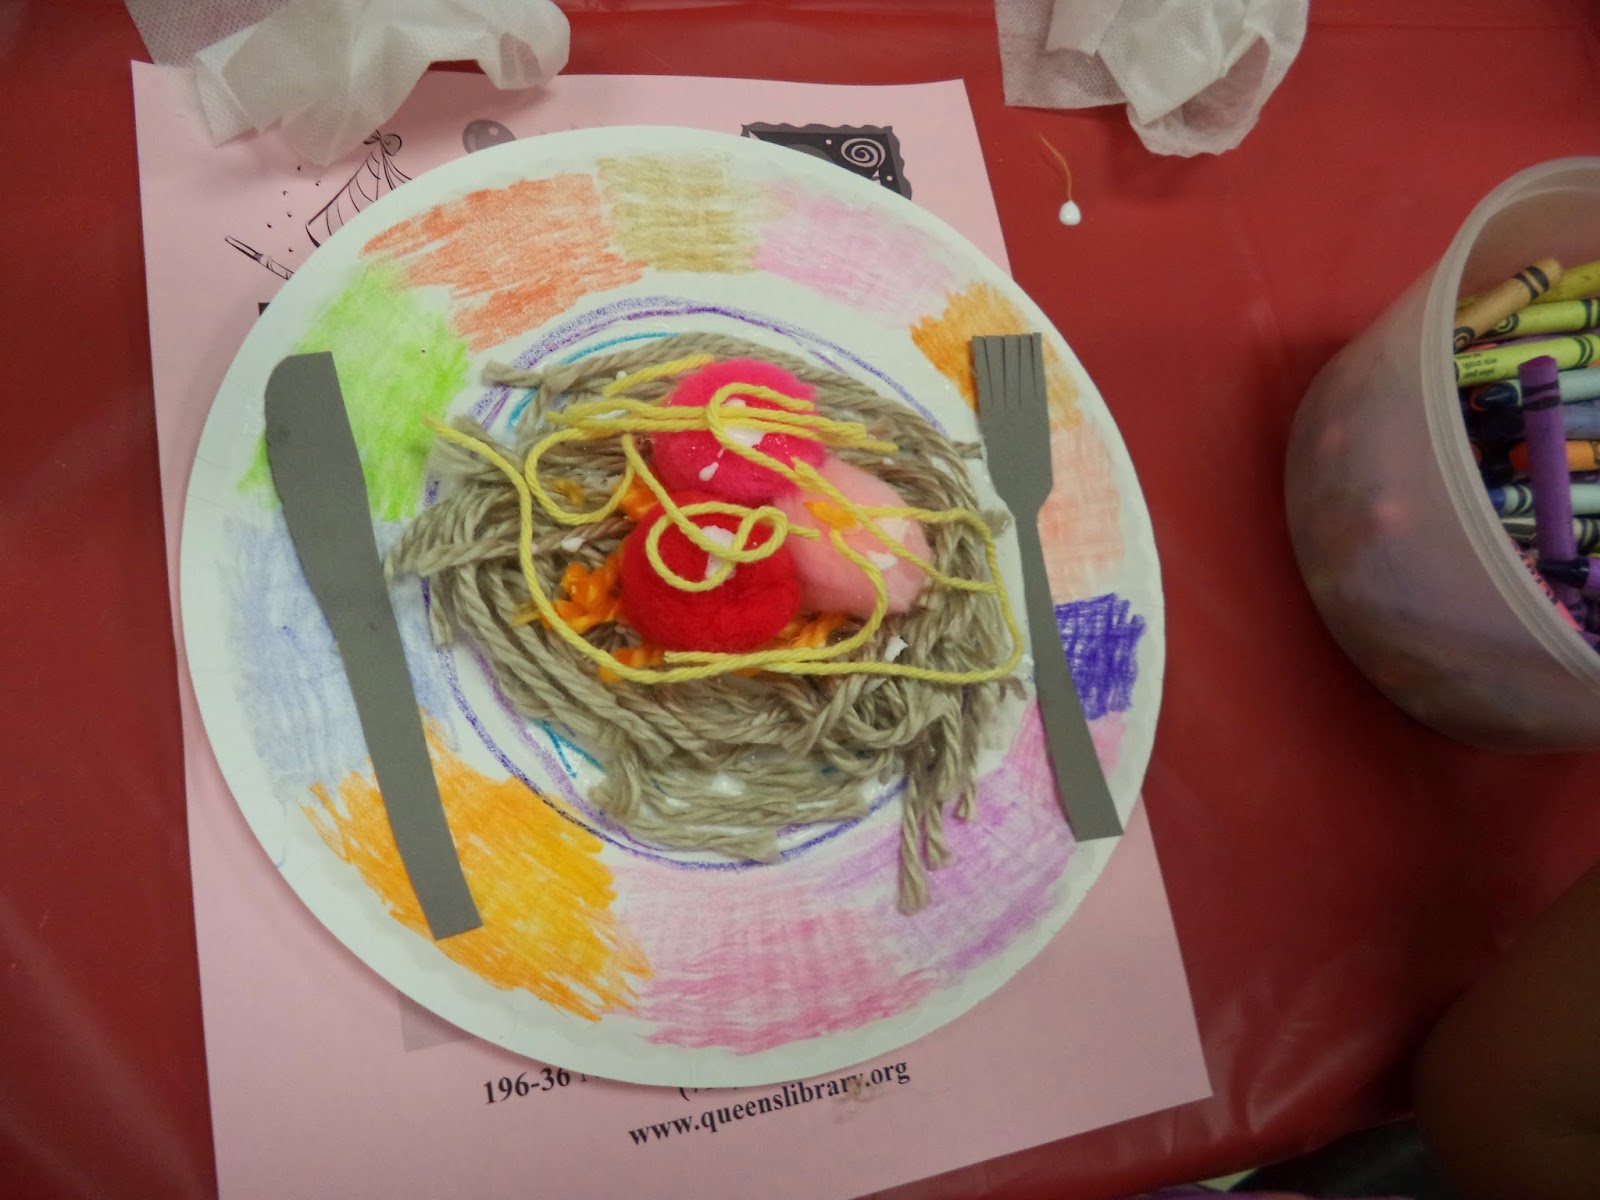
Let's create a pop art version of spaghetti and meatballs!
Supplies Needed: One paper plate, Card Stock, yarn, 2-3 pom poms, glue/tape and crayons/markers.
Directions:
1. Using crayons/markers, decorate your paper plate by coloring it with any design.
2. Cut up some yarn and glue/tape the yarn onto the plate to resemble spaghetti. (Yellow or tan yarn is preferable to make it look like real spaghetti.)
3. Glue/tape the pom poms on top of the yarn to resemble the meatballs.
4. Using scissors, cut out shapes of a knife and fork out of card stock and attach those near the edges of the plate.
Enjoy the spaghetti and meatball pop art dishes below created by the children at the library!
Ooh! There is a thunder and lightning storm outside! Perhaps we can observe the storm through the window as we are enjoying our spaghetti!
Let's create our own storms by designing a storm collage!
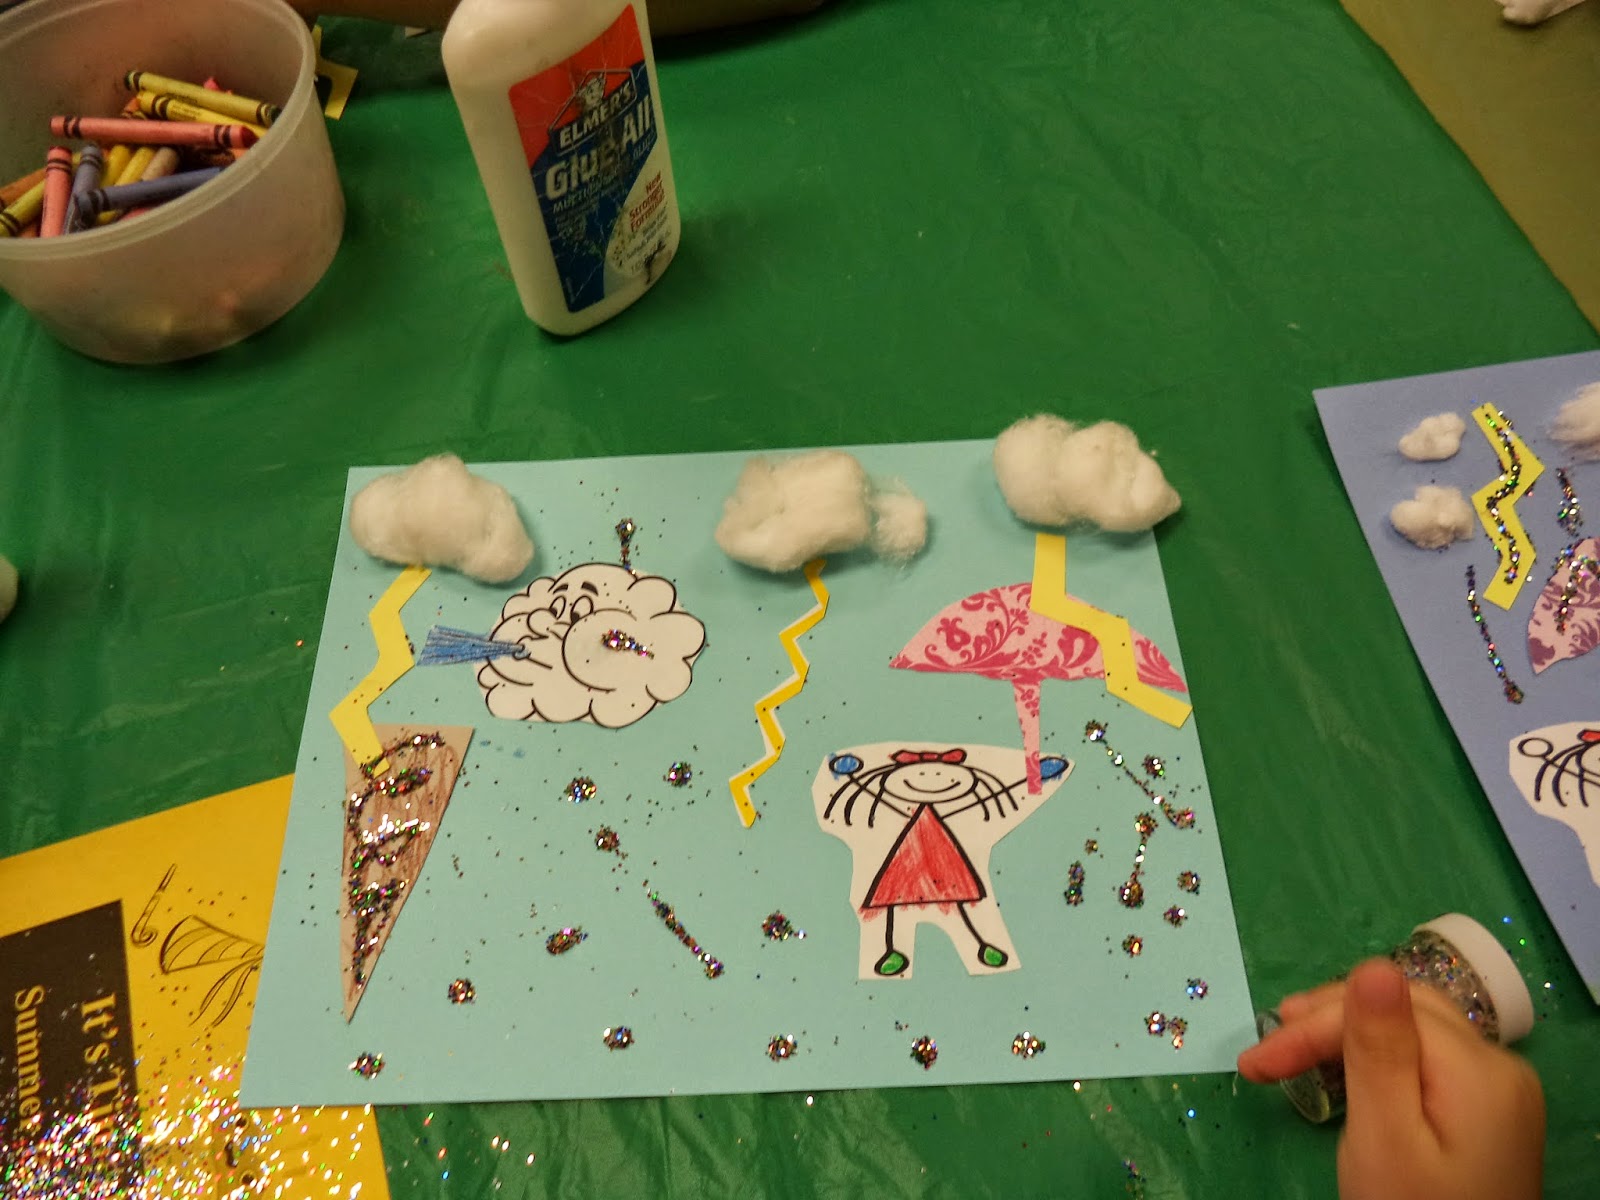
Storm Collage
Supplies Needed: Card Stock, Crayons/Markers, Glue, Glitter, Cotton, Scissors and Images of Storms (Wind, Girl/Boy Holding an Umbrella, etc.) and Anything Else of Preference!
Instructions:
1. Gather up images and objects that represent storm patterns, such as cotton for clouds, yellow card stock cut in zigzag patterns for lightning, glitter for rain drops, pictures of wind, cut outs of people holding umbrellas, etc.
2. On a letter sized piece of card stock (gray or blue is preferred), glue or tape all of your storm patters and decorate them as needed with crayons/markers.
Enjoy the storm collages below created
by the children at the library!
The storm has subsided and it's a new day! Let's learn about robots by reading about robots and making our own robot books!
Bot Book!
Supplies Needed: Card Stock, Scissors, Tin Foil, a Pipe Cleaner, Glue/Tape, Crayons/Markers, Regular Printer Paper, Foam Stickers and Other Decorations of Preference.
Instructions:
1. Cut out 2 identical robot shapes from pieces of card stock. Attach the robot shapes together on one side using glue/tape so that the 2 shapes open together as a book.
2. If you wish, cut out smaller pieces of paper and glue/tape them in between the robot shapes so that you have pages in your robot "Bot" book.
3. Using stickers, foil, crayons/markers, glue/tape, pipe cleaners, googly eyes and foam shapes, decorate and write in your "Bot" book.
4. To create the antennae for the robot, you can twist around a pipe cleaner and attach it onto the top of the head with glue/tape.
Enjoy the "Bot" books created by the
children at the library pictured below!
Did you know that robots are used for outer space missions?Let's visit the planetarium, learn about the solar system and then create our own paper solar systems!
Twirling Solar System
Supplies Needed: Blue card stock (1/2 letter size horizontal piece), Smaller pieces of card stock in different colors, crayons/markers, glue/tape, hole puncher, string and scissors.
Instructions:
1. Tape the 2 ends of the blue piece of card stock so that you have a round cylinder shape.
2. Using scissors, cut out 8 or 9 smaller round shapes from card stock of different colors for your planets.
3. Cut out a larger round shape from yellow card stock for the sun.
4. Using crayons/markers and stickers, color and decorate the planets and sun as you wish.
5. If you wish, you may write the names of the planets on them or type of the names of the planets, print them and then cut them out and attach them to the planets to label them.
6. Glue/tape the planets all around the outside of the blue paper cylinder. Glue/tape the sun onto the top front of the blue cylinder. Now it looks as if the planets are rotating around the sun!
7. Punch 2 holes at the top of the paper solar system with the hole puncher (one on each side).
8. Take a long piece of string and pull it through the holes and tie up the ends. Now you can twirl your paper solar system around as if the planets are rotating around the sun!
Enjoy the paper solar systems below created by
the children at the library!
After learning so much about science, let's pretend to be scientists and create our own lab coats! Then we can pretend to work in a laboratory just like real lab technicians!


Supplies Needed: White Card Stock, Neutral or Brown Card Stock, Smaller Pieces of Card Stock in Other Colors of Preference, Yarn, Crayons/Scissors, Glue/Tape, Stickers and Glitter Foam Sheets.
Instructions:
1. Cut out a lab coat shape and sleeves out of white card stock.
2. Cut out a head and neck using either tan, yellow or brown card stock (or any other color of your choice).
3. Cut out mitten or glove shapes from card stock for the hands. (The card stock can be any color of your choice.)
4. Cut out a small square of card stock for the pocket.
5. Cut out a lab beaker or test tube shape from card stock of any color.
6. Cut out pieces of string or yarn for the hair.
7. Cut out little shapes from glitter foam sheets for the buttons on the lab coat. You may use regular foam sheets if you do not have the glitter ones.
8. Glue or tape together the lab coat, sleeves and gloves/mittens and face. Attach the pocket to the coat and the beaker to one of the mittens.
9. Using crayons, markers, foam shapes and stickers, decorate and adorn your lab technician as you wish.
10. Glue the yarn onto the top of the head for the hair.
Enjoy the lab technicians below created by
the children at the library!


Thaumatrope Toy
Now that we learned so much about science, let's have some more fun and create a spinning toy!


Supplies Needed: Card Stock, Circle Cutouts of 2 Images (such as a bird and cage), Straw, Glue/Tape, Scissors and Crayons/Markers.
Instructions:
1. Color in the 2 images and glue/tape them each onto its' own piece of card stock in the same shape.
2. Glue/tape the 2 images together back to back and make sure that the images are visible on each side and that they are aligned.
3. Attach the connected images onto the top of a straw.
4. Place the straw with the images between your hands and rub your hands together to spin the thaumatrope and then you can see the 2 images merge into one. For example, the bird will appear to be in the cage instead of being separate from the cage.
Enjoy the spinning thaumatropes below created by
the children at the library!


