

Boo! Welcome to the fun month of October! Let's celebrate Halloween and the fall season with pumpkins, scarecrows, Christopher Columbus boats, bats, haunted houses, treats and candy!


Supplies: One small cardboard tube, black or dark blue construction paper, one strip of light colored paper, google eyes, shiny gem stickers, crayons/markers, scissors and glue/tape.
Instructions:
1. Wrap the card board tube in black or dark blue construction paper. Cut out bat wings of the same color and attach on each side of the tube.
2. Cut out 2 small triangles from construction paper of the same color. Attach each triangle onto the top of the tube. These will be the ears.
3. Draw a face on the front of the tube and attach a pair of google eyes. Now the bat has a face.
4. Adorn the bat with jewel stickers or shiny stickers.
5. Wrap a thin strip of light colored paper around the bottom of the tube. Now the bat has a superhero belt.
6. Stick your fingers up the tube and wave the bat around so that it looks as if it's flying.
Enjoy the bejeweled bat puppets below created by the children at the library!


Supplies Used: Dark colored construction paper or card stock, one pipe cleaner, 2 googly eyes, one large pom pom, scissors, crayons/marker and glue/tape.
Instructions:
1. Using scissors, cut out a bat shape. Cut out 2 smaller strips of paper in the shape of bat legs and attach to the bottom of the bat.
2. Using crayons/markers, draw a face on the bat's head. Attach 2 googly eyes onto the face to make the paper bat appear more lively.
3. Glue or tape a large pom pom onto the stomach of the bat below the head. This will make the bat feel soft in the belly.
4. Wrap the feet around onto the pipe cleaner so that the bat is hanging upside down by the pipe cleaner. The pipe cleaner is supposed to resemble a branch or tree limb.
Enjoy the bats below created by the children at the library!


The crayons look creepy when used to draw faces on the bats.


Supplies Used: Card stock, googly eyes, cotton, crayons/markers, glue/tape and scissors.
Instructions:
1. Cut out a crayon box shape from card stock and make sure it opens up into a card.
2. Cut out crayon shapes from card stock of different colors.
3. Draw faces and designs on the crayons and attach googly eyes onto the crayons.
4. If you wish, cut out thin small strips of paper and attach a strip to the center of each crayon in a horizontal direction so that the crayons have arms.
5. Attach the crayons along the top edge of the crayon box shape.
6. Attach pieces of cotton onto the box shape under or near the crayons to make fake cob webs. Draw spooky designs onto the crayons and crayons box.
Enjoy the creepy crayons below created by the children at the library.


Let's stop by the pumpkin patch and enjoy some apple cider!

Supplies Needed: One paper plate, tissue paper, orange construction paper, smaller pieces of construction paper in other colors (blue, yellow, red, etc.), beige/brown card stock, one toilet paper roll cut in half, fake yellow grass, crayons/markers, glue/tape and scissors.
Instructions:
1. Cover a paper plate with tissue paper. The tissue paper can be green or any fall color such as brown, red, orange, yellow, etc.
2. Cut a toilet paper tube or any small cardboard tube in half. Glue/tape each half onto the plate and attach fake yellow grass onto the tube halves to resemble hay stacks. If you don't have fake yellow grass, then shred a piece of yellow paper into small pieces and use that for the hay.
3. Cut out 6-8 small pumpkin shapes from orange construction paper and glue/tape them onto the plate. You may draw faces or designs on them if you wish.
4. Cut out a pair of pants shape from blue construction paper and a shirt shape from construction paper. Attach the pants and the shirt shapes together. Attach a pumpkin shape on top of the shirt for the head. Attach shoe shapes on the bottoms of the pants. You now have a scarecrow! If you wish, you can cut out a hat shape from construction paper and attach it to the pumpkin head and add fake hay to it.
5. Attach the scarecrow to one of the tubes (hay stacks). Position the scarecrow so that it is leaning against the hay stack.
6. Fold a small square shaped piece of paper and attach it onto the plate so that one side is standing up. This can be your apple stand. Cut out a human figure shape from paper and color in a face on it, hair, clothes, etc. Attach the paper human figure in front of or behind the apple stand.
7. Cut out a small apple shape from red paper and attach it onto the stand or hand of the human figure.
8. If you wish, cut out small cup shapes from paper and color them in red from the bottoms to the middles so as to make it seem as if they are cups filled with apple cider. Attach the cups to the stand.
Enjoy the paper pumpkin patch and apple stands below created by the children at the library!


Wow, those pumpkins are decorated and dressed up so nicely! It looks like a "pumpkin parade!"


Supplies Needed: Light colored construction paper, orange construction paper, blue card stock, foam stickers, stickers, scissors, crayons/markers and glue/tape.
Instructions:
1. Cut a letter sized piece of construction paper in half. Discard or save one half and use the other half for the pumpkins.
2. Fold the half that you're using.
3. Cut out 4 pumpkin shapes from orange construction paper.
4. Decorate the pumpkin shapes by drawing designs on them and attaching stickers to them.
5. If you wish to make a fish pumpkin or mermaid pumpkin, cut out a mermaid tail from blue card stock or any other color of your preference and attach the tail on the side of the pumpkin. If you wish to make a prince/princess pumpkin, then cut out a crown shape and attach it on top of another pumpkin shape.
6. Attach the pumpkins onto the folded piece of construction paper, one on each side!
Enjoy the pumpkin parades below created by the children at the library!


What's all the action over in the corner? Wow, ninja ghosts fighting!

Supplies Needed: One paper plate, dark tissue paper, fabric, white construction paper, scissors, crayon/markers and glue/tape.
Instructions:
1. Cover a paper plate in dark colored tissue paper.
2. Fold the paper plate in half and place the paper plate in a position where one half is up in a vertical position.
3. Cut out 2 ghost shapes from white construction paper. Glue/tape the ghosts onto the half of the paper plate that is in the vertical direction.
4. Cut out a piece of fabric in the shape of a half circle. Attach it onto the bottom of the plate in front of the ghost shapes. This will resemble the mat where the ghosts fight.
5. Cut out small strips of fabric and attach them onto the ghosts to resemble martial arts belts and bandannas.
6. Draw faces on the ghosts.
Enjoy the ninja ghosts below created by the children at the library!


While we are at the Fall Festival, let's enjoy some candy apples!


Ooh, I see a cobweb in the corner with a spider. The fall is a great time to learn about spiders! And let's create our own spiders and webs in the process!

Supplies Needed: One paper plate, pieces of pipe cleaners, 2 pom poms, a piece of card stock cut into a circle, crayons/markers, glue/tape, scissors and yarn.
Instructions:
1. Using crayons/markers, draw a spider web design on a paper plate. (Perhaps you can draw lines and circles to make it resemble a web).
2. Glue a design on the web as well and then press pieces of yarn on the glue to enhance the web for a touch and feel texture.
3. Cut out a circle from card stock in any color.
4. Draw a face on it and attach pom poms for the eyes. Cut 8 smaller pieces of pipe cleaners and attach them to the sides of the circle to resemble the legs of the spider.
5. Attach 2 smaller pieces of pipe cleaners above the eyes on top of the spider to resemble antennae.
Enjoy the creepy, crawly spiders and webs created below by the children at the library!
It's time to visit the haunted houses and see the bats flying around!
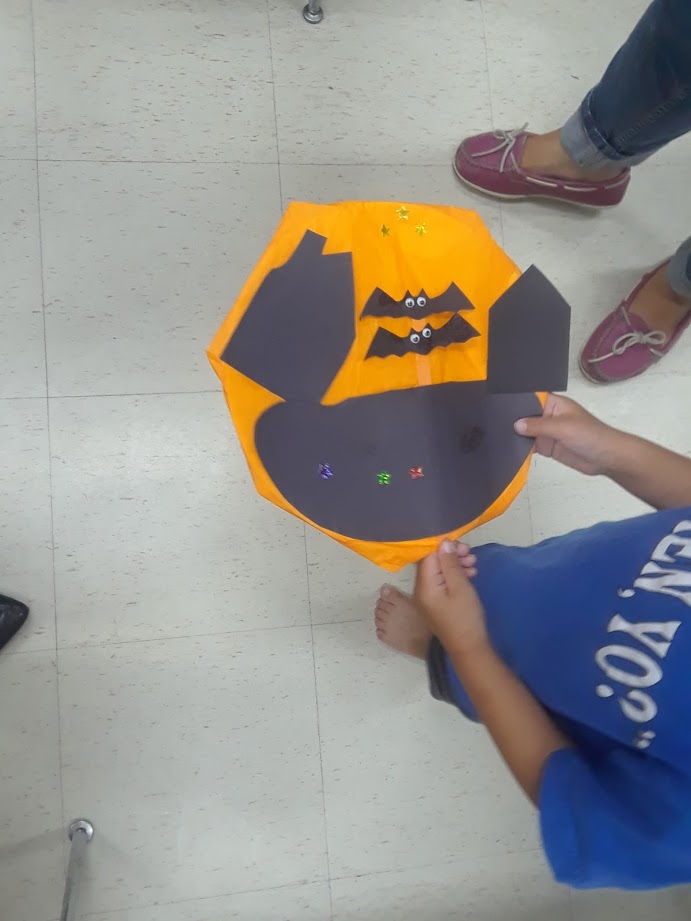
Bats Puppet Show Plate!

Supplies: One paper plate, black paper, dark colored tissue paper, 2 wooden ice cream sticks, 2 pairs of google eyes, glue/tape, white or light colored crayons/markers and shiny stickers.
Instructions:
1. Cover a paper plate with dark colored tissue paper (dark blue or green or purple, etc.)
2. Cut out a black semi circle shape that fits the length of the bottom of the plate. Attach the semi circle shape onto the bottom of the plate. Now you have your sky and grounds. Leave a space or opening down the middle of the semi circle for the bat puppets.
3. Cut out 2 house shapes from black paper and attach them on top of the ground in the middle of the plate. Using a white or light colored crayon and draw windows and doors on them. Now you have haunted houses.
4. Cut out 2 small flying bat shapes from black paper. Attach google eyes onto each one of them. Draw a face on them if you wish.
5. Attach one of the bats onto the top of the plate so that it looks as if it's flying in the sky.
6. Attach two wooden ice cream sticks together to make one long stick. Attach the other bat onto the top end of the stick.
7. Push the stick with the bat down the middle opening of the semi circle shape on the plate. You now have a bat puppet that you can move up and down to make the bat seem like it's moving.
8. Adorn the plate with shiny stickers.
Enjoy the bat puppet shows below created by the children at the library! BOO!


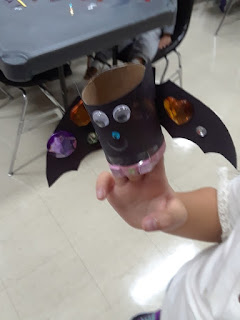
Bats don't have to be scary! You can make a bat pretty with gems!
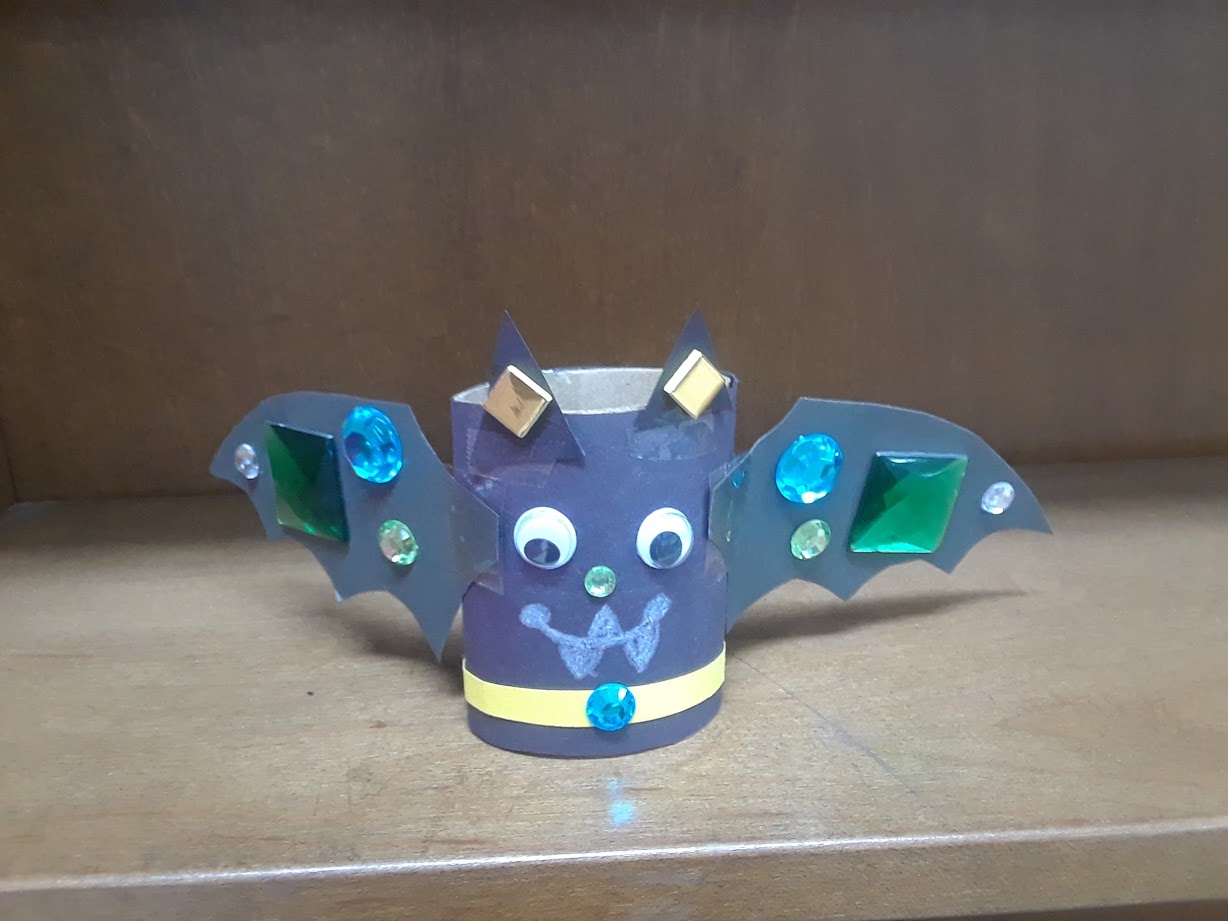
Bejeweled Bat Puppet!
Instructions:
1. Wrap the card board tube in black or dark blue construction paper. Cut out bat wings of the same color and attach on each side of the tube.
2. Cut out 2 small triangles from construction paper of the same color. Attach each triangle onto the top of the tube. These will be the ears.
3. Draw a face on the front of the tube and attach a pair of google eyes. Now the bat has a face.
4. Adorn the bat with jewel stickers or shiny stickers.
5. Wrap a thin strip of light colored paper around the bottom of the tube. Now the bat has a superhero belt.
6. Stick your fingers up the tube and wave the bat around so that it looks as if it's flying.
Enjoy the bejeweled bat puppets below created by the children at the library!


Seeing some bats flying around reminds me of witches flying to the moon on their brooms!
Witch Puppet


Supplies: One paper plate, crayons/markers, black paper, yellow paper, green paper, orange paper, two wooden ice cream sticks, yarn, stickers, glue/tape, scissors and a google eye.
Instructions:
1. Color in a paper plate so that it has a dark background (dark green or gray).
2. Cut a horizontal slit towards the bottom of the plate
3. Cut out a yellow circle and attach onto the top of the plate. This will be the moon.
4. Cut out a witch hat, dress and arms from black paper. Cut out legs with feet from yellow paper or paper of any other color. Cut out a round face with a pointy nose from green paper. Cut out hair from orange paper. Attach all the pieces of paper together so that you have your witch. Attach a google eye onto the face and draw a face onto the witch.
5. Attach the witch onto the middle of a horizontal wooden ice cream stick. Attach pieces of yarn at the end of the stick behind the witch so that the stick resembles a broom.
6. Attach the witch with the broom onto a vertical wooden stick. Now you have your witch puppet.
7. Adorn the witch with stickers.
8. Slide the witch through the slit and move it back and forth so that it looks as if the witch is flying towards the moon!
Enjoy the witch puppet shows below created by the children at the library!


Seeing the witch and bats flying in the air makes me want to go to a party and dress up as a monster.
Monster Party!

Supplies: One letter sized sheet of card stock, smaller pieces of paper, tissue paper, party stickers, strings, fabric, cut outs of fabric, google eyes, crayons/markers, one pom pom and glue/tape.
Instructions:
1. Fold the card stock in 3 sections inward.
2. On the top part of the folded card stock, attach google eyes, a pom pom for the nose and little strips of white paper for teeth.
3. Open up the card stock and attach paper balloons and tissue paper streamers towards the top. Cut out triangles for banners and attach those across the top as well. The strings can be used for the paper balloons.
4. Cut out a table, cake and party hats from smaller pieces of paper and attach at the middle and bottom sections of the sheet.
5. Attach party stickers as well. Draw spooky faces on the balloons, cake and party hats.
6. Attach a strip of fabric on the bottom for the carpeted floor.
Enjoy the monster parties created below by the children at the library!


There are some nice scarecrows around for decoration!
Scarecrow Puppets!


Later on, it'll be time to check out the bats flying around at night at the caves!
Hanging Tree Bat!

Supplies Used: Dark colored construction paper or card stock, one pipe cleaner, 2 googly eyes, one large pom pom, scissors, crayons/marker and glue/tape.
Instructions:
1. Using scissors, cut out a bat shape. Cut out 2 smaller strips of paper in the shape of bat legs and attach to the bottom of the bat.
2. Using crayons/markers, draw a face on the bat's head. Attach 2 googly eyes onto the face to make the paper bat appear more lively.
3. Glue or tape a large pom pom onto the stomach of the bat below the head. This will make the bat feel soft in the belly.
4. Wrap the feet around onto the pipe cleaner so that the bat is hanging upside down by the pipe cleaner. The pipe cleaner is supposed to resemble a branch or tree limb.
Enjoy the bats below created by the children at the library!


Creepy Crayons!


Supplies Used: Card stock, googly eyes, cotton, crayons/markers, glue/tape and scissors.
Instructions:
1. Cut out a crayon box shape from card stock and make sure it opens up into a card.
2. Cut out crayon shapes from card stock of different colors.
3. Draw faces and designs on the crayons and attach googly eyes onto the crayons.
4. If you wish, cut out thin small strips of paper and attach a strip to the center of each crayon in a horizontal direction so that the crayons have arms.
5. Attach the crayons along the top edge of the crayon box shape.
6. Attach pieces of cotton onto the box shape under or near the crayons to make fake cob webs. Draw spooky designs onto the crayons and crayons box.
Enjoy the creepy crayons below created by the children at the library.


Perhaps we can color a Monster-Merry-Go-Round with the creepy crayons!
Monster-Merry-Go-Round!


Supplies Needed: Construction Paper, Card Stock, Scissors, Glue/Tape, Crayons/Markers, String, hole puncher and Googly Eyes.
Instructions:
1. Cut a letter-sized sheet of construction paper in half. Use one half for the craft and discard or save the other half for something else.
2. Fold the half being used for the craft into a cylinder shape and tape the ends together.
3. If you wish, cut a design around the top edge using scissors.
4. Cut out 4 monster shapes from card stock or any kind of paper you have available.
5. Draw designs on the monster shapes and stick googly eyes on them.
6. Attach each monster shape around the paper cylinder. If you wish, you may draw in arms and legs onto the monsters.
7. Punch 2 holes onto the top of the cylinder, one on each end.
8. Pull a string through the holes and tie a knot with the ends of the string. The string will help you twirl the Monster Merry Go-Round.
Enjoy the Monster Merry-Go-Rounds below created by the children at the library!


Let's stop by the pumpkin patch and enjoy some apple cider!

Instructions:
1. Cover a paper plate with tissue paper. The tissue paper can be green or any fall color such as brown, red, orange, yellow, etc.
2. Cut a toilet paper tube or any small cardboard tube in half. Glue/tape each half onto the plate and attach fake yellow grass onto the tube halves to resemble hay stacks. If you don't have fake yellow grass, then shred a piece of yellow paper into small pieces and use that for the hay.
3. Cut out 6-8 small pumpkin shapes from orange construction paper and glue/tape them onto the plate. You may draw faces or designs on them if you wish.
4. Cut out a pair of pants shape from blue construction paper and a shirt shape from construction paper. Attach the pants and the shirt shapes together. Attach a pumpkin shape on top of the shirt for the head. Attach shoe shapes on the bottoms of the pants. You now have a scarecrow! If you wish, you can cut out a hat shape from construction paper and attach it to the pumpkin head and add fake hay to it.
5. Attach the scarecrow to one of the tubes (hay stacks). Position the scarecrow so that it is leaning against the hay stack.
6. Fold a small square shaped piece of paper and attach it onto the plate so that one side is standing up. This can be your apple stand. Cut out a human figure shape from paper and color in a face on it, hair, clothes, etc. Attach the paper human figure in front of or behind the apple stand.
7. Cut out a small apple shape from red paper and attach it onto the stand or hand of the human figure.
8. If you wish, cut out small cup shapes from paper and color them in red from the bottoms to the middles so as to make it seem as if they are cups filled with apple cider. Attach the cups to the stand.
Enjoy the paper pumpkin patch and apple stands below created by the children at the library!


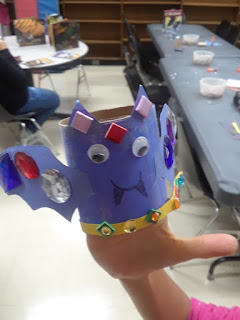
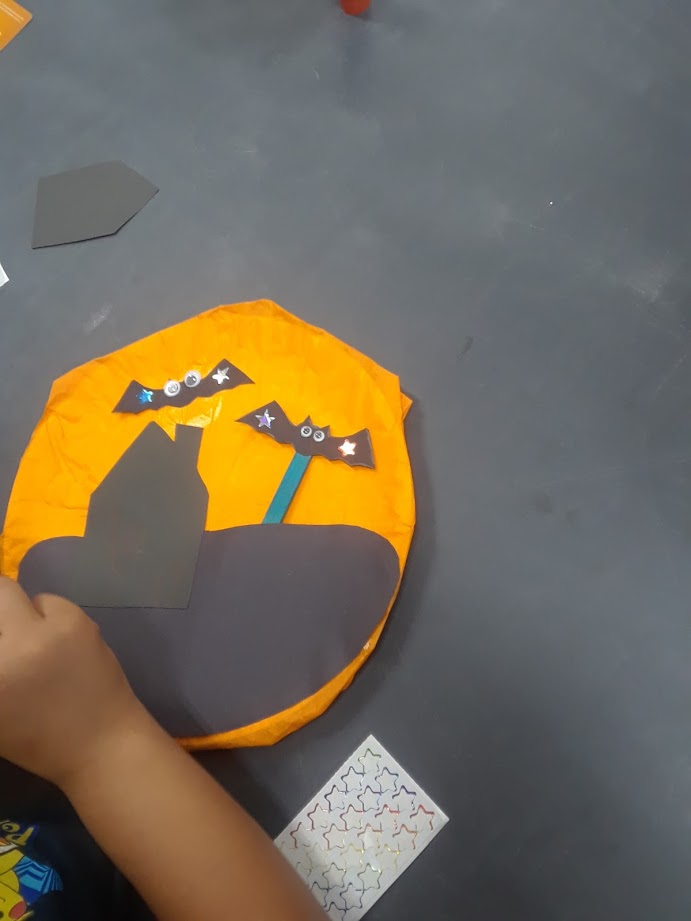
Wow, those pumpkins are decorated and dressed up so nicely! It looks like a "pumpkin parade!"
Pumpkin Parade


Supplies Needed: Light colored construction paper, orange construction paper, blue card stock, foam stickers, stickers, scissors, crayons/markers and glue/tape.
Instructions:
1. Cut a letter sized piece of construction paper in half. Discard or save one half and use the other half for the pumpkins.
2. Fold the half that you're using.
3. Cut out 4 pumpkin shapes from orange construction paper.
4. Decorate the pumpkin shapes by drawing designs on them and attaching stickers to them.
5. If you wish to make a fish pumpkin or mermaid pumpkin, cut out a mermaid tail from blue card stock or any other color of your preference and attach the tail on the side of the pumpkin. If you wish to make a prince/princess pumpkin, then cut out a crown shape and attach it on top of another pumpkin shape.
6. Attach the pumpkins onto the folded piece of construction paper, one on each side!
Enjoy the pumpkin parades below created by the children at the library!


Ninja Ghosts!

Supplies Needed: One paper plate, dark tissue paper, fabric, white construction paper, scissors, crayon/markers and glue/tape.
Instructions:
1. Cover a paper plate in dark colored tissue paper.
2. Fold the paper plate in half and place the paper plate in a position where one half is up in a vertical position.
3. Cut out 2 ghost shapes from white construction paper. Glue/tape the ghosts onto the half of the paper plate that is in the vertical direction.
4. Cut out a piece of fabric in the shape of a half circle. Attach it onto the bottom of the plate in front of the ghost shapes. This will resemble the mat where the ghosts fight.
5. Cut out small strips of fabric and attach them onto the ghosts to resemble martial arts belts and bandannas.
6. Draw faces on the ghosts.
Enjoy the ninja ghosts below created by the children at the library!


This reminds me to think of a Halloween costume. What should I wear for Halloween? Should I dress up as a witch, pumpkin, ghost or monster?
Circle of Costumes


Supplies Needed: One strip of construction paper, 3 small pieces of card stock in neutral colors (white, yellow, brown, beige, tan, etc.), black construction paper, orange construction paper, green construction paper, white construction paper, crayons/markers, hole puncher, string, glue/tape and scissors.
Instructions:
1. Bend a piece of construction paper into a circle or tube shape and attach the ends together.
2. Punch 2 holes at the top of the paper tube, one on each side.
3. Cut out 3 or 4 shapes of paper doll or ginger bread figures.
4. Cut out costumes from small pieces of paper, one for each figure. (For example, a white piece of paper with eyes and a mouth can be attached to one figure for a ghost costume and a round orange piece of paper can become a pumpkin costume for another figure, etc.)
5. Once all of the paper figures are covered in the costumes, attach each figure along the sides of the tube.
6. Pull a string through the holes on top and tie a knot. Now you have a circle of costumes that can spin around.
Enjoy the circle of costumes below created by the children at the library!


While we are at the Fall Festival, let's enjoy some candy apples!
Candy Apple Craft
Supplies Needed: Red Card Stock, one popsicle stick, card stock of another color, ribbon/yarn, brown paper or card stock, scissors, one hole puncher, crayons/markers, glue/tape and stickers.
Instructions:
1. Using scissors, cut out a piece of red card stock in the shape of an apple.
2. Cut out a shape from brown paper that would resemble dripping chocolate, toffee or caramel.
3. Cut out a small rectangle from card stock of any color to resemble a tag for the apple.
4. Color and decorate the apple with crayons/markers and stickers. Glue/tape the brown shape on top of the apple to make it seem as if the apple is covered in caramel, toffee or chocolate.
5. Attach a popsicle stick on the back top of the apple so that it looks like the stick is wedged into the apple.
6. If you wish, decorate your tag and then punch one hole in it.
7. Tie a ribbon or yarn through the hole and then tie the tag onto the stick.
8. Enjoy the candy apple.
Enjoy the candy apple crafts below created by the children at the library!
Supplies Needed: One paper plate, pieces of pipe cleaners, 2 pom poms, a piece of card stock cut into a circle, crayons/markers, glue/tape, scissors and yarn.
Instructions:
1. Using crayons/markers, draw a spider web design on a paper plate. (Perhaps you can draw lines and circles to make it resemble a web).
2. Glue a design on the web as well and then press pieces of yarn on the glue to enhance the web for a touch and feel texture.
3. Cut out a circle from card stock in any color.
4. Draw a face on it and attach pom poms for the eyes. Cut 8 smaller pieces of pipe cleaners and attach them to the sides of the circle to resemble the legs of the spider.
5. Attach 2 smaller pieces of pipe cleaners above the eyes on top of the spider to resemble antennae.
Enjoy the creepy, crawly spiders and webs created below by the children at the library!


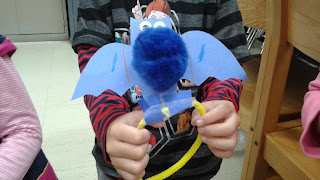
Let's Go See the Monster Puppet Show!
.JPG)
Supplies Needed: One toilet paper tube, a googly eye, yarn, construction paper, scissors, glue/tape & crayons/markers.
Instructions:
1. Wrap a toilet paper tube in construction paper (any color).
2. Fasten the construction paper around the tube using glue/tape.
3. Cut out small shapes and designs from pieces of construction paper to decorate the tube.
4. Stick on a googly eye as well. You may use as many eyes as possible.
5. If you would like the monster to have hair, then cut out some pieces of yarn and glue/tape the pieces of yarn around the top of the tube. Make sure most of the yarn sticks out to make it seem as if the monster's hair is hanging all over.
Enjoy the monster tubes below created by the children at the library!
.JPG)
.JPG)

It's now getting dark out at the festival. It's a good time to enjoy some apple cider, treats and create some ghost stories!
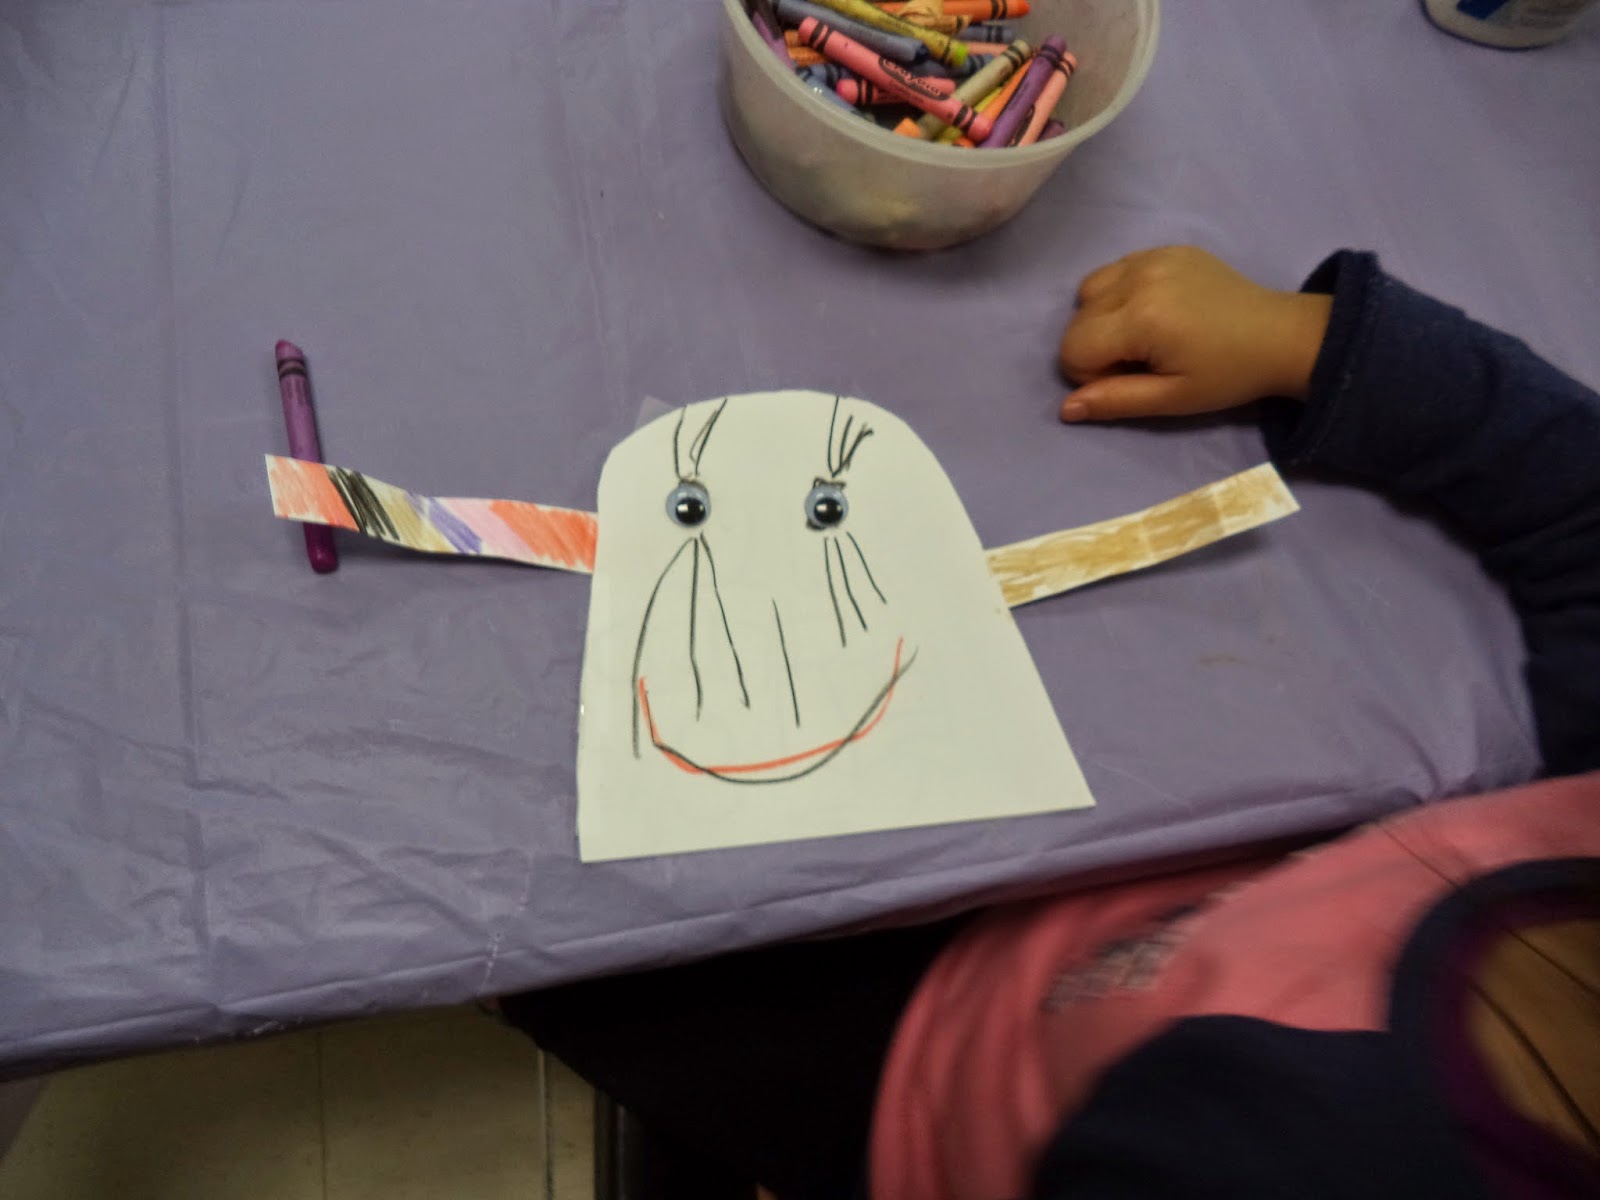
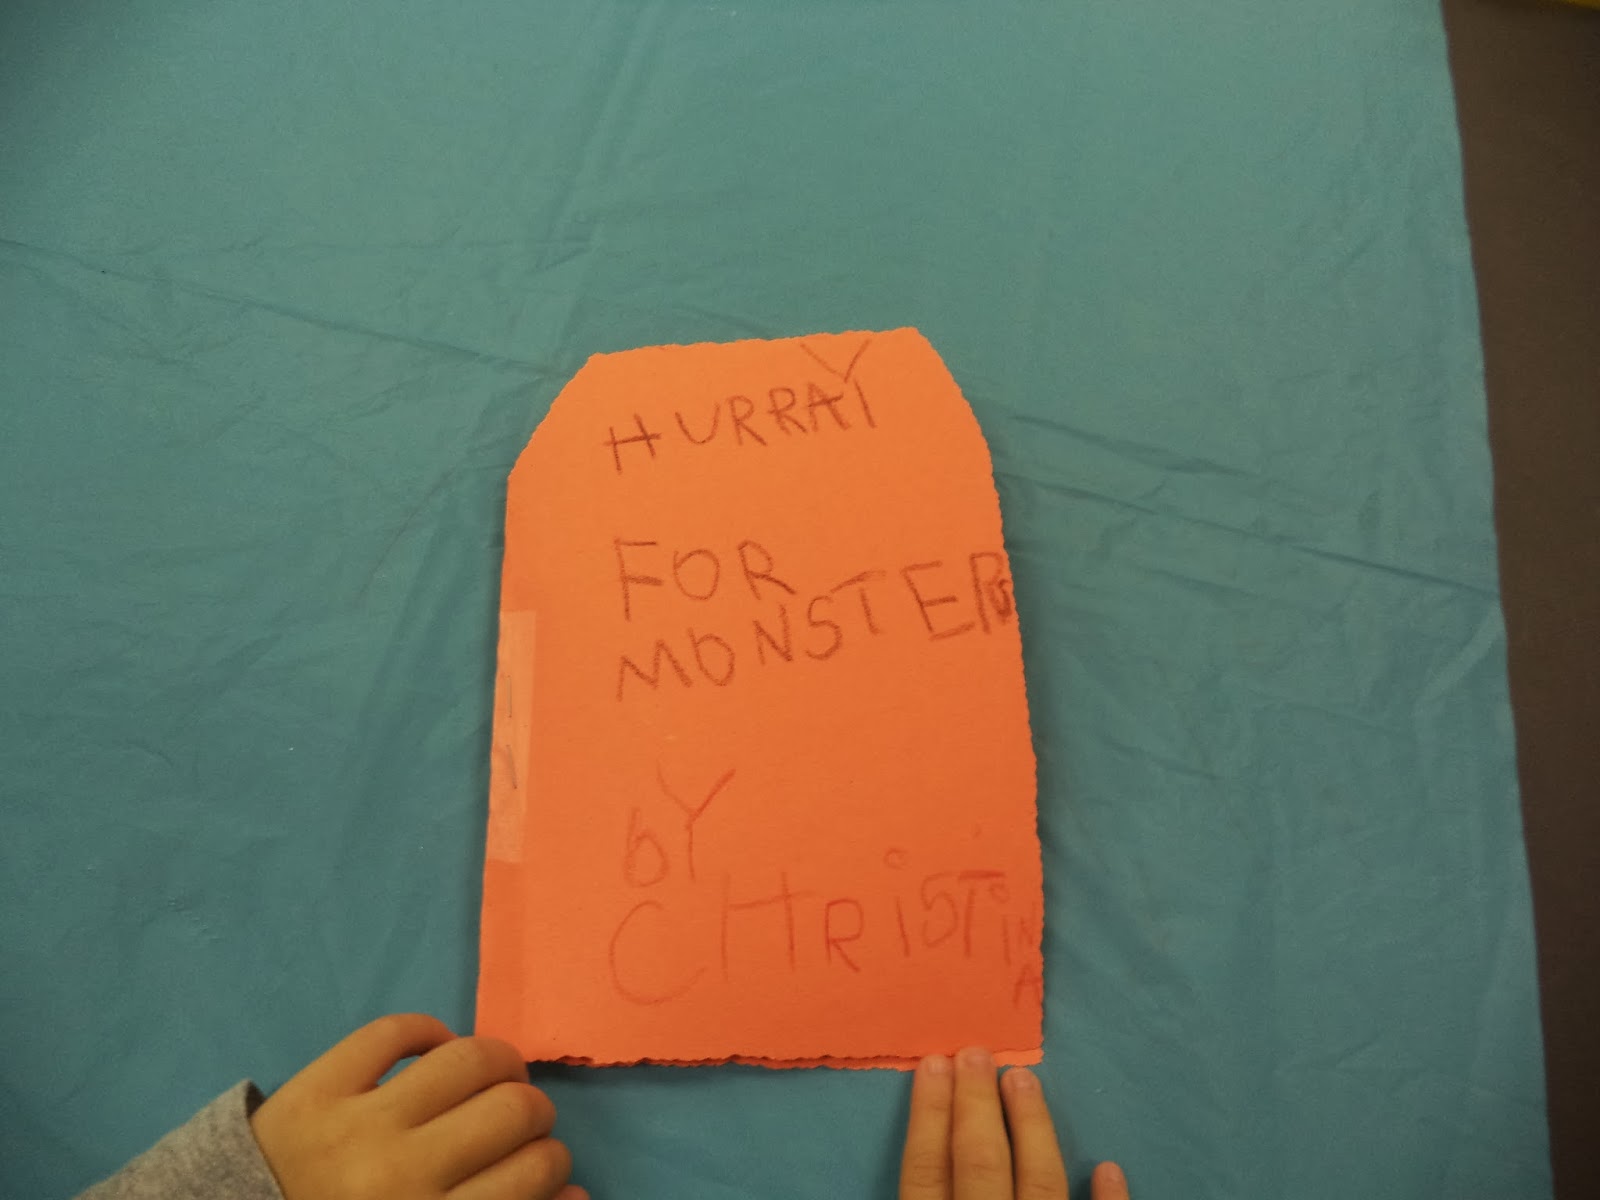
Ghost Story Book!
 |


Supplies: White card stock, googly eyes, crayons/markers, glue/tape and scissors!
Instructions:
1. Take a piece of white card stock and fold it in half. Cut out a ghost shape from the folded piece of card stock. (Make sure that the card stock is still folded so that it's a book.)
2. Cut out 2 strips of white card stock and attach each strip to the sides of the ghost shape book for the arms.
3. Color and decorate the front of the ghost book using crayons/markers and googly eyes. You may use anything else of your preference to adorn the ghost.
4. Draw or write a story on the insides of the ghost book and the back if you wish to create a ghost story! BOO!
Enjoy the ghost stories below created by the children at the library!


Let's Create Some Trick 'O' Treat Bags at the craft table for Halloween!
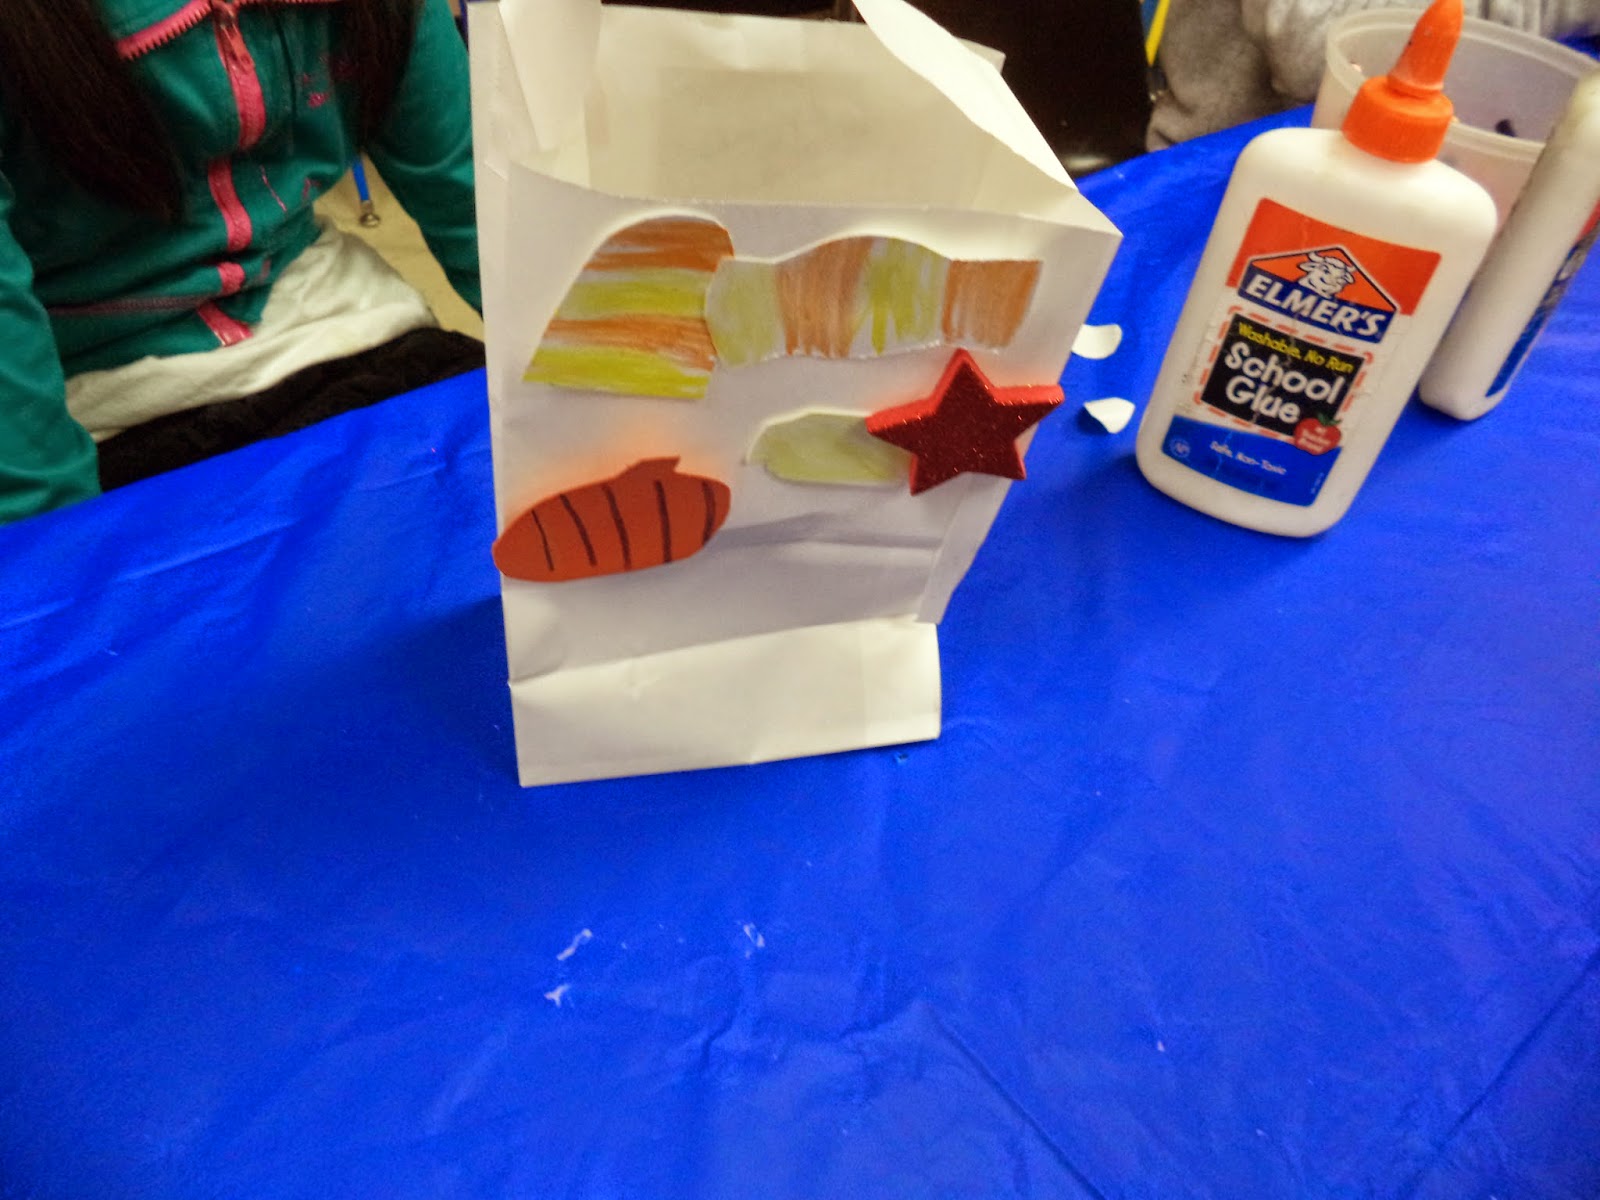
Candy Bags!


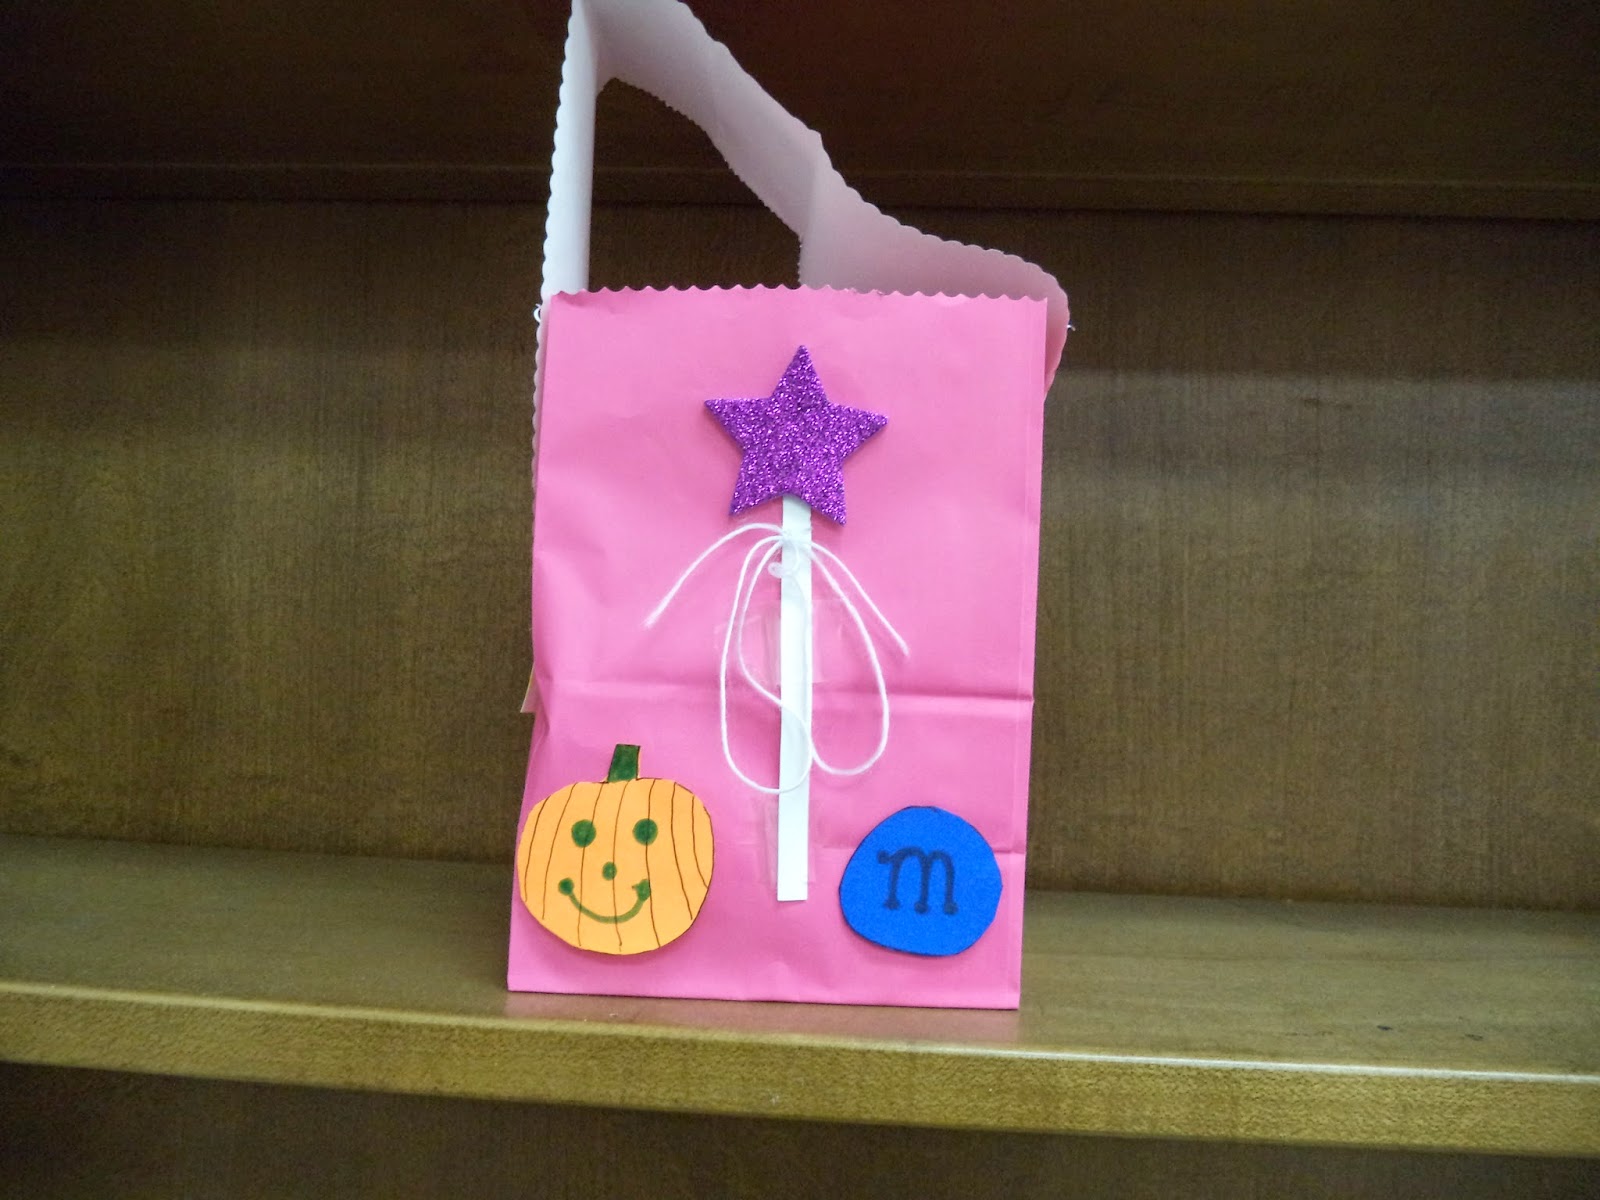
Supplies: A paper bag, scissors, foam stickers, card stock, crayons/markers & glue/tape.
Instructions:
1. Cut off 1-2 inches from the top of the bag. Save the piece that is cut off. That piece will be your bag handle.
2. Cut out shapes from pieces of card stock to resemble candy. (For example, circles can become M & M's and brown rectangles can become chocolate bars, etc.
3. Color your card stock cut outs with crayons/markers to design your candies.
4. Glue/tape the paper candies all over the outside of the bag.
5. Use foam stickers for other types of candies, such as lollipops or sparkly gum drops.
6. If you wish, you may cut out pumpkins and attach them to the bag as well.
7. Glue/tape each end of your handle onto the top of the bag (one end on each side).
Enjoy the candy bags below created by the children at the library! Trick 'O' Treat!


Let's go pick out some pumpkins to decorate!
Stuffed Paper Bag Pumpkins


Supplies Needed: Paper Bags, Crayons or Markers, Stickers, Glue or Tape, Green Pipecleaners
1. Take a brown paper bag, color it orange using either a crayon, marker or paint.
2. Stuff the bag with scrap paper or any other materials that will fill up the bag.
3. Tie the bag with a green pipe cleaner or twistie.
4. Decorate as you wish.
Now that we have our pumpkins picked and decorated, let's make some scarecrows for the yard! We must protect our crops!
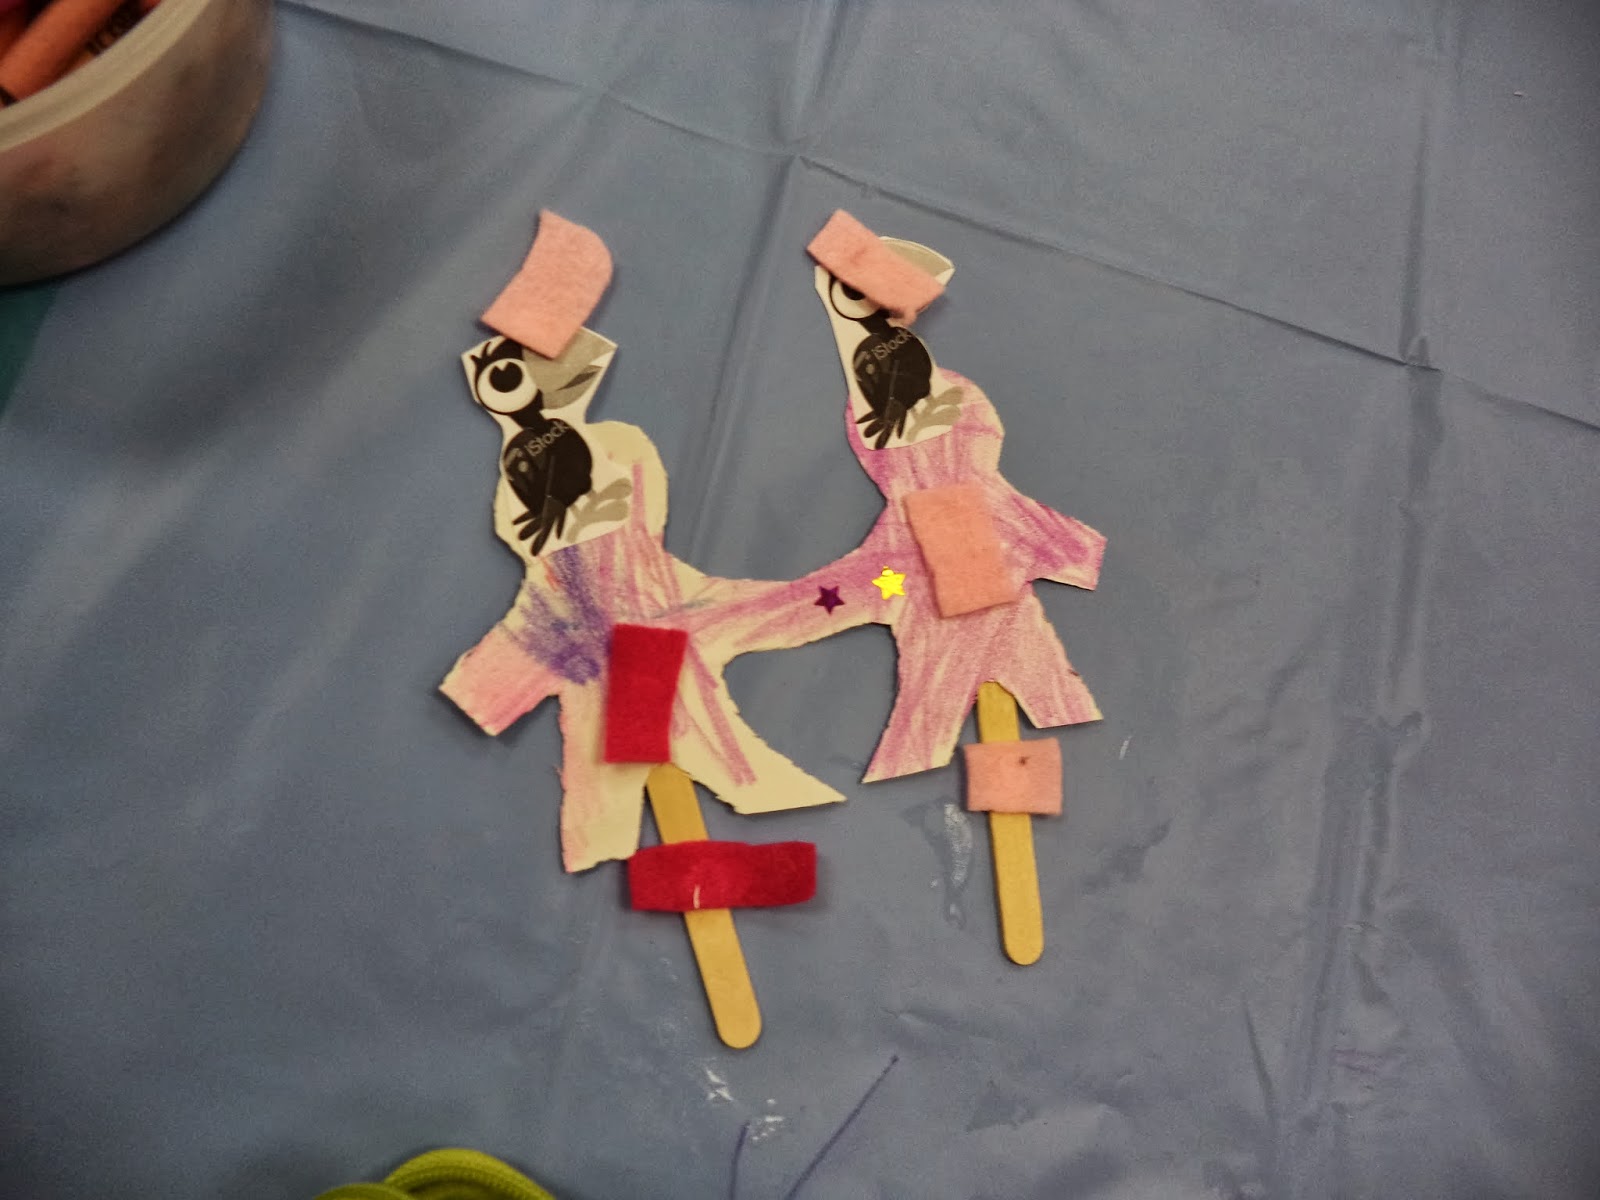
Scarecrow Paper Dolls
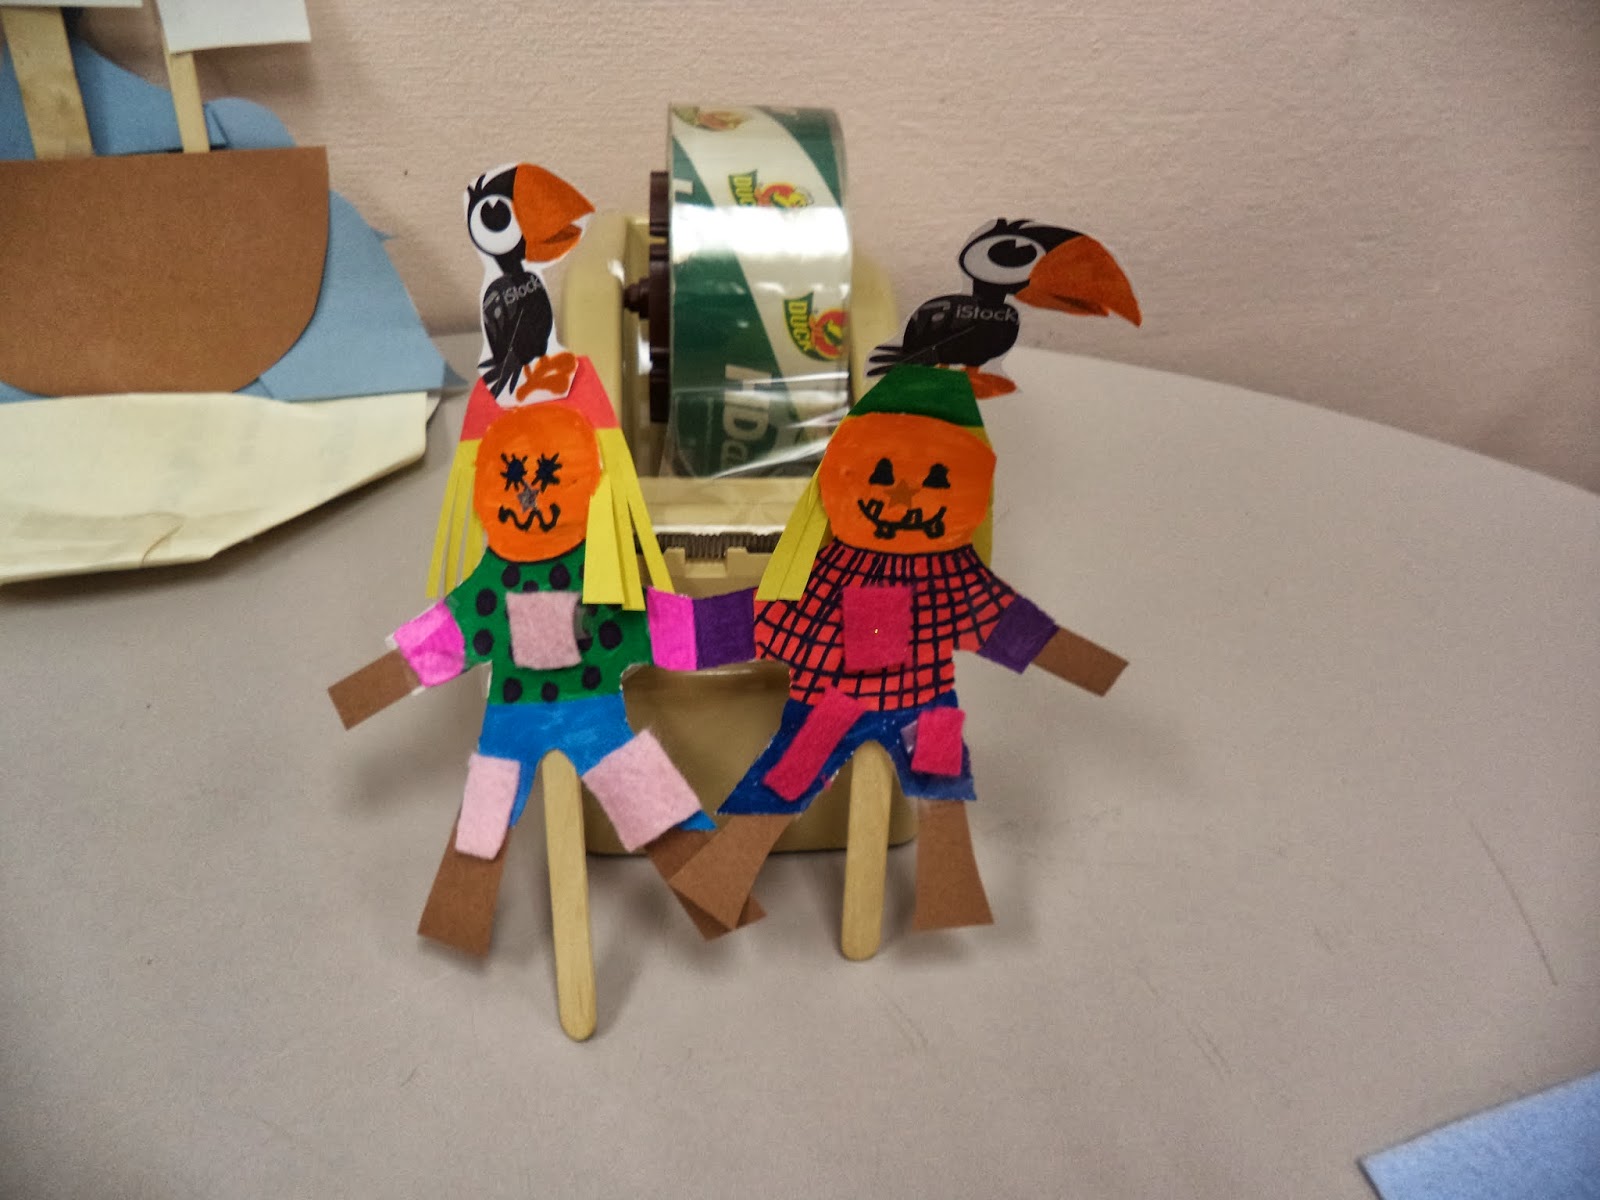
Supplies Needed: Construction paper, 2 pictures of crows, 2 Popsicle sticks, small pieces of fabric, crayons/markers, glue/tape, scissors and stickers.
Instructions:
1. Draw a shape of a doll on construction paper and cut out the doll. Trace the outline of that doll onto another piece of construction paper and cut that one out too. Using glue/tape, attach the 2 paper dolls together by a hand.
2. Color and decorate the paper dolls as you wish.
3. Glue/tape small pieces of fabric on the dolls to resemble patches on the scarecrows.
4. Cut out 2 triangle shapes or any shapes of your choice and cut fringes on the bottom of each shape.
5. Attach each fringed shape onto the back of each of the doll's head to create scarecrow hair.
6. Color 2 pictures of crows and attach each one onto the top of each doll's hair to make it seem as if a crow landed on each scarecrow.
7. If you wish, you may adorn the dolls with stickers too.
8. You may make the arms and legs of the dolls longer and more natural in appearance by attaching strips of brown paper onto the ends of the arms and legs.
9. Glue/tape a Popsicle stick on the back of each doll so that you can hold up the scarecrow paper dolls as if they are puppets.
Enjoy the scarecrow paper dolls below created by the children at the library!


Now that we have made our own scarecrows and decorated the yard with them, let's take a moment to remember Christopher Columbus and decorate a boat for Columbus Day!
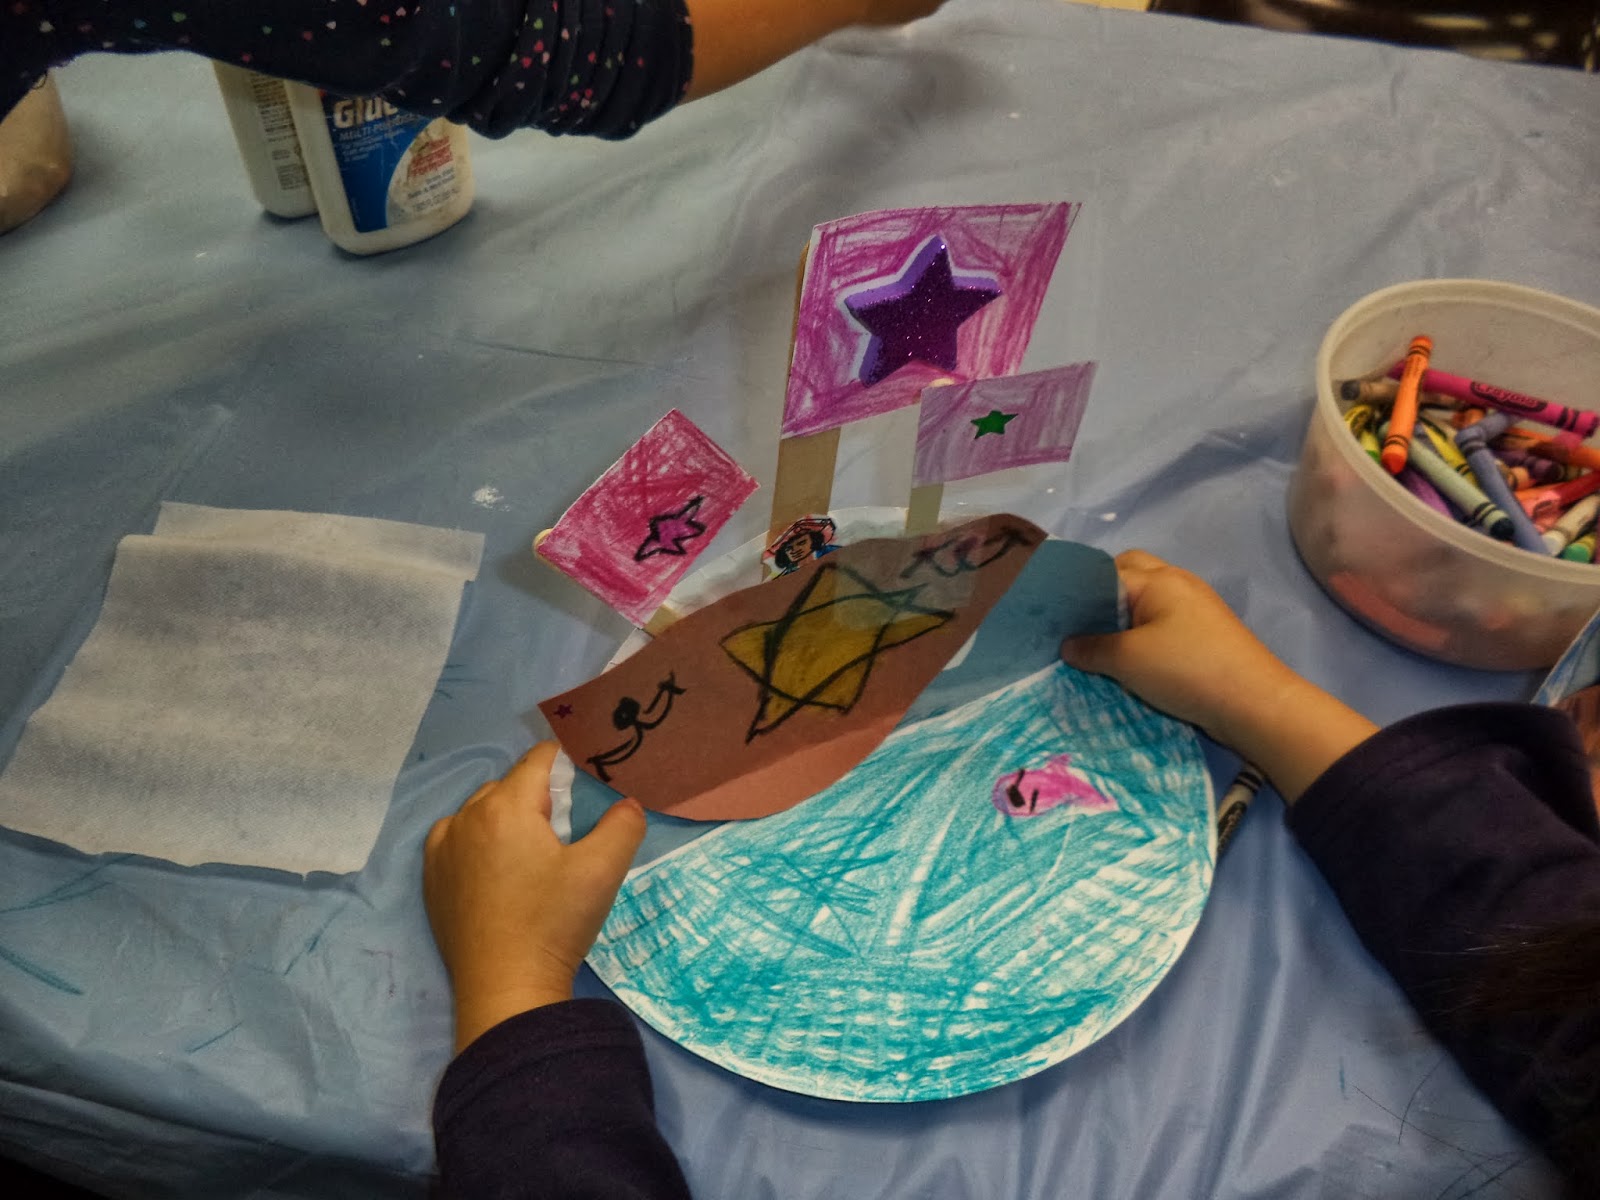
Christopher Columbus Boat

Supplies Used: One paper plate, brown construction paper, blue construction paper, white construction paper, 3 Popsicle sticks, crayons/markers, glue/tape, scissors, stickers and a picture of Christopher Columbus. (You may download a picture of Columbus from online, photocopy a picture from a book or draw one by hand).
Instructions:
1. Fold the paper plate in half and stand it up.
2. Using scissors, cut out waves or wavy shapes out of blue construction paper. Glue/tape the blue paper waves onto the top standing part of the plate.
3. If you wish, color in the bottom of the plate a light brown or tan color to resemble sand or the coast where Columbus landed.
4. Using scissors, cut out a half circle from brown construction paper.
5. Color and decorate the half circle as you wish. This will be the body of the ship.
6. Glue/tape 3 Popsicle sticks on the other side of the brown half circle that is not colored or decorated. Make sure that most of the sticks are exposed and only an inch is behind the paper.
7. Cut out 3 small squares from white construction paper and glue/tape each white square onto the top of each stick. The sticks and white squares will resemble the sails of the boat.
8. If you wish, you may decorate the paper sails with stickers.
9. Once your ship is glued/taped together and decorated, you may glue/tape the ship onto the blue paper waves.
10. Color in the picture of Columbus if it is only black and white. Glue/tape the picture of Columbus onto the top of the ship to make it look as if Columbus is on the ship.
Enjoy the Columbus Day ships created by the children at the library!


Enjoy your Columbus Day weekend! Now let's get ready for Halloween and create some spooky stories! We can create our own paper spooky story books!
Spooky Story Book


Supplies Needed: Construction Paper, Regular Scissors, Zig Zag Scissors, glue/tape, crayons, markers, googly eyes stickers, card stock and any other stickers of your choice.
Instructions:
1. Take a letter-sized piece of construction paper in any color and fold it in half.
2. You may use zig zag or regular scissors to cut around the edges to create a haunted house shape if you wish.
3. Unfold the sheet of construction paper. Take a few smaller sheets of paper and attach them along the folded center of the bigger sheet using either a stapler or tape.
4. Now that you have your paper book, you may color, decorate and write in your book using crayons, markers, stickers, googly eyes, card stock shapes and anything else of your choosing.
5. Have fun!
Enjoy the spooky story books written and illustrated by the children at the library! BOO!


Now that we have our pumpkins, scarecrows and scary stories to tell, let's make a mummy for more spookiness!
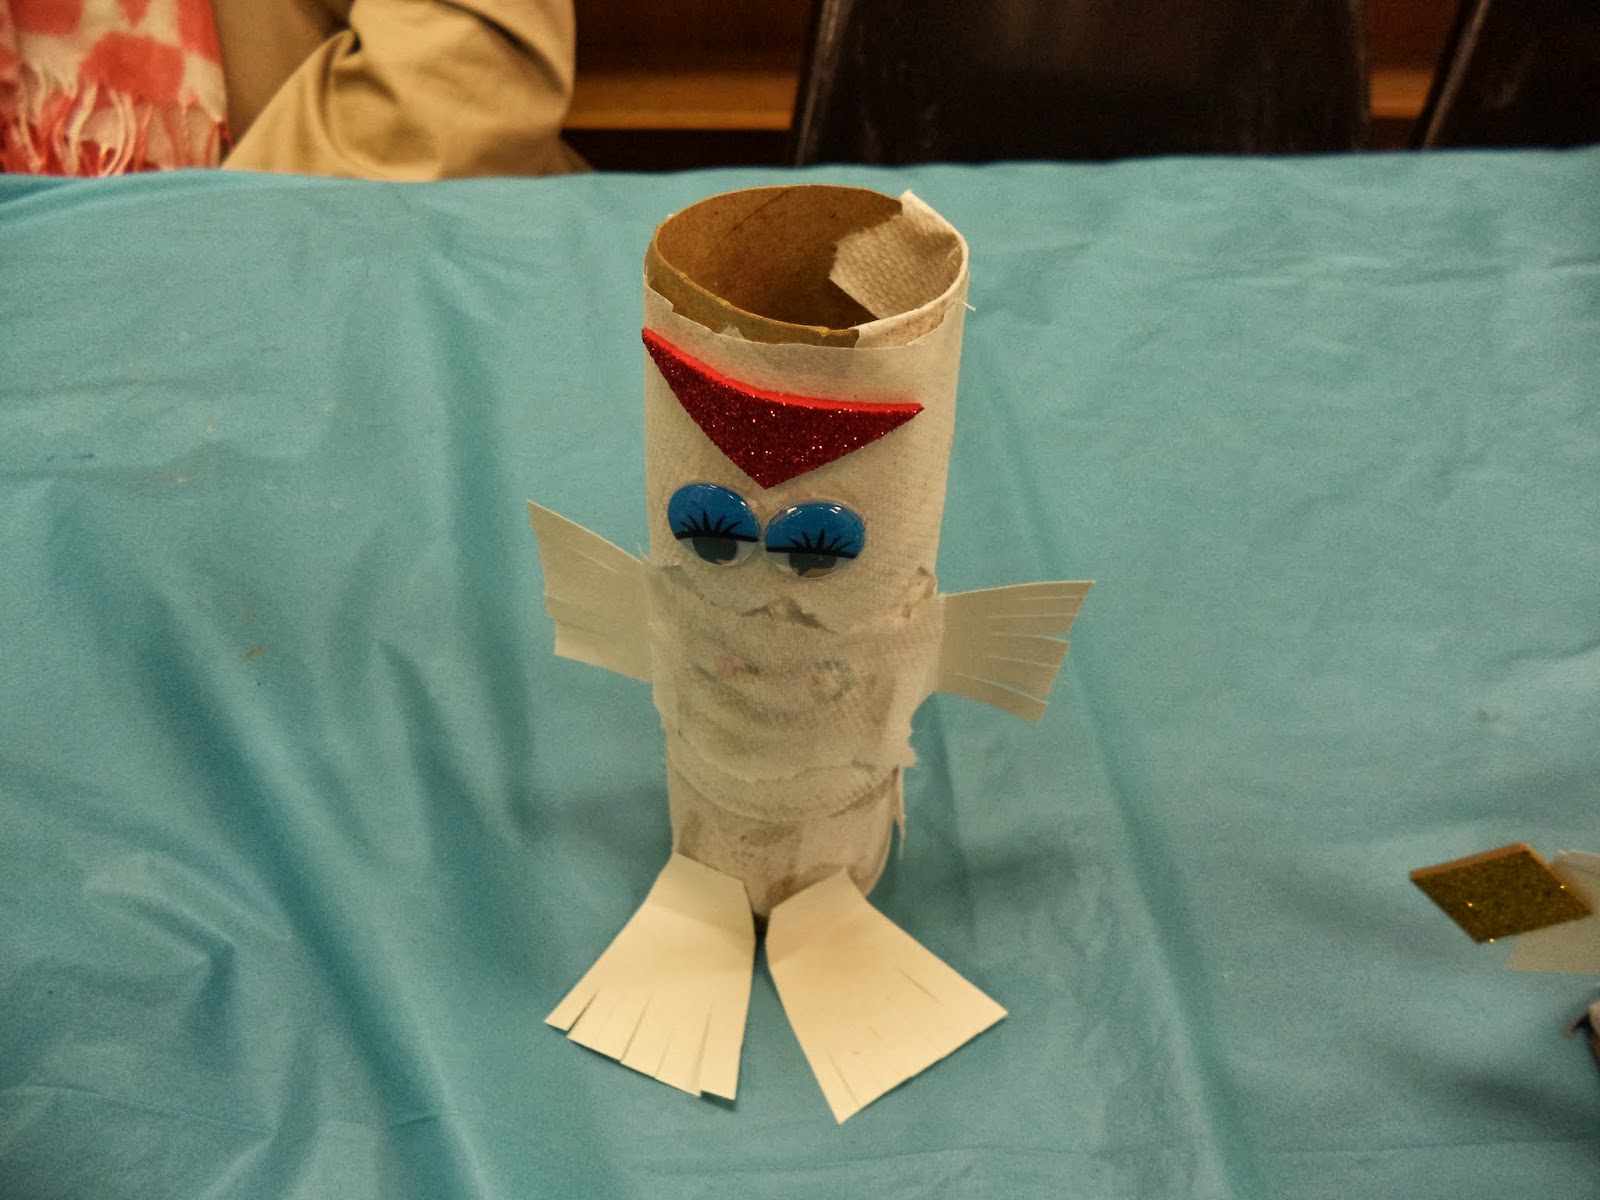
Mummy Tubes


Supplies Needed: A cardboard tube (toilet paper tube or paper towel tube), paper towels, glue, scissors, googly eye stickers, white construction paper and any other stickers for decoration.
Instructions:
1. Cut up pieces of paper towels into strips.
2. Squeeze glue all over the cardboard tube and stick on the paper towel strips as you wrap the strips around the tube.
3. Stick on the googly eyes.
4. If you wish, cut out arms and legs from white construction paper and attach to the wrapped tube.
5. You may draw a nose and mouth under the eyes with a crayon or marker if you wish.
Check out the mummy tubes created by the children at the library!


Let's create more spooky moments with freaky french fries from McDonald's Mania!
Freaky French Fries!


Supplies Needed:
Red card stock, yellow card stock, scissors, zigzag scissors, glue/tape, crayons/markers, googly eyes stickers, one strip of white paper and anything else you wish to use to embellish the fries.
Instructions:
1. Cut a piece of red card stock into the shape/outline of a french fries container.
2. Cut out strips from yellow card stock that are half an inch wide and a few inches long. For a jagged effect, use zigzag scissors to cut out the strips to make them resemble ridged fries.
3. Glue/tape the yellow strips (fries) onto the back of the red paper container. Make sure that enough of the fries stick up and out from behind the red card stock so that they can be seen!
4. If you wish, cut out the letter "M" from yellow card stock and glue/tape the "M" onto the front of the red paper fries container to resemble fries from McDonald's with the "M" McDonald's logo.
5. Using crayons/markers, draw any spooky designs and pictures of your choice, such as spiders, jagged lines, fake blood, etc.
6. Adorn the fries with googly eye stickers.
7. If you wish, you can cut out paper bones from white paper and stick them anywhere onto your fries.
8. If you wish, create a paper ring by gluing or taping the ends of a strip of paper together. Attach that ring onto the back of your fries if you wish to make the "freaky fries" into a puppet for Halloween. You can stick your fingers through the ring and show your puppet to trick or treaters!
Happy Halloween! Enjoy the freaky french fries below created by the children at the library!


Now that we have our pumpkins, scarecrows, scary stories to tell, mummies and freaky fries, let's have a Halloween party and decorate the room with bat banners!
Bat Banners


Supplies Needed: Card stock paper of different colors, googly eyes, tape or glue, stickers, string and a hole puncher.
1. Cut out triangles out of card stock paper. The triangles are the body. Cut out wing shapes and head shapes with pointy ears. I made my own shapes, but you can trace from shapes online.
2. Tape or glue the head onto the triangle. We made the triangular bodies upside down. Tape or glue the wings on each side of the body.
3. Decorate the bat as desired using markers, stickers, crayons and googly eyes for the head.
4. Punch a hole in the top of the head using a hole puncher and lace a string through to tie and have the bat suspended from the string.
Now that we are enjoying the Halloween party, let's enjoy some candy! How about Twizzlers?
Pop Art Twizzlers Candy
Andy Warhol created pop art using soup cans and Brillo pads. Perhaps we all can create pop art with candy!


Supplies Needed: Red or Pink Construction Paper; scissors, red crayons or markers, glue or tape, a picture of strawberries or cheeries, words printed out describing the candy, such as "Twizzlers", "Strawberry", "Low Fat", "Twists", etc. amd some lamination.
1. Fold a red or pink sheet of letter sized construction paper in half to form the Twizzlers wrapping.
2. Tape or staple around the edges and leave one smaller end open to stuff the paper twizzlers.
3. I cut out a swirl shape on one side of the wrapper to make it resemble a real Twizzlers package.
4. Take more construction paper and cut out strips of paper to resemble real Twizzlers. You can either use a craft scissor with a patterned blade or you can draw lines on the strips of paper to look like a twisted twizzler.
5. On the outside of the paper wrapping, glue the text labels and pictures of the strawberries or cherries on it.
6. Stuff the wrapping with the strips of paper twizzlers.
7. Laminate the cut out swirl feature in the front to make it rememble a Twizzlers wrapper.
8. Trick or Treat! Happy Halloween!
Now that we have our pumpkins, flying bats and candy, let's create some spider stories to tell on Halloween!
Spider Stories


Supplies Needed: Toilet Paper Tube, Pom Pom or Cotton Balls, tape or glue, 8 Pipe Cleaners, 8 pieces of construction paper cut in small squares in any color, Foil or Construction Paper to wrap the tube, Foam shapes to stick on the face of the spider.
1. Wrap a toilet paper tube in foil or paper to make the body of the spider.
2. Glue and stuff a pom pom or a bunch of cotton balls in one end of the tube to make the head.
3. Glue or stick on foam shapes for the eyes and mouth.
4. Take 8 pipe cleaners and bend them any way you like. Tape or glue on the ends of the of pipe cleaners onto the tube, four on each side to make 8 legs.
5. On each square of construction paper, write a sentence or draw a picture of your own story and then place the squares in order for how you want the story to flow.
6. Tape or glue on each square on each pipe cleaner (The other end not attached to the tube) as the spiders feet to make a "Story Spider".
Now it's time to harvest food and plan for Thanksgiving!