

Welcome to the month of March! This is the time for rainbows, colors, unicorns, pots of gold, shamrocks, changing weather, the start of Spring, Dr. Seuss's birthday and a celebration of women!
Happy Birthday to Dr. Seuss!
I love the Lorax and his Truffella Trees!


All kinds of weather patterns occur during the month of March. There are clouds, rain, sun, wind, snow, etc.
Sky mobiles!


It's the month of St. Patrick's Day and it's a good time to learn about rainbows since there is supposed to be a pot of gold at the end of the rainbow!
3D Rainbows!


The rainbows may be a reminder of the colorful books in the library with colorful pictures in them! Let's make some rainbow people books!
Rainbow Accordion Books!


This month of March is merry! Besides rainbows and a snow day, Easter is at the end of this month! I see some peeps in the stores! Perhaps the peeps need pajamas in this cool March weather!
Peeps in Pajamas!


It's Dr. Seuss's Birthday again! Let's read the Cat in the Hat! Perhaps we can make the Cat in the Hat and Thing 1 and 2 puppets to bring them to life!
Cat in the Hat and Thing 1 and 2 Stick Puppets!


Dr. Seuss inspires us to use our imaginations! March is a colorful month! Unicorns are colorful!


It's St. Patrick's Day and I see a pot of gold at the end of the rainbow!


I see a rainbow in the sky! Let's take a hot air balloon ride in the sky!


Wow, that hot air balloon ride was fun! It's windy now. It's time to fly some kites! Let's have a kite festival!

Happy Birthday to Dr. Seuss!
I love the Lorax and his Truffella Trees!

Supplies: One small cardboard tube, orange paper, white paper, yellow fabric, one large pom pom, one small pom pom, crayons/markers, 2 strips of pipe cleaner, glue/tape and scissors.
Instructions:
1. Wrap the cardboard tube in orange paper. Cut out 2 oval shaped eyes from white paper and attach the eyes onto the top front of the orange tube.
2. Color in the eyes. Attach a small pom pom below the eyes. This will be the nose of the Lorax. Cut out a yellow mustache from yellow fabric in the shape of the mustache on the Lorax character. Attach the mustache under the small pom pom nose.
3. Draw a small red mouth or tongue under the mustache.
4. Wrap 2 pieces of pipe cleaner together so that they twist together into one pipe cleaner. Cut out a circle from paper and attach a big pom pom onto the circle. Attach the pom pom onto one end of the pipe cleaner. This will be the truffella tree.
5. Attach the truffella tree onto one side of the tube (Lorax) with the big pom pom on top. Now you have a Lorax puppet with a truffella tree!
Enjoy the Lorax puppets below created by the children at the library!


All kinds of weather patterns occur during the month of March. There are clouds, rain, sun, wind, snow, etc.
Sky mobiles!


Supplies: Blue paper, card stock or paper with a pattern on it, cotton balls, tissue paper, scissors, string, one hole puncher, glue/tape and stickers.
Instructions:
1. Cut a letter sized sheet of blue paper in half horizontally. Discard the half you are not using.
2. Fold the blue paper that you are using for the craft in a cylinder shape. Attach the ends together using glue/tape.
3. Punch 2 holes, one on each side at the top. Pull a string through and tie the ends of the string together.
4. Attach cotton balls onto the blue cylinder for the clouds.
5. Cut out 4-5 strips of tissue paper and attach them onto the bottom of the cylinder. Attach them evenly along the bottom edge.
6. Cut out rain drop shapes from paper with a pattern on it or any paper if you don't have paper with patterns on it.
7. If you wish, attach stickers that have a weather or sky theme onto the cylinder near the clouds. You can use stars, sun, moon or anything else.
Enjoy the sky mobiles below created by the children at the library!


It's St. Patrick's Day! I see a leprechaun!
Leprechaun Wind Sock!


Supplies: Green paper, orange paper, orange tissue paper, one strip of black paper, glue/tape, scissors, crayons/markers and a shamrock shape.
Instructions:
1. Cut a piece of green construction paper in half vertically.
2. Fold one of the halves of green paper into a cylinder sphere shape.
3. Cut out a hat shape from some of the other half of the green paper. Attach the hat on top of the green cylinder shape on the front side. The cylinder shape is the face of the leprechaun and now it has a hat.
4. Draw a face onto the leprechaun. Cut out a beard shape from orange paper and cut fringes into the beard. Attach the beard below the mouth of the leprechaun.
5. Attach orange strips of tissue paper onto the bottom of the beard for a windsock effect.
6. Cut out a shamrock shape and color it green. Attach the shamrock onto the hat.
7. Attach a black strip of paper onto the top of the cylinder behind the hat. Each end of the strip should be attached to each side at the top so that you can hold the wind sock leprechaun by the strip.
Enjoy the leprechaun windsocks below created by the children at the library!


Leprechauns are mystical just like unicorns are!
Bobble Head Unicorn!


It's the month of St. Patrick's Day and it's a good time to learn about rainbows since there is supposed to be a pot of gold at the end of the rainbow!
3D Rainbows!

Supplies: Construction paper of different colors (colors of the rainbow), white paper, one letter-sized sheet of card stock, yellow paper, crayons/markers, glue/tape, stickers and glitter glue or glitter.
Instructions:
1. Place the sheet of card stock on a flat surface in a horizontal direction.
2. Cut out 6 strips of construction paper and each of them should be in a different color of the rainbow.
3. Attach the strips of paper all next to each other in a diagonal direction across the card stock sheet. The colors should be in order of the rainbow. (Red on top and Purple or Violet on the bottom). To make it 3D, attach only the ends of the strips onto the card stock so that the middle of the strips stick up into an arch shape.
4. Cut out 2 cloud shapes from white paper and attach onto each end of the rainbow.
5. Cut out a sun shape from yellow paper and attach onto the top left corner.
6. Using crayons/markers, draw a face onto the sun and on anything else of your preference.
7. Use glitter glue or glitter and stickers to decorate as you wish.
Enjoy the 3D rainbows below created by the children at the library!


The rainbows may be a reminder of the colorful books in the library with colorful pictures in them! Let's make some rainbow people books!
Rainbow Accordion Books!


Supplies: White or light colored construction paper, scissors, 6 printouts of human stick figures, crayons/markers, glue/tape and stickers.
Instructions:
1. Cut a letter-sized piece of white or light colored construction paper in half horizontally.
2. Fold the paper across in 3 sections in an accordion or panel style. You should have 6 sections total, 3 front and 3 back.
3. If you wish, cut out arch shaped openings on the bottom of each section.
4. Color in the human stick figures, each in a color of the rainbow. Attach each colored stick person on each section.
5. Draw a design on the background of each stick figure and adorn with stickers.
6. Color in a rainbow and attach onto the top center of the book.
7. Stand the book up so that it should stand up by itself.
Enjoy the rainbow people books below created by the children at the library!


This month of March is merry! Besides rainbows and a snow day, Easter is at the end of this month! I see some peeps in the stores! Perhaps the peeps need pajamas in this cool March weather!
Peeps in Pajamas!

Supplies: One sheet of letter-sized card stock or construction paper, smaller pieces of card stock or construction paper, fabric, crayons/markers and glue/tape.
Instructions:
1. Fold the sheet of card stock or construction paper in half. One half should be vertical and the bottom half should be flat on a surface of a table. The vertical part will be the wall and the bottom part will be the floor.
2. Cut out 2 bunny peep shapes from card stock or construction paper.
3. Cut out 2 half circles from fabric. Each half circle of fabric should fit on the body of a bunny. Attach each piece of fabric onto the bottom half of a bunny. Now each bunny is wearing pj's.
4. Draw 2 eyes and a nose/mouth on each bunny similar to a marshmallow peep bunny.
5. Cut out a circle or oval from fabric and place on the bottom of the floor at the edge. This can be a throw rug or mat.
6. Cut out a bed shape from paper and attach the bed onto the center of the folded sheet. Perhaps the top part can be folded so that the top part of the bed can be against the wall and the rest of the bed can be on the floor.
7. Cut out a square shaped piece of fabric and attach onto the bed. Now you have a blanket for the bed. Attach one of the bunny peeps on top of the bed or under the blanket.
8. Attach another bunny peep standing up against the wall.
9. Cut out 2 squares from paper. Decorate a design on one square to resemble a night stand and attach next to the bed against the wall.
10. Color a window design on the other square and attach on the wall above the bed. Now the bedroom as a nightstand and window.
11. If you wish, feel free to adorn the pajamas of the peeps with ruffles or buttons using small strips of white paper and then drawing buttons or a bow on them.
Enjoy the bunny peeps in pajamas below created by the children at the library!


It's Dr. Seuss's Birthday again! Let's read the Cat in the Hat! Perhaps we can make the Cat in the Hat and Thing 1 and 2 puppets to bring them to life!
Cat in the Hat and Thing 1 and 2 Stick Puppets!


Supplies: 3 wooden ice cream sticks, card stock or regular paper in white and red, blue fabric, crayons/markers, scissors, glue/tape and Styrofoam cups.
Instructions:
1. Cut out 3 round or octagon shapes from white paper. Draw faces on them. These will be the faces for the cat in the hat and thing 1 and thing 2. For the cat face, draw whiskers and attach small pieces of paper on the top of each side of the face to resemble the cat's ears.
2. Cut out a top hat shape from white paper and draw big stripes across it using a red crayon. This will be the cat's hat. After coloring in the stripes, attach the hat onto the top of the cat's head.
3. Cut out an oval shape from white paper and attach below the cat's head. Cut out a bow tie shape from red paper and attach below the cat's head and right above the body.
4. Color a black outline around the edge of the body and face to resemble the cat's colors.
5. Cut out 2 small white strips of paper and attach to each side of the body for the arms. You may cut out hand shapes at the ends of the strips for the hands.
6. Once the cat in the hat is put together and colored in, attach the cat onto a wooden ice cream stick. Now you have a Cat in the Hat puppet.
7. Cut out 2 round shapes from blue fabric and attach each round blue fabric shape onto the back of each of the 2 other faces for thing 1 and thing 2.
8. Cut out 2 oval shapes from red paper and attach below each face of the thing 1 and thing 2. Attach 2 red strips of paper onto each side of the red ovals for the arms. The ovals are the bodies.
9. Once Thing 1 and Thing 2 are assembled, place each of them onto a wooden stick. Now you have your Thing 1 and Thing 2 puppets.
If you wish, you may hold the puppets with your hands or you can stick the bottom of the stick puppets into the bottoms of Styrofoam cups to hold them in place.
Enjoy the Dr. Seuss Cat in the Hat stick puppets below created by the children at the library!


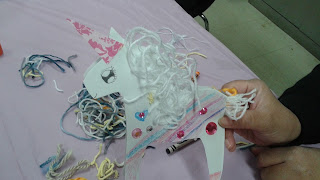
Dr. Seuss inspires us to use our imaginations! March is a colorful month! Unicorns are colorful!


Supplies Used: Construction paper, yarn, crayons/markers, googly eyes, glue/tape and sticky fake gems.
Instructions:
1. Cut out 2 unicorn shapes from construction paper. Make sure the unicorn shapes are cut together at the same time and connect at the top so that the unicorn has 2 sides and can be stood up in a vertical position.
2. Using crayons/markers or coloring pencils, draw designs and a face on the unicorn.
3. Cut out a small narrow shaped triangle from card stock or any paper. This will be the horn. Attach the horn onto the top of the head below the ears and above the muzzle.
4. Cut up small pieces of yarn or string and attach along the edge of the neck. This will be the mane for the unicorn.
5. Cut up some longer pieces of yarn and attach them together on one end using tape. This will be the unicorn's tail. Attach the tail onto the back rear end of the unicorn.
6. Embellish the unicorn with a googly eye on each side of the face and sticker gems anywhere on the face or body.
Enjoy the unicorns below designed by the children at the library!


Where ever there are unicorns, there must be trolls somewhere. Welcome to the land of Trolls!


Supplies: Construction paper, green paper, light colored card stock, fabric, scissors, crayons/markers, glue/tape and sticker gems.
Instructions:
1. Fold a rectangular piece of construction paper in half so that in can open and close like a book.
2. Cut out 2 troll doll shapes from light colored card stock. (Neutral colors or pastels colors are good to use).
3. Cut out 2 shapes from fabric that will resemble hair of the troll dolls. Attach each piece of fabric onto the top of the head of each troll doll shape. Now the paper troll dolls have the hair!
4. Draw faces onto the troll dolls. If you wish, attach googly eyes on them or you can draw the eyes as well. Feel free to draw outfits onto the trolls.
5. If you wish, embellish the trolls by attaching a sticker gem onto the bellies or anywhere else.
6. Attach the trolls onto the paper book, either on the inside or outside pages.
7. Adorn the book with scenery such as green paper for grass and flowers and different color shapes for the flower petals. Draw or attach a yellow sunshine.
Enjoy the troll villages below created by the children at the library!


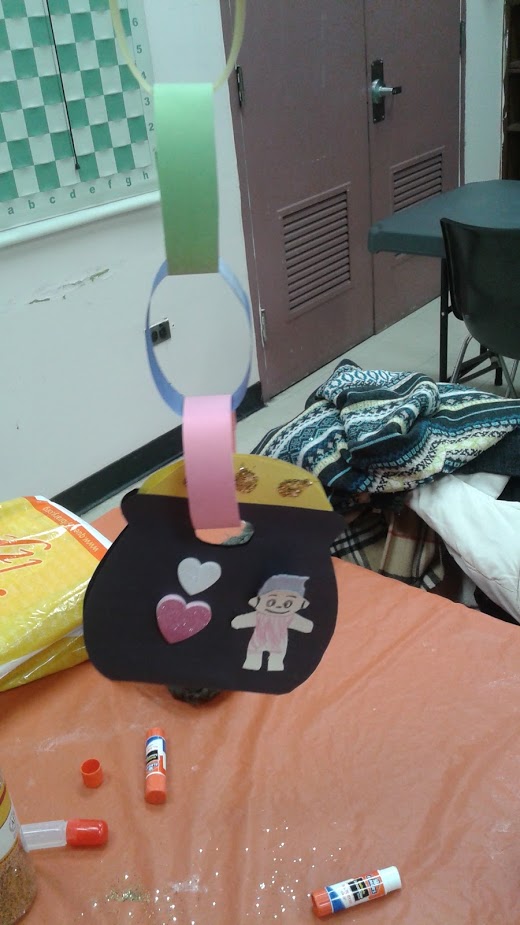
Supplies: Six strips of construction paper in different colors of the rainbow, black construction paper, yellow paper, gold glitter, glue/tape, crayons/markers and scissors.
Instructions:
1. Cut out 2 pot shapes from black construction paper and make sure the 2 shapes are attached together at the bottom. This will be the black pot for the gold.
2. Cut out 2 half circles from yellow paper and attach each one to the top of the pot. Dab some blobs of glue onto the yellow half circles and cover the glue with gold glitter. Shake off the excess glitter. Now you have a pot of gold.
3. Poke a hole in the top part of the pot under the gold. Make sure the hole is wide enough for a strip of paper to fit through.
4. Bend one of the strips of paper into a circle and tape the ends together. Place another strip through the first paper circle and attach the ends of that strip together so that you have a second circle looping through the first one. Do the same for the rest of the strips except for the last strip of paper. The last strip will be looped through the hole in the pot and then the ends can be attached together. Now you have a pot of gold at the end of a rainbow of loops!
5. Decorate the pot with stickers, designs, paper dolls and anything else of your preference.
Enjoy the pots of gold below designed by the children at the library!


I see a rainbow in the sky! Let's take a hot air balloon ride in the sky!

Supplies: Strips of construction paper of different colors, one sheet of card stock (preferably light blue), small pieces of white paper, glue/tape, crayons/markers and scissors.
Instructions:
1. Lay a light blue sheet of card stock paper down on a flat surface. If you don't have light blue card stock, then any light color will work.
2. Cut out a 3" by 3" circle from construction paper. Attach the circle on the center of the card stock sheet towards the top. This will be the hot air balloon shape.
3. Cut out 7-8 narrow strips of construction paper. Bend each strip into an arch shape and then bend the ends under the arch. Attach each arched strip onto the paper circle. Each bent end should be glued or taped down onto the edge of the circle. The arch part should be sticking up. You should have a puffy striped circle covering up the white circle.
4. Cut out a basket shape and color it. Attach the basket shape beneath the puffy circle. Leave some room to draw some vertical strings/rope so that the basket appears attached to the balloon.
5. Draw a person in the basket. Cut out white cloud shapes and attach around the balloon for clouds in the sky. Draw a sun in an upper corner. Draw some grass below.
Enjoy the hot air balloons below created by the children at the library!


Wow, that hot air balloon ride was fun! It's windy now. It's time to fly some kites! Let's have a kite festival!

Supplies: One paper plate, blue tissue paper, green tissue paper, white tissue paper, card stock, yarn, string, gem stickers, crayons/markers, scissors and glue/tape.
Instructions:
1. Cover a paper plate with light blue or aqua blue tissue paper. Fold the paper plate in half and then position the plate covered in blue tissue paper on a flat surface with one half of the plate standing up and the other half flat down on the surface.
2. Crumple up small pieces of green tissue paper and glue/tape onto the bottom of the plate. This will be the grass!
3. Cut out a circle from yellow/gold paper/cardstock and attach onto the top part of the plate that's standing up. This will be the sun.
4. Crumple up a piece of white tissue paper and attach onto the top of the plate near the sun. This will be a cloud. You can use cotton or any other white materials available if you wish.
5. Cut out 3 different shapes from card stock of different colors. Draw designs on them and decorate them with gem stickers or any stickers available. These will be the kites. Attach a string onto the bottom of each shape. Each string should be a few inches long. Attach ribbons onto the kites as well.
6. Attach the kites onto the tops of the plate under the sun and cloud.
7. Cut out 2 paper doll figures and draw faces and outfits on them. You can draw hair on them or attach yarn onto the heads of the dolls for hair. Attach them onto the bottom flat part of the plate near the grass. You can bend and tape the feet down to make them stand up. Attach the bottom parts of the kite strings onto their hands. Now it looks as if the dolls are flying kites.
Enjoy the kite flying dioramas below created by the children at the library!


It's time to start enjoying the outdoors and Spring is around the corner! The birds in their nests look like birds in a basket!
Birds in a Basket!

Supplies: One paper plate, tissue paper, 3 cut outs of baby birds, glue/tape, scissors, crayons/markers, fake grass and feathers.
Instructions:
1. Cut a paper plate in half. Place one half down on as flat surface.
2. Cut out the center of the other half. Glue/tape the cut out center onto the middle of the half of the plate that is flat on the surface.
3. The arch part of the cut half of the plate should be attached to the top of the bottom half. This will be your handle for the basket.
4. Cut out or download three images of baby birds or chicks. Color them and then glue them onto the paper plate basket. You may glue them onto the top of the cut out half circle to make it seem as if the birds are in the basket.
5. Wrap the bottom part of the basket with tissue paper.
6. Attach a feather onto the top of each baby bird.
7. Attach some fake grass onto the basket.
8. Scrunch up some smaller pieces of tissue paper and attach to the basket to resemble flowers.
Enjoy the birds in the baskets below created by the children at the library!


I see a baby chick! It looks so soft and fuzzy!
Chick Dolls!

Supplies: Two small cardboard tubes, yellow construction paper, white paper, orange paper, one feather, glitter foam stickers, glue/tape and crayons/markers.
Instructions:
1. Wrap two small tubes in yellow construction paper. Attach one on top of the other and make sure the tubes are in a horizontal direction. You now have the body of the chick.
2. After you decide which tube is the top of the bird and which tube is the bottom of the bird, you can now add features to the bird.
3. Cut out a heart shape from orange construction paper and attach to the bottom of the bird. This will be the bird's feet.
4. Cut out 2 small circles from white paper and attach onto the top front of the bird. The circles will be your eyes. You may draw on the eyes to create eyeballs or lashes
5. Cut out a small triangle from orange or white paper and attach upside down below the eyes. This will be your beak.
6. Attach a long strip of paper through the inside bottom of the top tube and let the ends hang out. This will be the wings.
7. Attach a feather onto the top back of the head.
8. If you wish, adorn the chick with glitter foam stickers or any stickers of your preference.
Enjoy the chicks below created by the children at the library!


Happy Birthday Dr. Seuss! It's always a good time to imagine silly situations such as a wacky Wednesday, Fox in Socks and Green Eggs and Ham!
Let's enjoy a plate of green eggs and ham for Dr. Seuss's Birthday!

Supplies Used: One paper plate, tissue paper, green construction paper, white construction paper, crayons/markers, glue/tape and scissors.
Instructions:
1. Cover a paper plate with light colored tissue paper.
2. Cut out 2 white sunny side up egg white shapes. Cut out 2 small green circles. Attach each green circle onto the center of an egg white shapes. You now have your eggs with green egg yolks.
3. If you wish, draw a face on the paper green egg yolks and draw any design or lines you wish on the eggs.
4. Cut out a ham shape from green paper. Color in a face and meat lines.
5. Cut out a Dr. Seuss hat shape from white paper and color red stripes on it.
6. Cut out a fork shape and color it in any color of your choice.
7. Cut out a bow tie shape and color it in red.
8. Cut out a white hand and a long slender arm. Color in the arm a dark color.
9. Attach all of the shapes onto the paper plate in any way of your preference.
Enjoy the green eggs and ham below created by the children at the library!


Fox in Socks!

Supplies Used: Construction Paper, Fabric, Crayons/Markers, Glue/Tape, a Fox Image and Scissors.
Instructions:
1. Cut out a sock shape from construction paper of any color of your choice.
2. Download from online or create an image of a fox.
3. Cut out 4 small sock shapes from fabric.
4. Color the big paper sock with crayons/markers and any other materials of your preference.
5. Color the fox and attach the fabric socks onto the feet of the fox.
6. Attach the fox onto the paper sock.
Enjoy the foxes in socks below created by the children at the library!


We can now feel as warm as a fox in socks. Let's go outside for some fresh air. I see a rainbow in the sky! March is a time for pots of gold at the end of rainbows! Are there leprechauns around?
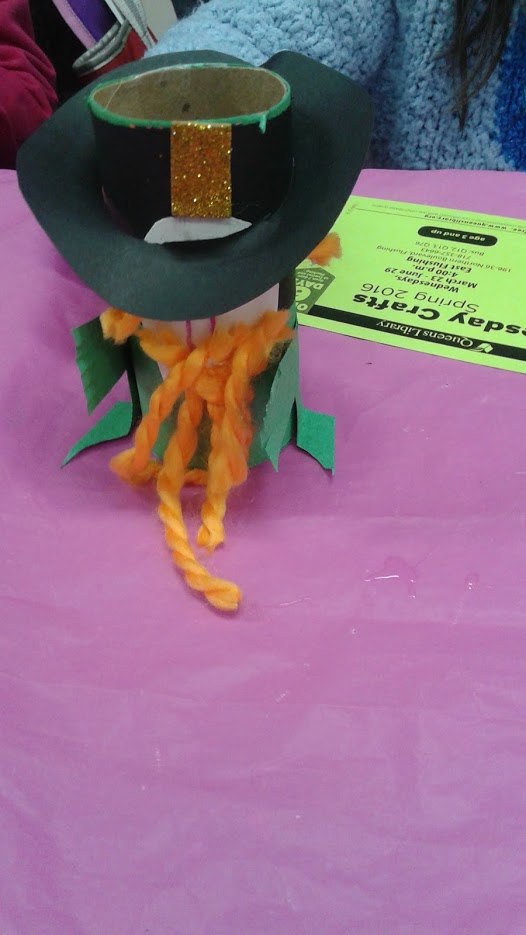
Leprechaun Puppet!

Supplies Used: Green construction paper, black construction paper, white or beige construction paper, one small cardboard tube, orange yarn, gold glitter foam shape stickers, crayons/markers, glue/tape and scissors.
Instructions:
1. Wrap a small cardboard tube in green paper.
2. Wrap the top of the tube with a strip of black paper.
3. Cut out a small circle from white or beige construction paper. Draw a face on the circle.
4. Attach the face onto the front center of the tube underneath the black strip of paper.
5. Cut out small pieces of orange yarn and attach onto the bottom of the face for a beard and attach one or 2 pieces of yarn onto the top of the face for hair.
6. Cut out 2 small strips of green or black paper and attach each strip to each side of the tube. Now the leprechaun has arms.
7. Cut out a circle from black construction paper and cut a hole in the middle of the circle that fits the volume of the tube.
8. Pull the circle over the top of the tube and push it down to the bottom of the black strip of paper so that the leprechaun has a rim for the hat.
9. Cut out a small square shape from a gold or silver foam sheet and attach onto the front of the hat for the hat buckle.
Enjoy the leprechaun puppets below created by the children at the library!


There are some birds outside. Their nests look like baskets!
Birds in a basket!

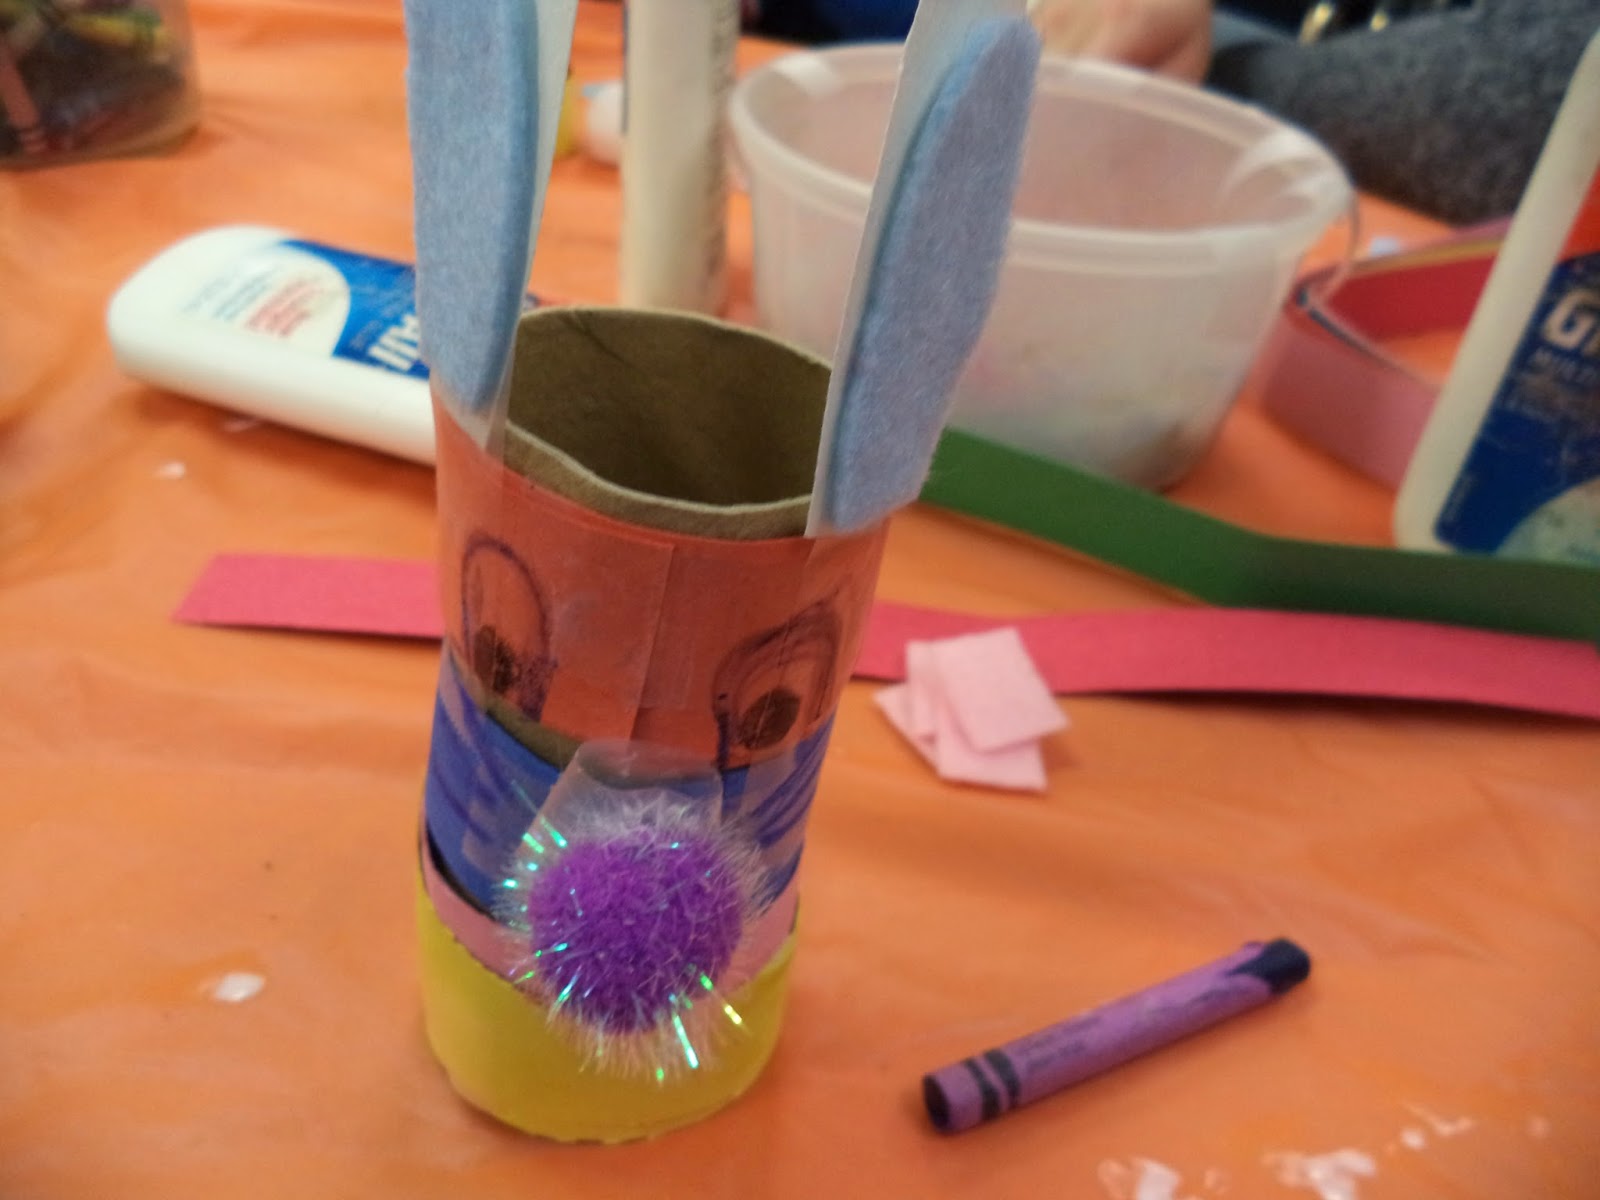
Easter is around the corner. Let's create some rainbow rabbits!


Supplies Used: One cardboard toilet paper tube, one cotton ball, construction paper of different colors, fabric, pom pom, crayons/markers, scissors and glue/tape.
Instructions:
1. Cut out 5 to 6 strips of construction paper and make sure each strip is a different color.
2. Wrap each strip of paper around the tube from top to bottom. Use glue/tape to make each strip stick around the tube.
3. After you are done with the strips, you should have a nice layer of colors for the body of the rabbit
4. Using scissors, cut out 2 rabbit ear shapes and attach them to the top of the rabbit.
5. Using crayons/markers, draw a face below the ears. You may use a pom pom or cotton ball for the nose.
6. Attach a cotton ball to the bottom rear of the rabbit for the tail.
7. Using fabric or paper, cut out simple shapes for the paws and feet and attach them along the front of the rabbit. (The shapes can be simple squares, ovals, triangles or rectangles if that is easier to do).
8. You may use pieces of fabric to attach to the paper ears to make them feel soft to the touch.
Enjoy the "Rainbow Rabbits" below created by the children at the library!


Weather Windsocks


Supplies Needed: One cardboard tube, tissue paper, construction paper, cotton balls, pictures of the sun, snowflakes, rain and other kinds of weather either drawn or printed out from online, crayons/markers, scissors/glue, one whole puncher and string.
Instructions:
1. Wrap a toilet paper roll in construction paper (preferably blue construction paper to represent the sky).
2. Using crayons/markers, stickers and cotton, decorate the wrapped tube with weather symbols, such as the sun and cotton for the clouds.
3. Attach strips of tissue paper onto the bottom of the tube.
4. Attach pictures of different kinds of weather onto each strip of tissue paper, such as rain, wind, snow, etc. This should make it seem as if precipitation is falling from the sky.
5. Punch a hole on the top of each side of the tube and pull a string through the holes. Tie a knot in the string at the top.
Now you have a weather wind sock that you can hang from anywhere.
Enjoy the windsocks below created by the children at the library!


Rainbow Fairies
Let's create some rainbow magic fairies in all different colors!


Supplies Needed: Card stock, white or light colored construction paper, one cardboard tube, pipe cleaner, stickers, crayons/markers, glue/tape, scissors and yarn.
Instructions:
1. Wrap a toilet paper tube in white or light colored construction paper.
2. Cut out 2 wings and glue/tape the wings onto the back of the tube.
3. Attach 2 small pipe cleaners onto the wings and make sure both ends stick up from behind the back of the tube.
4. Color on the front and sides of the tube any patterns of your preference using crayons/markers.
5. Cut out 4 small strips of card stock and attach them to the bottom front and sides for the arms and legs. (2 on the bottom and 2 on the sides).
6. Cut out a circle from card stock or construction paper and draw a face on it.
7. Attach the face onto the top front of the tube. Attach some yarn around the top and sides of the face for hair.
8. Cut out a small strip of card stock and attach the small strip onto the top of the face to resemble a halo or crown.
9. Stick on a star sticker onto a small circle of paper and attach it to one end of a small piece of pipe cleaner. This will be the wand.
10. Attach the wand with the star onto one of the arms to make it seem as if the fairy is waving a wand.
Enjoy the fairies below created by the children at the library!


Say hello to Rainbow Pony, Ladybug Pony,
Happy Heart Pony and Flower Power Pony!

Supplies Needed: A paper plate, white construction paper, tissue paper of different colors, crayons/markers, glue/tape and card stock.
Instructions:
1. Cover one side of a paper plate with green tissue paper.
2. Download from the computer or draw an outline of a pony. Trace the outline of the pony onto white construction paper. Repeat for more ponies.
3. Cut out the pony shapes from the white construction paper and color them with any colors, designs or patterns of your choice.
4. If you wish, you can color both sides of the pony the same or just color one side.
5. After the ponies are all full of colors, glue/tape a small strip of folded cardstock onto one side of each pony for support. (If you have 4 ponies, you will need 4 strips, one for each pony).
6. Glue/tape the bottom part of the support strip attached to each pony onto the paper plate on top of the green tissue paper. The paper ponies should then be in a standing position.
7. For more embellishments, take some small pieces of tissue paper of other colors and scrunch them into little shapes and glue/tape them around the edges of the plate around the ponies. This should simulate a pasture or meadow with flowers around it.
8. Enjoy the colorful little ponies!
Below are more colorful pony displays by the children at the library!


In honor of Women's History Month, let's read about Cinderella and create two different faces of our heroin! Let's do the same thing with the Irish Cinderlad so that the boys in the library will not feel left out!
The Two Faces of Cinderella/Cinderlad
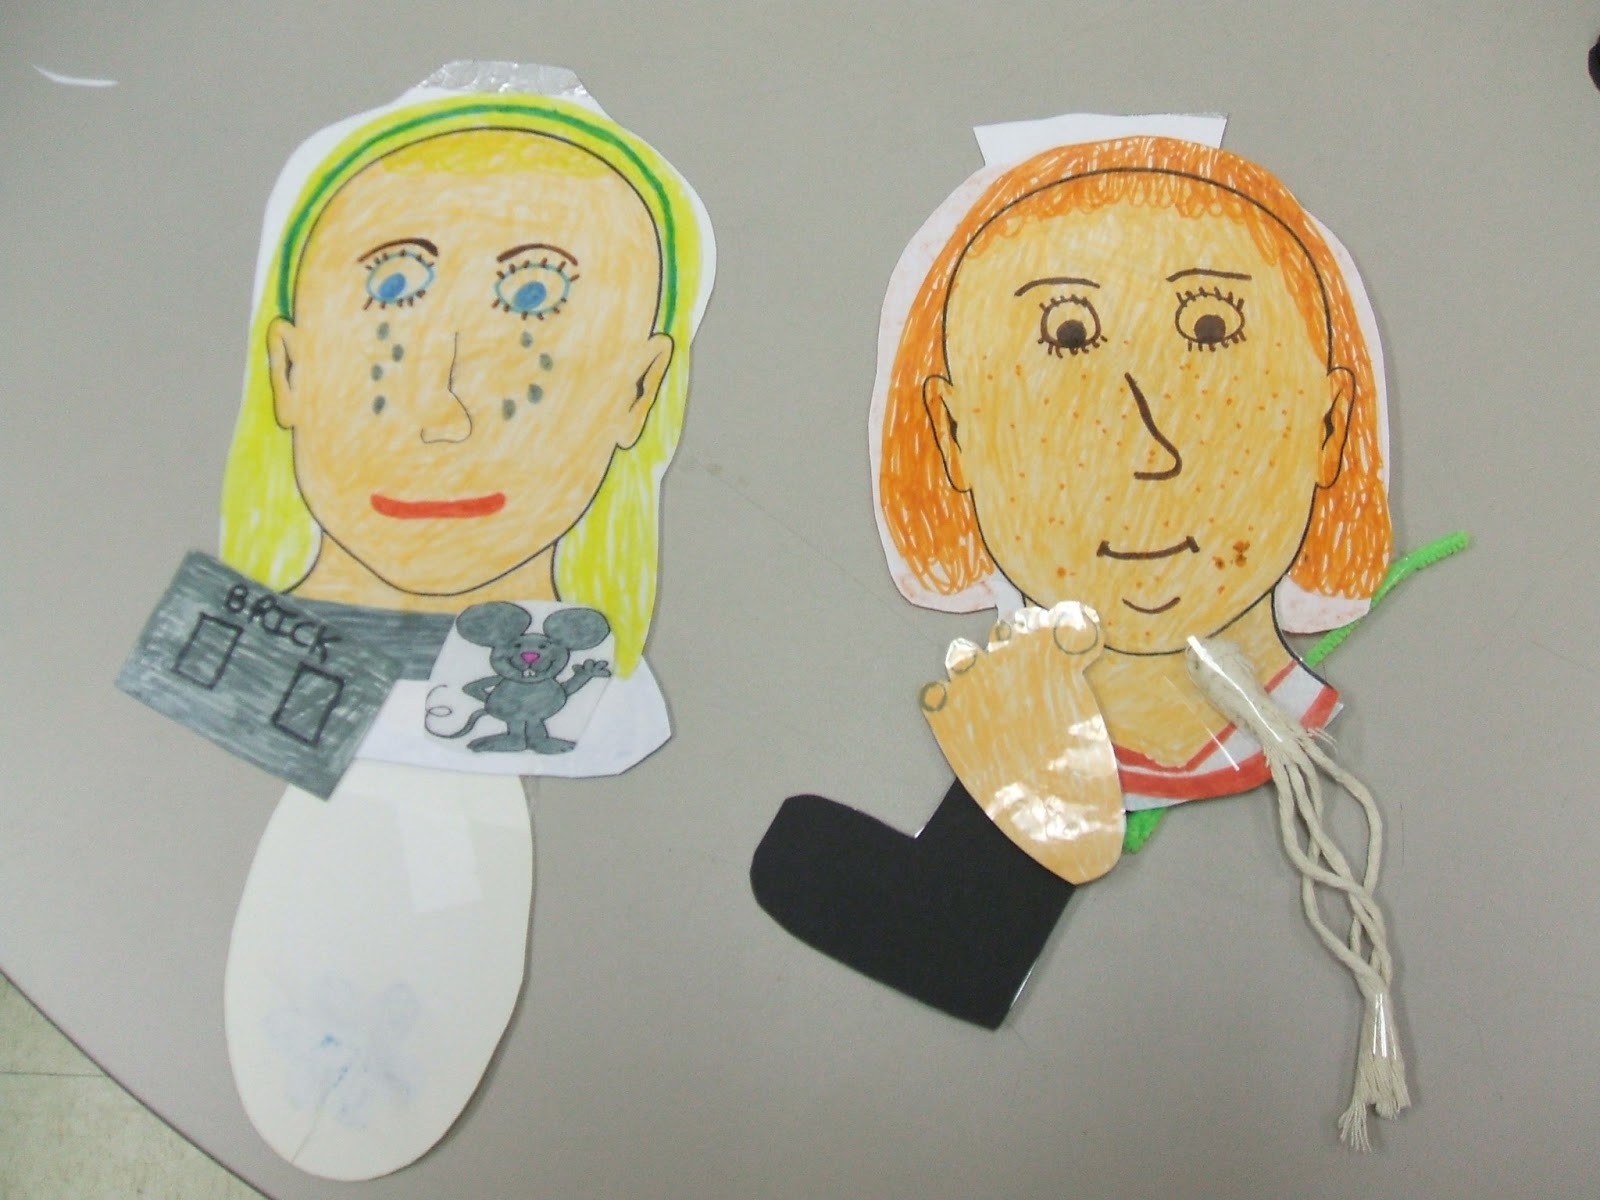

One side of Cinderella shows the one that has to live with her wicked stepsisters, sleeping on a cinder block and living among mice. The flip side shows Cinderella all dressed up in a gown, jewelry, a crown and a glass slipper living happily ever after.
There is an Irish Cinderlad (a male Cinderella) version of this. One side shows Cinderlad with feet too big and a bull's tale. The flip side shows him with a sword, crown and boots that fit his feet and living happily ever after with a princess.
Supplies Needed: Construction Paper (White for the slipper and cinder block or Black for the boot), images of a blank face, crayons/markers, glue/tape, tin foil, string for the bull's tale, pipe cleaner for the sword and a picture of a mouse to color.
Instructions:
1. Draw a face of Cinderella on each face outline. Have each face reflect the time in Cinderella's life. One face should be plain and sad, the other one should be smiling and glamorous!
2. Attach the backs of the 2 faces together using glue/tape so that each face is showing on the other side.
3. Embellish the glamorous Cinderella with jewels and a tiara using pieces of tin foil. Embellish her make-up using markers or crayons.
4. Cut out a slipper from construction paper, color and decorate it. Then attach it to the bottom of Cinderella's glamorous face to further demonstrate the glamour and happiness at the royal palace.
5. Color small rectangles and pictures of mice and attach them to the bottom of the plain Cinderella's face to resemble the cinder blocks and mice Cinderella had to live with during her early hardships.
6. If you are creating a 2 faced Cinderlad, then follow the same steps above with a plain face and glamorous face except that you will use a boot and sword instead of a slipper and a tail and big foot instead of mice and blocks.
Enjoy the fairy tales created below by the children at the library!


 Let's get ready for the month of April showers, poems and more of the Spring season!