

Summer is here and the theme is about the universe and space!
There are fireworks lighting up the sky!
Fourth of July Fireworks Craft!

Supplies: One dark colored sheet of card stock, smaller pieces of brightly colored card stock or paper in bright colors, stickers, glue/tape, glitter or glitter glue, tissue paper and anything else you wish to use.
Instructions:
1. Lay down a dark colored sheet of card stock on a flat surface. The dark color will be the night sky background.
2. To create the paper fireworks, cut out small, thin strips of card stock or paper of bright color. Bend or curl up the strips of paper and glue/tape them onto the dark card stock in a circle formation. Add glittery stickers or glitter to the circle formation. Do this with other strips of paper to make more fireworks. You now have fireworks in the sky.
3. If you wish, roll up a small piece of card stock into a tube shape and attach strips of tissue paper out of the bottom. Attach a small paper triangle at the top. This will be the firework rocket. Attach onto the dark sky background.
4. Embellish the fireworks with glitter or glitter glue and shiny stickers.
Enjoy the fireworks below created by the children at the library!


The libraries are open and there are books about the solar system. Perhaps you can make your own solar system book!
Solar System Books!


Supplies: Construction paper, scissors, crayons/markers, blue/tape, stickers of out of space images and anything else you wish to use.

Instructions:
1. Fold a few sheets of construction paper together into a book and cut it into the shape of a circle so that it resembles planets in the solar system.
2. Cut out smaller circles from construction paper and glue/tape them onto the pages of the books. Color and decorate them to resemble planets, the moon and the sun.
3. Adorn with stickers and feel free to write a story about the planets or write about anything you wish about the solar system.
Enjoy the solar system books below created by the children at the library!


Where there are planets, perhaps there is life and beings in outer space!
Alien Masks

Supplies: Letter sized sheets of card stock in a bright color, scissors, glue/tape, crayons/markers and anything else you wish to use.
Instructions:
1. Cut out an alien head shape from card stock. Cut out circles in the head for the eyes.
2. If you wish, cut out one or two small strips of card stock and attach them onto the top of the head for an antennae or more antenna.
3. Cut out a strip of paper and fold it into a loop. Attach it horizontally onto the back of the alien's head so that you can place your fingers through it to hold it like a mask or puppet.
4. Color around the eyes and draw a face on the alien in any way you wish.
Enjoy the alien masks below designed by the children at the library!


Where there are aliens, there are UFO's!
Alien in UFO

Supplies: Paper plate, card stock or construction paper, scissors, glue/tape, crayons/markers, smaller pieces of paper and anything else you wish to use.
Instructions:
1. Fold a paper plate in half. Cut out half of the center and fold it up so that it sticks out.
2. Stand up the folded paper plate so that it rocks back and forth and the center half that is cut out is sticking up.
3. Color and decorate the plate using crayons/markers and small pieces of paper. You now have a UFO
4. Cut out an alien head from card stock or construction paper and draw a face on it. Attach the alien head to the top half center of the plate that is sticking up. It should look as if the alien is in the UFO.
Enjoy the aliens in UFO's below created by the children at the library!


While watching for a UFO, there was a shooting star in the sky!
Shooting Star Wand

Supplies: Wooden ice cream stick, card stock, scissors, tissue paper, glitter, glue/tape and crayons/markers and anything else you wish to use.
Instructions:
1. Cut out a star shape from card stock. Attach it onto an ice cream stick.
2. Color and decorate the star using markers or crayons, glitter or glitter glue and anything else you wish to use.
3. Cut out strips of tissue paper and attach onto one side of the star to create a shooting star effect.
Enjoy the shooting star wands below created by the children at the library!


Wow, seeing shooting stars makes me wonder what it's like to be an astronaut!
Floating Astronauts!

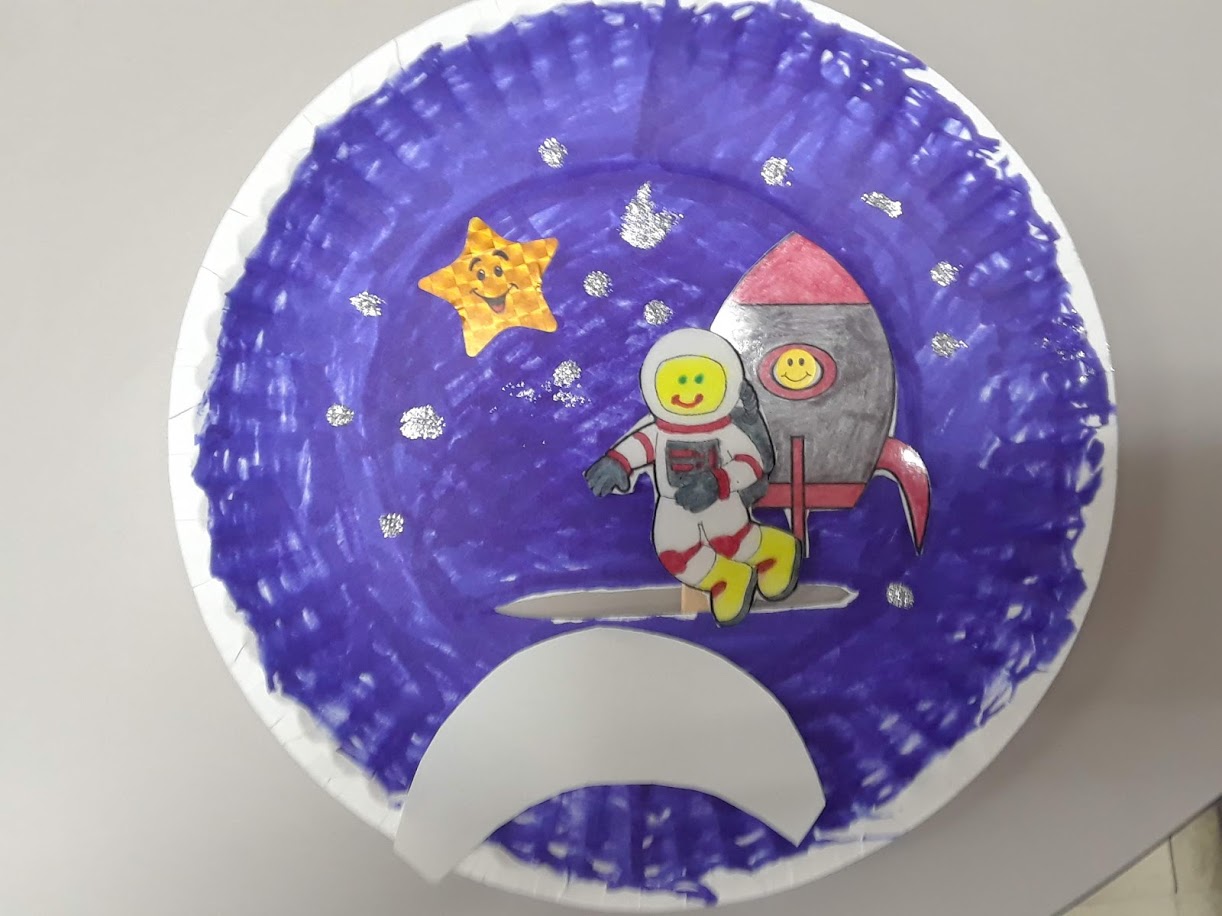
Supplies: One paper plate, one ice cream stick, scissors, a cut out of an astronaut, paper rocket, crayons/markers, glue/tape, stickers, glitter and white paper.
Instructions:
1. Using scissors, cut a small line or slit in a horizontal direction in the center near the bottom of the paper plate.
2. Color in the paper plate a dark blue or black to resemble an out of space background.
3. Cut out a moon shape from white or gray paper and place the moon shape on the bottom of the paper plate below the slit.
4. Cut out an image of an astronaut and color in or decorate the astronaut if you wish. Attach the astronaut onto an ice cream stick. Now you have a floating astronaut puppet to move around through the slit.
5. Attach a paper rocket onto the paper plate above the slit so that it looks as though the rocket landed on the moon.
6. Adorn the background on the plate with stickers and glitter.
Enjoy the floating astronaut puppets below created by the children at the library!


It's exciting imagining a floating astronaut in space on the moon or on another planet!
Space Wreaths!

Supplies: One paper plate, card stock or construction paper, glue/tape, crayons/markers, scissors, stickers, glitter and anything else you wish to use to adorn the wreath.
Instructions:
1. Cut out the center of a paper plate and discard the center or save it for something else.
2. Color in the remaining edge of the paper plate a dark color to resemble the universe.
3. Cut out a few circles and color and decorate them to resemble planets. Attach them along the outer rim of the paper plate.
4. Cut out a star shape and decorate it and attach it onto the wreath.
5. Adorn the space wreath with glitter and stickers.
6. Fold a strip of paper into a loop and attach onto the top back of the wreath to hold and let it hang like a wreath.
Enjoy the space wreaths below created by the children at the library!


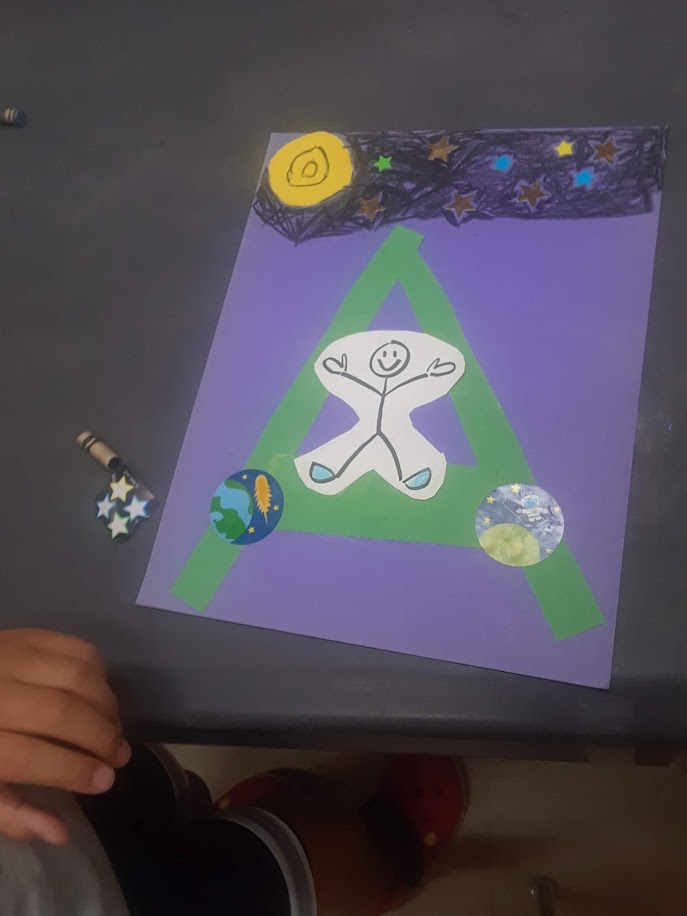
Let's Swing to the Moon and Stars!

Supplies: Construction paper, a stick figure cut out, stickers, crayons/markers, glue/tape and scissors.
Instructions:
1. Cut out strips of paper and place them into a formation so that it looks like a swing set.
2. Attach the paper swing set onto a sheet of dark blue paper.
3. Color in a stick figure and place it onto the paper swing. Now you have a girl/boy swinging on a swing and looking up at the stars at night.
4. Adorn the dark sky background with a moon and stars and any other sticker of your preference.
Enjoy the swings below created by the children at the library!


After seeing some galaxies up in the sky, it would be nice to have an arm cuff on during the day to remember it!
Galaxy Cuffs

Supplies: Small cardboard tube (toilet paper sized), blue paper, glitter or glitter glue, glue/tape, scissors and stickers.
Directions:
1. Using scissors, cut a vertical line down one side of the tube so that the tube can open up.
2. Decorate the open tube with blue paper on the outside.
3. Adorn the blue covered tube with stickers and glitter to resemble a galaxy in the sky.
4. Place the open tube or cuff on your wrist. The blue background and decorations should be showing on the outside.
Enjoy the galaxy cuffs below designed by the children at the library!


Wearing a galaxy cuff makes me feel like a super hero from a Star Wars movie! Let's make and hold a light saber!
Light Sabers

Supplies: One long cardboard tube (paper towel sized), one sheet of brightly colored paper, duct tape, stickers and anything else of your preference.
Instructions:
1. Wrap the cardboard tube in the paper.
2. Wrap pieces of duct tape on the bottom of the tube so that the tube resembles a light saber.
3. Adorn the tube with stickers and other decorations of your choice.
Enjoy the light sabers below created by the children at the library!


Light sabers makes me want to see more stars. All the stars lighting up the sky appear to be a star safari!
Star Safaris

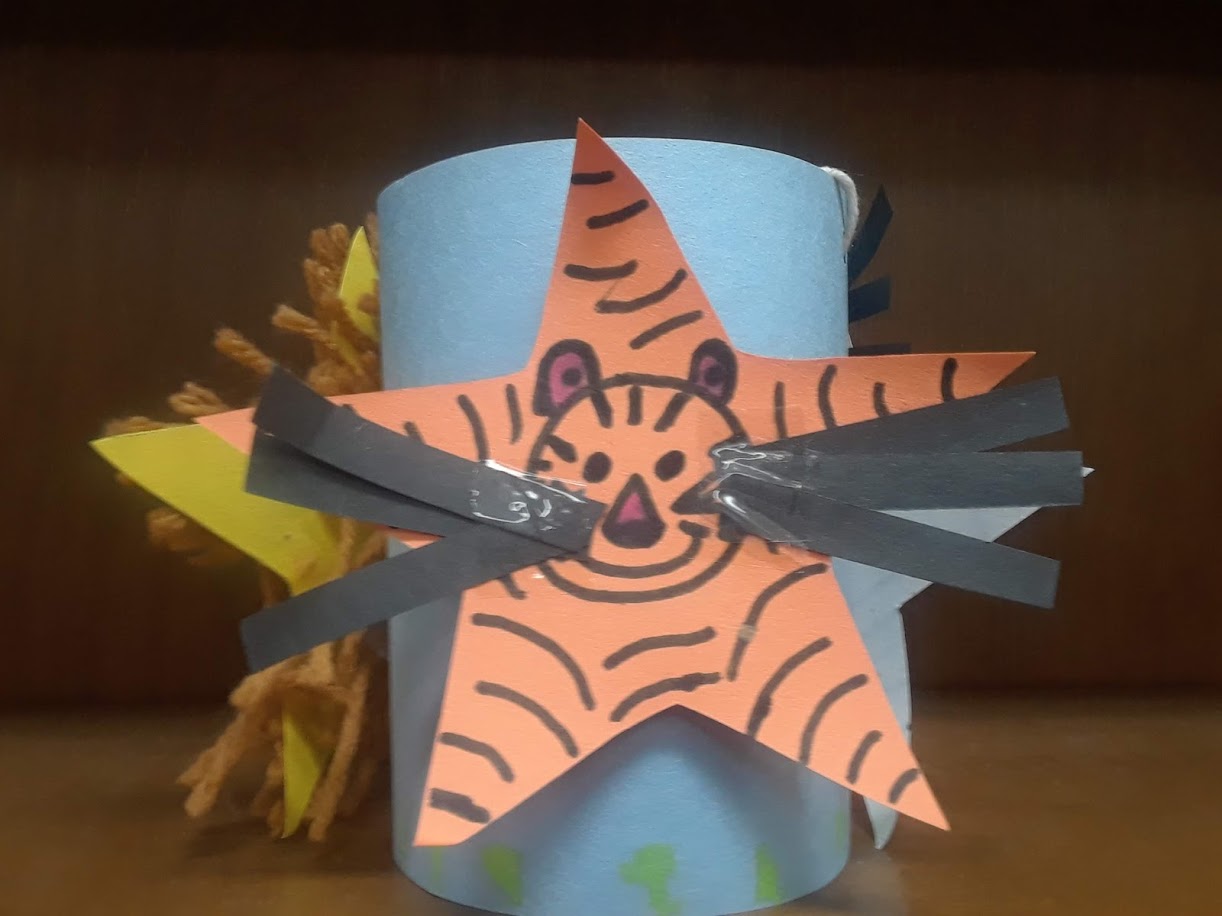

Supplies: Construction paper, scissors, yarn, glue/tape, crayons/markers, string, hole puncher and anything else of your preference.
Instructions:
1. Cut a sheet of blue construction paper in half vertically and discard the other half.
2. The half of blue paper you are using, fold into a tube and attach the ends together and stand the tube up vertically.
3. Punch 2 holes at the top of the tube, one on each side and place a string through the holes and tie the ends together. This will make the tube spin around when you hold it by the strings a certain way.
4. Cut out 3-4 star shapes from construction paper of safari animal colors, such as yellow, orange, white, etc. Draw safari animal faces and designs. (For example, stripes for tigers and zebras and spots for giraffes, etc.) Adorn the animal stars with whiskers using small strips of paper or yarn.
5. Attach the star animals onto the tube..
6. Color in some green grass on the bottom of the tube to make it seem as if the animals are on a savanna grass land.
Enjoy the star safaris below created by the children at the library!


Looking up at the sky makes me want to fly on an airplane! Sometimes the tail lights on a plane resemble moving stars!
Paper Airplanes!

Supplies: Card stock, crayons/markers, glue/tape, scissors and anything else of your preference.
Instructions:
1. Cut out a shape that resembles the body of an airplane. Cut a slit through the middle bottom of the body of the plane. The wings will go through there.
2. Color in a shape that resembles airplane wings and draw or color in a design on them. Place the wings through the slit in the body.
3. Cut out a tail fin shape and attach onto the rear of the plane's body. Now you have a paper airplane with wings that move.
4. Color in and draw a design on the plane.
Enjoy the paper airplanes below created by the children at the library!


Of course seeing the night sky and imagining flying in the sky reminds me of cats leaping. Some constellations take the shape of animals!
Cat Constellations!

Supplies: Two wooden clothes pins, blue card stock paper, scissors, glue/tape, star stickers, light colored crayons and anything else you wish to use.
Instructions:
1. Cut out a cat shape from blue colored card stock. Cut out ears and a tail for the cat as well from the blue card stock. The cat doesn't need legs since the clothes pins will be the legs the cat stands on.
2. One one or both sides of the cat, draw a constellation design using a light colored crayon. Adorn the constellation design using star stickers.
3. Attach the clothes pins on the bottom of the cat to make it stand up on it's own.
Enjoy the cat constellations created below by the children at the library!


Seeing constellations in the sky reminds me of comets
racing in the sky!
Comet on a stick!

Supplies: Construction paper, ice cream stick, stickers, glitter, glue/tape, crayons/markers, scissors and anything else you wish to use.
Instructions:
1. Cut out a circle shape from construction paper and draw a design on it. Adorn the circle with stickers and glitter.
2. Cut out thin strips of paper from construction paper and attach the strips onto one side of the circle. This will be the tail of the comet.
3. Attach the comet onto the top of an ice cream stick. Now you have a comet on a stick!
Enjoy the comets on sticks below created by the children at the library!


