

Welcome to the month of April! Happy April Fool's Day, Easter, Passover, Earth Day and National Poetry Month! If it's Easter, it's a nice time to decorate eggs and enjoy some peeps! The Spring is a good time to learn about the life cycle of a frog and other creatures such as birds. It's also a time to sing in the rain!
Let's spring into the month of April like an Easter bunny!
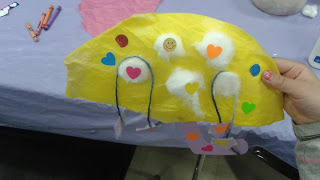
Bunny with Bushy Nose and Tail!

Supplies: Pastel colored construction paper, fabric, one big pom pom, one small pom pom, google eyes, glue/tape and crayons/markers.
Instructions:
1. Cut a thick strip of paper from construction paper of a pastel or Spring color. The paper should be in the shape of a long rectangle. Attach the ends together so that the strip folds into a circle. This will be the body of the bunny.
2. Cut out two heart shapes of the same color and turn them upside down. Cut off the pointy bottom tip of each heart.
3. After you decide which side of the circle is the bottom and which side is the top, attach one upside down heart onto the bottom of the circle and color in paw marks. This will be the feet of the bunny.
4. Attach a large pom pom onto the back of the circle. This will be the bunny's cotton tail.
5. Cut out two bunny ear shapes and attach them onto the top back of the other upside down heart. This will be the head/face of the bunny.
6. Draw a face onto the bunny and attach a small pom pom onto the center of the face for the nose. Attach google eyes onto the face or draw eyes on if you don't have google eyes.
7. Cut two small pieces of fabric in the shape of tear drops and attach onto each ear to make the ears feel soft.
8. Attach the head, face onto the top front of the bunny.
Enjoy the bunnies below created by the children at the library!


Seeing bunnies hop around reminds me of Earth Day and all of the animals of the world!
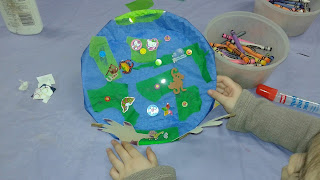
We've got the whole world in our hands!

Supplies: Card stock, blue paper, crayons/markers, stickers, glue/tape and anything else you wish to use for the craft.
Instructions:
1. Cut out a hand shape from card stock of a bright color.
2. Cut out a circle shape from blue paper. Make sure it's the right size to fit on the palm of the paper hand.
3. Attach the blue circle onto the palm of the paper hand. The blue circle will be the earth.
4. Color in land or continent shapes onto the blue circle with a green crayon or marker.
5. Color in images on the fingers or anywhere else on the hand that pertain to Earth Day, such as animals, flowers, insects or anything else.
6. If you wish, bend the tips of the fingers inward and color in fingernails.
7. Cut out a strip of paper and fold it into a loop and attach the loop onto the back of the hand. You can place your hand or some fingers through the loop to hold the hand like a puppet on your hand.
8. If you wish, adorn the hand and earth with stickers.
Enjoy the worlds in hands crafts below created by the children at the library!


Visiting the zoo is a nice way to celebrate Earth Day! There are sloths at the zoo!
Sloth on a stick!


It's a nice day to visit the bird sanctuary and see some colorful birds. Perhaps we can take one home!
Bird in a Cage!


Supplies: One strip of card stock, 4 strips of construction paper, 2 pieces of string, one paper cut out of a bird, costume feathers, glue/tape and crayons/markers.
Instructions:
1. Bend the strip of card stock into a circle and attach the ends together. Place the circle in a horizontal position flat on a table.
2. Attach one end of each of the four strips of construction paper onto the inside of the card stock circle. Bring the other ends of the strips of construction paper together and attach those ends together. You should now have a bird cage shape.
3. Color and decorate a paper bird shape with crayons/markers and fake feathers.
4. Attach one end of a string onto the paper bird and attach the other end onto the inside top of the bird cage so that the bird is hanging inside the cage and inside the strips of paper.
5. Attach another string onto the top of bird cage on the outside and now you can dangle or hang the bird cage or twirl it around.
Enjoy the paper bird cages below created by the children at the library!


The weather changes in April from rain to sun!
Change of weather panels!


Supplies: Blue construction paper, white paper, pieces of white napkin or thick white paper towel, yellow paper, crayons/markers, glue/tape and scissors.
Instructions:
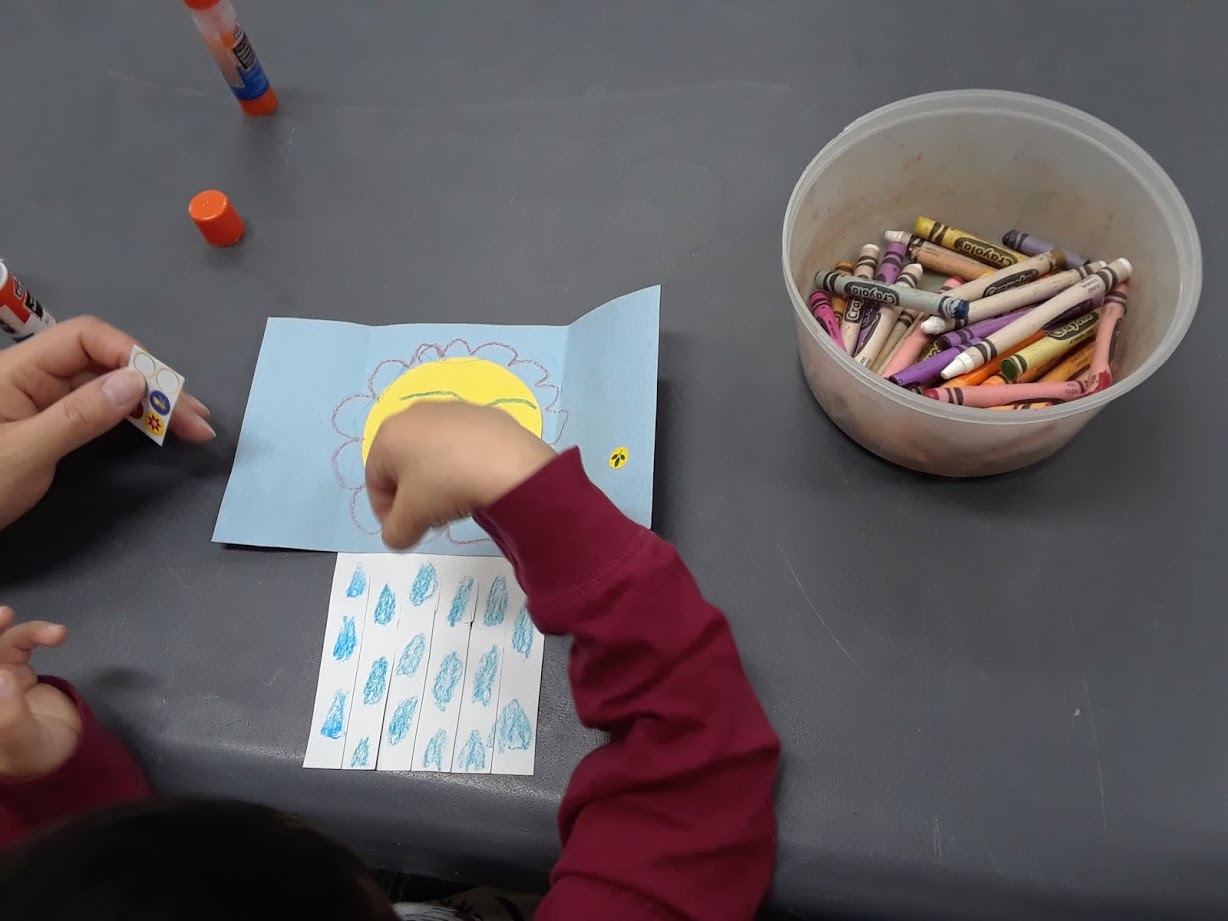
1. Cut out a long rectangle shape from light blue construction paper. Fold the paper into 3 sections so that you have 3 panels.
2. Attach a big yellow circle onto the inside center panel and color in a face and sun rays and this will be the sun.
3. Using scissors, cut out cloud shapes from white paper napkins or paper towels. If you wish to use cotton, that's fine too.
4. Fold over the other 2 panels over the sun so that the sun is covered up. Attach the clouds onto the outside panels. Now you can fold or unfold the panels to reveal clouds or the sun.
5. Attach a few white strips of paper onto the back bottom of the center panel behind the sun. Using crayons/markers, draw rain drops on the strips. Make sure you can fold the strips up behind the sun so that when the panels are open and the sun shines, it's not rainy or cloudy. When you close the panels so show the clouds, then the rain drops can be unfolded down to show rain.
Enjoy the change of weather panels below created by the children at the library!


Happy Earth Day!
The Circle of Endangered Animals!


Supplies: Blue construction paper, scissors, crayons/markers, glue/tape, cut outs of 4 animals on the Endangered Species list, green tissue paper and string.
Instructions:
1. Using scissors, cut out a long rectangle shape from blue construction paper.
2. Bend the blue paper into a cylinder shape and attach the ends together with glue/tape.
3. Place the cylinder standing upright onto a flat surface.
4. Decorate the bottom and top of the paper cylinder with pieces of green tissue paper. Now your cylinder circle has the colors of earth, blue sky, seas and green grass.
5. Color in 4 animals that are endangered, such as a tiger, gorilla, sea turtle, etc. Attach the animals all around the outside of the cylinder.
6. Attach each end of a string on different sides of the cylinder at the top. Now you can hold onto the circle of endangered animals with the string and twirl it around so that you can see all of the animals.
Enjoy the circles of endangered animals below created by the children at the library!


Now that it's warmer outside, it's nice to take a walk and see some Spring creatures outside, such as butterflies, ducks and worms.
Spring Safari!


Supplies: Construction paper, scissors, cut outs of spring images such as umbrellas, rain boots, insects, etc., pieces of white napkin cut into cloud shapes, glue/tape and crayons/markers.
Instructions:
1. Cut out a paper book from construction paper into the shape of a tulip.
2. Color in pictures of Spring, such as an umbrella, insects, earth worms and rain boots, etc.
3. Cut out 4 green leaf shapes from green paper and adorn the bottom of the tulip book with them.
4. Cut out cloud shapes from white napkins or use cotton balls and attach anywhere onto the tulip book so that there are clouds.
5. Draw in a sun, rain and anything else that reminds you of the Spring season.
Enjoy the Spring safaris below created by the children at the library!


I see some peeps in the windows! They are in the colors of paradise!
Peeps in Paradise!

Supplies: One letter sized piece of light blue card stock, smaller pieces of card stock in bright or pastel colors, small strips of green paper, a strip of brown paper, a small piece of yellow paper or card stock, beige card stock, blue tissue paper, crayons/markers and glue/tape.
Instructions to follow later!


It's time to see some eggs hatching!
Hatchimals!


Supplies: Card stock in bright colors, 2 googly eyes, one small piece of pipe cleaner, crayons/markers, glue/tape and 2 small strips of regular paper.
Instructions:
1. Cut out an egg shape from card stock. Draw a design on one side of the egg shape.
2. Cut the egg shape in half from side to side and cut in a zigzag way so that the egg shape looks like it's a cracked egg.
3. Cut out a round chick shape from card stock of a different color. Draw a face and design on the chick shape. Attach googly eyes onto the chick shape. Attach a pipe cleaner onto the top of the chick's head to resemble an antennae. The chick is supposed to resemble the "Hatchimal" toy.
4. Attach the chick shape onto the back of the bottom half of the egg shape. Make sure the front face and some of the upper body is sticking up enough from the egg half to be visible.
5. Bend 2 small strips of paper into loops and glue/tape the ends of each loop together. You should have 2 paper loops.
6. Attach one loop onto the back of the top half of the egg shape. Attach the other loop onto the bottom of the egg half. You should be able to slide your thumb through the loop on the bottom half of the egg and your index finger through the loop on the top half of the egg. Open and close the thumb and index finger to make it seem as if the egg hatches and the chick or "Hatchimal" hatches from the egg.


Enjoy the "Hatchimal toys below created by the children at the library!


I love those marshmallow peeps! They are such bright colors!
Peeps in Paradise!

It's raining, it's pouring, the old man is snoring!
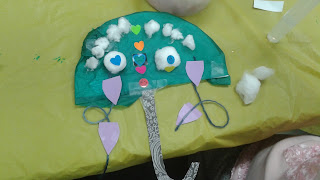
Paper Umbrellas!
Supplies: One half of a paper plate, card stock, tissue paper, cotton, stickers, string, scissors, glue/tape and crayons/markers.
Instructions:
1. Cut a paper plate in half and discard one of the halves.
2. Cover the half of the plate in tissue paper that you'll use for the craft. This will be the top of the umbrella.
3. Cut out a cane shape from card stock and attach onto the bottom of the umbrella half. Now your umbrella has a handle.
4. Cut out 2 pieces of string. Cut out a few rain drop shapes from card stock. Attach the rain drops onto the strings and attach each string onto the bottom of the umbrella top. Now you have rain drops falling.
5. Decorate the paper umbrella with cotton, stickers and anything else of your preference.
6. If you wish, you can fold a small strip of paper into a circle and attach the ends together to make a paper cuff. You can attach the cuff onto the back of the umbrella and slide a finger or 2 through the cuff to hold the umbrella like a puppet.
Enjoy the paper umbrellas below created by the children at the library!


April Showers Bring May Flowers!
Let's enjoy the gardens! How about a giggle garden to lighten up the day?


Instructions:
1. Cut out a rectangle or square shape from brown paper and a slightly smaller rectangle or square shape from green paper.
2. Glue or tape the green paper on top of the brown paper. Now you have the grass growing from the soil.
3. Color in a few paper flower shapes. Decorate with stickers and googly eyes.
4. Cut out some small strips of green paper. Bend each green strip into a zig zag shape.
5. Attach a flower on one end of a zig zag strip and attach the other end onto the paper grass. Repeat this for each flower.
6. If you wish, attach fake grass onto the green paper around the flowers.
Enjoy the giggle gardens below created by the children at the library!


After enjoying some rain and gardens, it's time to think about protecting the earth.
We've got the whole world in our hands!

Supplies: One paper plate, blue tissue paper, green tissue paper, neutral colored card stock, glue/tape, markers/crayons, stickers, scissors and glitter foam shapes.
Directions:
1. Wrap a paper plate in blue tissue paper.
2. Cut out smaller pieces of green tissue paper and attach them onto the plate onto the blue tissue paper. This will be the Earth and the continents.
3. Attach stickers onto the paper Earth, either onto the continents or the oceans. The stickers can be any kind that you would like to use. It's your own world!
4. Cut out 2 hand shapes from light colored or brown card stock and color in finger nails, sleeves, watches, etc.
5. Attach the 2 hands at the bottom of the plate to make it seem as if the world is in the hands.
6. If you wish, cut out a small rectangle from glitter foam sheets and attach onto one of the hands as a ring or bracelet.
Enjoy the worlds in hands below created by the children at the library!


After celebrating from Earth Day, it's a good time to learn about different creatures and their life cycles. What does a frog look like when it's a baby?
The life cycle of a frog book!


Supplies Needed: Construction paper, images of frogs, an image of a tadpole, an image of a frog let, an image of frog eggs, scissors, crayons/markers, glue/tape and stickers.
Instructions:
1. Cut out half of a sheet of construction paper and make sure the paper is a rectangle shape.
2. Fold the paper into 4 different zigzag sections. Now you have an accordion book. Decide which end of the accordion book you would like to use for the title. Using crayons/markers, write in a title of the book, such as "The Life Cycle of a Frog".
3. Cut out lily pads from green construction paper and attach to the sections of the book.
4. Cut out square shapes from blue construction paper and attach onto some of the pages if you wish to have some sections of water for the tadpoles to swim in.
5. Cut out an image of frog eggs or you can draw them too. Attach the frog eggs onto one of the sections at one end.
6. Attach an image of a tadpole and attach onto the next section.
7. Attach an image of a frog let and attach onto the next section.
8. Attach pictures of frogs onto the rest of the sections.
9. Using crayons/markers, color in the tadpole, frog let and frogs. Color in any fauna/flora or anything else in nature that you would like to include in the book.
10. You may embellish the pictures with stickers if you wish.
Enjoy the frog cycle books below created by the children at the library!


Let's decorate some eggs and create stuffed egg head puppets!
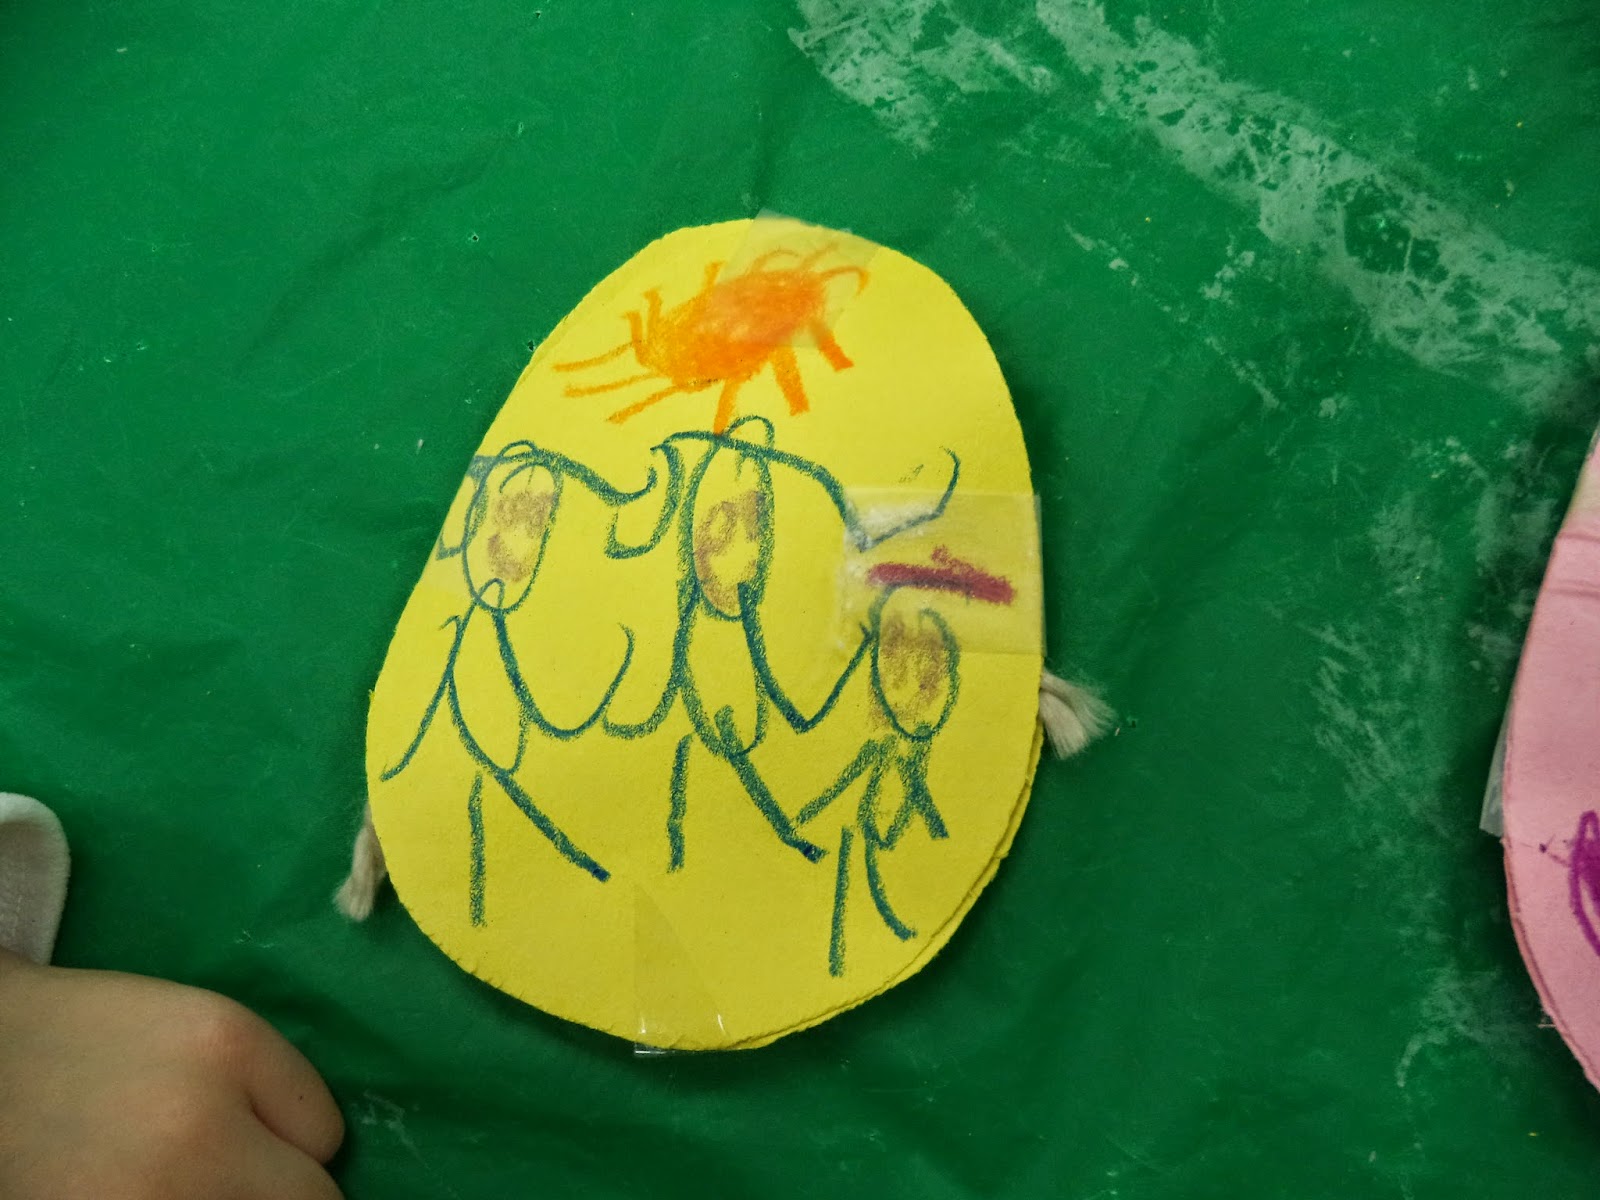
Egg Heads!

Supplies Used: Construction paper, Scissors, Crayons/Markers, Yarn, Glue/Tape and Cotton.
Directions:
1. Using scissors, cut out 2 egg shapes from construction paper of any light, Spring color.
2. Attach the 2 egg shapes together by the bottom using glue/tape. You should have an opening between the egg shapes on the top and sides.
3. Color and decorate one side of the egg using crayons/markers and anything else of your preference, such as cotton, stickers, etc. This will be the front of your egg.
4. Stuff some yarn or cotton into the top opening of the egg and push it all down so that the egg has some volume.
5. Close and seal up the rest of the egg using glue/tape.
6. You may add yarn or cotton at the top of the egg shape to resemble hair if you colored in a face on the egg.
7. If you wish, you may take a small strip of paper, bend it into a loop, attach the ends together and glue/tape the loop onto the back of the egg so that you can place your fingers through the loop. You can now hold your egg head as if it's a puppet.
8. Repeat the above steps if you wish to make more stuffed paper egg heads!
Enjoy the egg heads below created by the children at the library!


Happy Spring Holidays! Enjoy decorating your eggs!
Let's enjoy some peeps as well.
Does anyone have a peep in their pocket?

Peeps in a Pocket!
.JPG)
Supplies: Construction Paper, Scissors, Crayons/Markers, Glue/Tape and Cut-Outs of Bunnies and Chicks.
Instructions:
1. Using scissors, cut out 2 identical shapes in the form of a pants pocket.
2. Attach the 2 pocket shapes together along the bottom and bottom sides using glue/tape.
3. Using crayons/markers, color a design on your paper pocket.
4. Using scissors, cut out a few shapes of bunnies and chicks from light colored construction paper.
(You may cut from an outline of a bunny and chick from the Internet for the shape if you wish.)
5. Using crayons/markers, color in a face and any other design on each bunny and chick. (These will resemble the peeps candy.)
6. Glue/tape the paper peeps on the inside of the top of the pocket. Make sure that enough of the peeps are showing from inside the pocket.
Enjoy the peeps in a pocket below created by the children in the library!
.JPG)
.JPG)
.JPG)
.JPG)
.JPG)
.JPG)
.JPG)
.JPG)
Now that we have some peeps in our pockets to munch on, we can enjoy a visit to the Museum of Natural History and learn about a T-Rex! Perhaps a T-Rex has a tale to tell of its' own!
T-Rex Tale!
Supplies: Construction Paper, White Paper, Crayons/Markers, Glue/Tape, Scissors and Googly Eyes.
Instructions:
1. Cut out 2 T-Rex dinosaur shapes out of construction paper.
2. Attach the 2 T-Rex shapes together from at the top only! (Glue or tape the back of the heads, backs and tips of the tails together). The 2 dinosaurs should now be merged into one dinosaur that opens on the bottom
3. Cut out 2 small rows of triangles attached together and attach along the inside of the mouth of the dinosaur. Make sure the white triangles stick out to look like dinosaur teeth.
4. Using crayons/markers, color in the face and body of the dinosaur in any way of your choice.
5. If you wish, you may open up the dinosaur and write a small story (tale) inside or just draw pictures inside. Pictures can tell a tale too!
6. Attach a googly eye onto each side of the head where the eyes should be.
Enjoy the T-Rex tales below created by the children at the library!


It's been a nice day at the museum! Now it's time to go back outside! It's raining again! Let's enjoy some April showers that bring May flowers. Let's open up our colorful umbrellas!

Supplies Needed: Card Stock, Construction Paper, Scissors, Glue/Tape, Crayons/Markers, Cotton and Pom Poms.
Instructions:
1. Cut out a cloud shape from card stock (blue, white or gray card stock). Glue/tape pieces of cotton around the edge of the paper cloud. Now you have a cloud! Leave the outside of the cloud empty.
2. Cut out 2 strips of construction paper. Attach each strip to the bottom back of the cloud. Each strip should be hanging from the cloud at an angle or slant.
3. Cut out 2 small umbrella shapes from card stock of any color. Attach each umbrella shape onto the middle of each hanging strip.
4. Using crayons/markers, draw rain drop shapes along the strips and around the umbrellas to resemble rain.
5. Cut out 4 flower shapes from card stock. (Include the stems and leaves). Attach 2 flowers to the bottom of each strip. It should look as if it's raining on the flowers and umbrellas.
6. Write or type up the saying "April Showers Bring May Flowers" and attach that phrase onto the middle of the cloud.
7. If you wish to add texture or a touch and feel effect to the flowers, add pom poms to the round flower shapes for decoration and touch.
8. If you wish, punch a hole on the top of the cloud with a hole puncher and slide some string through. Tie a knot in the string and now you have a hanging Spring decoration!

Enjoy the April Showers and Flowers below created by the children in the library!


It's time to return home from the museum and to get out of the rain! Let's make some art work. How about designing a still life image of an umbrella?
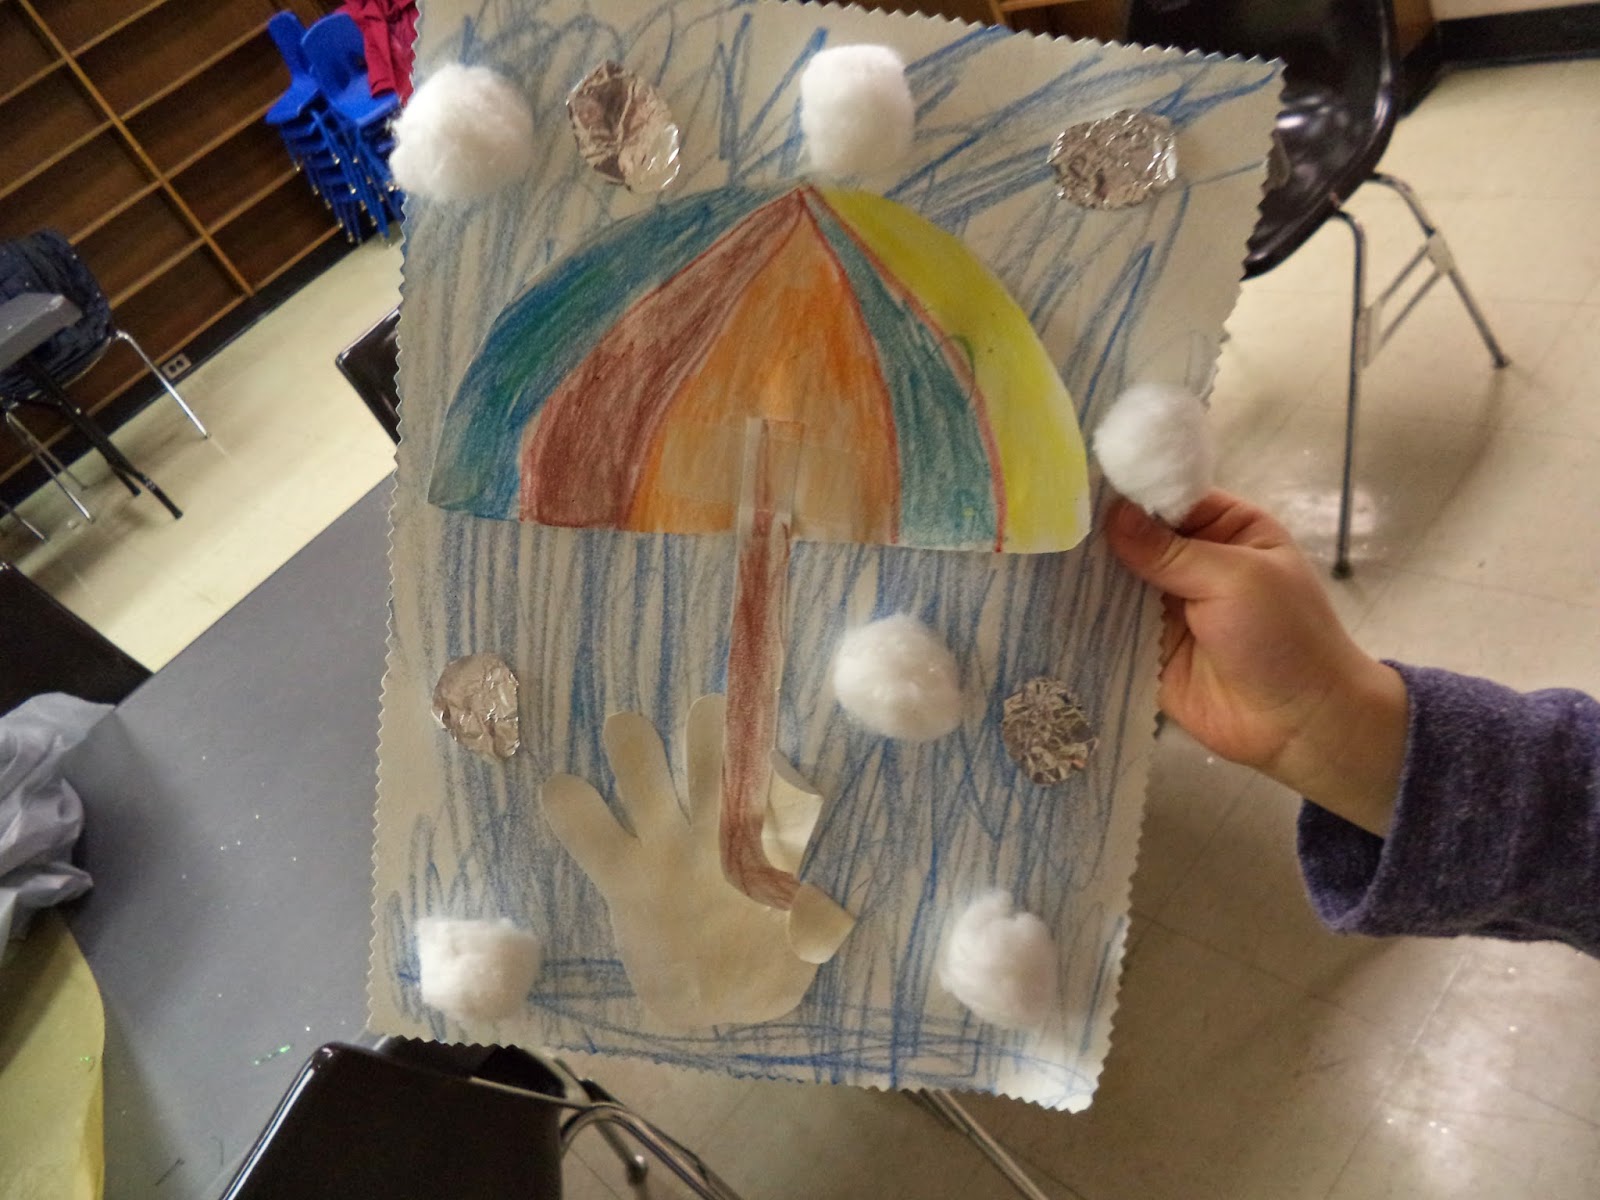
Still Life with Umbrella Art

Supplies: Construction Paper, Cotton Balls, Tin Foil, Printouts of a Hand and an Umbrella, crayons/markers, glue/tape and scissors.
Directions:
1. Using scissors, cut out an outline of an umbrella and a hand.
2. Glue or tape the umbrella onto the construction paper. Color and decorate the umbrella.
3. Color the hand and glue/tape the hand under the umbrella handle. If you wish, you may bend some of the fingers around the handle and glue/tape the folded fingers down to make it seem as if the hand is holding the umbrella.
4. Glue/tape cotton balls around the top of the umbrella to resemble clouds.
5. Using scissors, cut out rain drop shapes from tin foil and glue/tape the foil rain drops around the umbrella to give an appearance of a rain shower.
Enjoy the umbrellas below that were designed by the children at the library! Enjoy the rain!


As we know, the earth needs some rain in order to have
healthy green grass, crops, flowers, etc.
We have to be good to the Earth! Let's Celebrate Earth Day!
Color My World!

Supplies: Construction paper, image of the earth, crayons/markers, scissors, glue/tape and stickers.
Instructions:
1. Download and print an image of Earth.
2. Color in the earth in any colors of your preference.
3. Glue/tape the earth onto a letter-sized sheet of construction paper.
4. Color and decorate on or around the earth using letters, symbols, stickers, any recycled material etc. (Ex. The heart shape can represent love for the earth.)
Enjoy the colorful worlds below created by the children at the library!


Let's create some Earth Day puppets from recycled paper to remind ourselves to be kind to our Earth!


Supplies Needed: Blue Card Stock, Green Card Stock, Googly Eyes, Foam Stickers, Yarn, Crayons/Markers, Glue/Tape and Scissors.
Directions:
1. Cut out a circle from blue card stock. This will be your Earth!
2. Cut out 4 small strips of paper from blue card stock. (If you wish, you may fold up the strips in a zigzag direction and then unfold them to create a bouncy, springy effect.)
3. Attach the 4 strips of paper along the sides and bottom of the circle so that the Earth has arms and legs.
4. Cut out small pieces of green card stock in the shape of blotches to resemble land masses or continents.
5. Glue/tape the green pieces of paper onto the Earth circle.
6. Attach googly eyes and draw a mouth for the face.
7. If you wish your puppet to have hair, attach yarn onto the top of the circle.
8. Attach foam stickers or any other stickers at the ends of the puppets arms and legs for a more visual effect.
Enjoy the Earth Day puppets below created by the children at the library!


When we are kind to the earth, the animals will be happy! The bunnies will love running around on the green grass!
Let's say hi to the bunnies at the farm!
Bunny Tube!


Supplies: One Toilet Paper Tube, Construction Paper, Card Stock, Pom Pom, Cotton Ball, Scissors, Crayons/Markers, Glue/Tape.
Directions:
1. Wrap a toilet paper tube in construction paper (any color of your choice) and fasten the ends of the paper together using glue/tape.
2. Using crayons/markers, draw a bunny face on the tube. (Eyes, whiskers, mouth, etc.)
3. Using glue/tape, attach a pompom onto the middle of the face for the nose.
4. Attach a cotton ball onto the back of the tube to resemble a cotton tail.
5. Cut out 2 small rabbit feet shapes and attach them onto the bottom front of the tube so that the rabbit has feet. (You can do the same thing for the front paws or you can just draw front paw shapes onto the front sides of the tube.) Your rabbit should now have 2 front paws and 2 feet.
6. Cut out 2 long, thin strips of card stock and make sure they are both the same length.
7. Bend each strip into the shape of a rabbit ear.
8. Attach the 2 bent rabbit ear strips together to make the shape of the letter "M". Attach the ears onto the top of the tube. (Each bottom end that is unattached will then be attached to each top side of the tube.)
Enjoy the pictures below of the bunnies created by the children at the library!


The library is a good place to build a haiku!
Perhaps we can write a Haiku about riding up in the blue sky on a hot air balloon!
Build-A-Hot Air Balloon Haiku


Supplies Needed:
A light blue legal-sized sheet of paper, crayons/markers, glue/tape, a few cotton balls, stickers, little pieces of white paper and access to a PC/Laptop.
Instructions:
1. Download and print out an image of people in a hot air balloon.
2. Cut out the image and color it.
3. Glue or tape the hot air balloon image onto the blue sheet of paper.
4. Glue or tape the cotton balls onto the blue paper around the hot air balloon to resemble clouds.
5. Draw a sun, grass and anything else you wish to embellish in the picture. Use stickers of your choice as well.
6. Either think of your own haiku to write or download one from online or through a poetry book. Hopefully, the haiku should pertain to riding a hot air balloon or the outdoors, the skies, etc.
7. Type out the Haiku in big bold letters in Microsoft Word or write the haiku down in large letters using markers or crayons.
8. Once your haiku is typed or written, cut out all of the words so that each word is its' own small rectangle.
9. Glue/tape the words onto the blue paper below the hot air balloon or around the hot air balloon together to reform the haiku.
10. Enjoy the haiku you built and here are some build-a-hot air balloon haikus created by the children at the library. See the pictures below!


The library has so many books with poems, that it is important that libraries stay open. Perhaps we can build new ones too!

Supplies Needed: A letter sized piece of construction paper (preferably a light color or white), a small piece of construction paper of a different color (either blue or green), crayons/markers, glue/tape, scissors, a small piece of tin foil scrunched up into a ball and stickers


Instructions:
1. Fold the legal sized piece of construction paper in half from top to bottom. Make sure that the folded part is on top.
2. The folded top part will be the roof of the library. You may use scissors to cut out some angles at each end to create a slant effect.
3. Somewhere on the bottom of the library, cut a vertical line upwards for about an inch and a half. Then at the top of the cut line and adjacent to it, cut a small line horizontally. (The cuts should resemble a perpendicular angle.)
4. Fold out the remaining leftover shape away from where you cut to make it seem like you have a door that is opening and closing.
5. Using crayons or markers, color and decorate your library as you wish. Draw different shapes for windows, bricks, trees, plants, flowers, etc.
6. Using another small piece of construction paper, cut out a book drop return box. Write the words "Book Drop" if you can. You may draw the book return slot onto the paper library itself if you wish.
7. Take the small tin foil ball and glue it onto the door that you cut out earlier to resemble a door knob. You may use a pompom if you wish or draw it on as well.
8. Feel free to use stickers to add to the exterior of the paper library.
Below are paper stand up libraries designed by the children at the library!


All libraries are open! Enjoy!
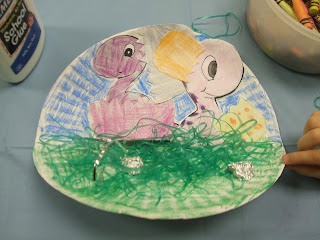
Now that we are in a library, perhaps it is a good time to learn and read about dinosaurs! What does a baby dinosaur look like when hatching out of an egg? Let's find out and create our own baby dinosaurs hatching out of eggs!
Baby Dinosaurs Hatching out of Eggs


Supplies: A paper plate, 2 cut outs of baby dinosaurs, white construction paper, crayons/markers, glue/tape, scissors, Easter grass and small pieces of tin foil.
Instructions:
1. Fold a paper plate in half.
2. Color the inside of the paper plate with any designs or scenery of your choice. For example, one half can resemble a sky and the other half can resemble grass or the ground.
3. Download pictures of baby dinosaurs from the Internet and print them out.
4. Cut out the pictures of the dinosaurs and color them in any color of your choice.
5. Draw two outlines of the bottoms of hatched eggs onto white construction paper and cut out the outlines. You may cut into each outline a zig zag pattern on the top to make it seem as if the bottom of the egg is broken from being hatched.
6. Draw 2 smaller outlines of the tops of hatched eggs with zig zig patterns on the bottom sides.
7. When everything is all colored in, glue/tape the egg pieces onto the bodies of the paper dinosaurs to make it seem as if they are hatching out of the eggs. The top parts of the eggs can be attached on top of the head of each dinosaur or scattered about on the plate, depending on your own preference.
8. Glue/tape the dinosaurs with the egg pieces onto one of the colored sides of the plate, preferably the part that's going to be the top part standing up.
9. Try to make the top part of the plate stand up.
10. Feel free to decorate the bottom side of the plate with Easter grass and pieces of tin foil scrunched in little balls for rocks.
Enjoy the baby dinosaurs below created by the children at the library!


It's time to check out books! Here is a basket that you can use to carry your books! This reminds me of Spring holiday baskets full of eggs, candies and goodies! Taking out books from the library feels just as nice as carrying a basket of treats!
Basket of Eggs Books!


Supplies: Construction paper, glue/tape, scissors and crayons/markers.
Directions:
1. Cut out a big basket shape from construction paper. (You can cut out an arch separately for the handles and attach them to the rest of the paper basket if you wish.)
2. Cut out at least 10 egg shapes (even number) from construction paper. (White or a light color is preferred).
3. Attach the egg shapes together in pairs (2 eggs each) by taping or gluing them together on one side. You should now have little paper egg books that open up.
4. Attach the paper egg books onto the paper basket.
5. Color and decorate the eggs and basket as you wish. Enjoy a basket of egg books for the Spring holidays!

Some of the books at the library have pictures of colorful bunnies in them! It makes me want to imagine how a rainbow colored bunny would look like!
Mosaic Bunny!

Supplies: Small square pieces of card stock, one sheet of construction paper, crayons/markers, glue/tape and 2 pom poms.
Directions:
1. Cut out small squares of card stock of different colors.
2. Draw or trace an outline of a bunny onto a sheet of construction paper.
3. Glue/tape the square card stock pieces inside the outline of the bunny shape.
4. Using crayons/markers, draw in extra scenery of your preference, such as a cloud, sun, grass, flowers, etc.
5. Use any left over squares to fill in the scenery, such as a cloud, sun, flowers, carrots, etc.
6. Attach a pom pom onto the nose part of the bunny and one onto the rear for the tail.
Enjoy your colorful bunnies!


After reading about dinosaurs and bunnies, it is time to walk home in the nice weather! Oooooh, I see some pink, wiggly earth worms in the grass! Let's collect some worms in a can and then we can plant some nice gardens!
Cans of Worms


Supplies Needed: One toilet paper tube cut in half to yield 2 halves of a tube, white or light colored construction paper or wrapping paper, pink construction paper, brown construction paper, green Easter grass, crayons/markers, glue/tape, scissors and small stickers.
Directions:
1. Cut one toilet paper tub in half.
2. Wrap each half of the tub in construction paper of any color of your choice, preferably, a light color for Spring.
3. After each tube half is wrapped in paper, decorate the outside of each tube using crayons/markers, stickers and anything else of your choice.
4. Cut 2 small square shapes out of construction paper of any color.
5. Glue/tape the bottom of the tube half onto a paper square and do the same for the other tube half.
6. Fill each tube half with pieces of cut up brown construction paper to resemble dirt/soil. Add some green Easter grass as well to resemble grass.
7. Cut out small strips of paper from pink construction paper to resemble worms.
8. Take each paper worm and draw a face on each one with eyes, nose and a mouth if you wish.
9. Stuff each tube half with the paper worms and have the paper worms stick out with the faces showing so that they can be seen.
10. Enjoy the cans of worms for the Spring season!
Enjoy the cans of worms created by the children at the library!


We are now heading into the month of May! It's time to do more gardening and it's time to get ready for Mother's DWelcome to the month of April! Happy April Fool's Day, Easter, Passover, Earth Day and National Poetry Month! If it's Easter, it's a nice time to decorate eggs and enjoy some peeps! The Spring is a good time to learn about the life cycle of a frog and other creatures. It's also a time to sing in the rain!


It's been a nice day at the museum! Now it's time to go back outside! It's raining again! Let's enjoy some April showers that bring May flowers. Let's open up our colorful umbrellas!
Enjoy the April Showers and Flowers below created by the children in the library!
It's time to return home from the museum and to get out of the rain! Let's make some art work. How about designing a still life image of an umbrella?
Still Life with Umbrella Art
As we know, the earth needs some rain in order to have
healthy green grass, crops, flowers, etc.
We have to be good to the Earth! Let's Celebrate Earth Day!
Color My World!
Let's create some Earth Day puppets from recycled paper to remind ourselves to be kind to our Earth!
Let's celebrate National Poetry Month!
The library is a good place to build a haiku!
Perhaps we can write a Haiku about riding up in the blue sky on a hot air balloon!
Build-A-Hot Air Balloon Haiku


Supplies Needed: A letter sized piece of construction paper (preferably a light color or white), a small piece of construction paper of a different color (either blue or green), crayons/markers, glue/tape, scissors, a small piece of tin foil scrunched up into a ball and stickers


I see some peeps in the windows! They are in the colors of paradise!
Peeps in Paradise!
Supplies: One letter sized piece of light blue card stock, smaller pieces of card stock in bright or pastel colors, small strips of green paper, a strip of brown paper, a small piece of yellow paper or card stock, beige card stock, blue tissue paper, crayons/markers and glue/tape.
Instructions to follow later!
It's time to see some eggs hatching!
Hatchimals!
Supplies: Card stock in bright colors, 2 googly eyes, one small piece of pipe cleaner, crayons/markers, glue/tape and 2 small strips of regular paper.
Instructions:
1. Cut out an egg shape from card stock. Draw a design on one side of the egg shape.
2. Cut the egg shape in half from side to side and cut in a zigzag way so that the egg shape looks like it's a cracked egg.
3. Cut out a round chick shape from card stock of a different color. Draw a face and design on the chick shape. Attach googly eyes onto the chick shape. Attach a pipe cleaner onto the top of the chick's head to resemble an antennae. The chick is supposed to resemble the "Hatchimal" toy.
4. Attach the chick shape onto the back of the bottom half of the egg shape. Make sure the front face and some of the upper body is sticking up enough from the egg half to be visible.
5. Bend 2 small strips of paper into loops and glue/tape the ends of each loop together. You should have 2 paper loops.
6. Attach one loop onto the back of the top half of the egg shape. Attach the other loop onto the bottom of the egg half. You should be able to slide your thumb through the loop on the bottom half of the egg and your index finger through the loop on the top half of the egg. Open and close the thumb and index finger to make it seem as if the egg hatches and the chick or "Hatchimal" hatches from the egg.
Enjoy the "Hatchimal toys below created by the children at the library!
I love those marshmallow peeps! They are such bright colors!
Peeps in Paradise!
It's raining, it's pouring, the old man is snoring!
Paper Umbrellas!
Supplies: One half of a paper plate, card stock, tissue paper, cotton, stickers, string, scissors, glue/tape and crayons/markers.
Instructions:
1. Cut a paper plate in half and discard one of the halves.
2. Cover the half of the plate in tissue paper that you'll use for the craft. This will be the top of the umbrella.
3. Cut out a cane shape from card stock and attach onto the bottom of the umbrella half. Now your umbrella has a handle.
4. Cut out 2 pieces of string. Cut out a few rain drop shapes from card stock. Attach the rain drops onto the strings and attach each string onto the bottom of the umbrella top. Now you have rain drops falling.
5. Decorate the paper umbrella with cotton, stickers and anything else of your preference.
6. If you wish, you can fold a small strip of paper into a circle and attach the ends together to make a paper cuff. You can attach the cuff onto the back of the umbrella and slide a finger or 2 through the cuff to hold the umbrella like a puppet.
Enjoy the paper umbrellas below created by the children at the library!
April Showers Bring May Flowers!
Let's enjoy the gardens! How about a giggle garden to lighten up the day?
Supplies: Brown construction paper, green construction paper, paper cut outs of flowers, fake grass, stickers, googly eyes, crayons/markers, scissors and glue/tape.
Instructions:
1. Cut out a rectangle or square shape from brown paper and a slightly smaller rectangle or square shape from green paper.
2. Glue or tape the green paper on top of the brown paper. Now you have the grass growing from the soil.
3. Color in a few paper flower shapes. Decorate with stickers and googly eyes.
4. Cut out some small strips of green paper. Bend each green strip into a zig zag shape.
5. Attach a flower on one end of a zig zag strip and attach the other end onto the paper grass. Repeat this for each flower.
6. If you wish, attach fake grass onto the green paper around the flowers.
Enjoy the giggle gardens below created by the children at the library!
After enjoying some rain and gardens, it's time to think about protecting the earth.
We've got the whole world in our hands!
Supplies: One paper plate, blue tissue paper, green tissue paper, neutral colored card stock, glue/tape, markers/crayons, stickers, scissors and glitter foam shapes.
Directions:
1. Wrap a paper plate in blue tissue paper.
2. Cut out smaller pieces of green tissue paper and attach them onto the plate onto the blue tissue paper. This will be the Earth and the continents.
3. Attach stickers onto the paper Earth, either onto the continents or the oceans. The stickers can be any kind that you would like to use. It's your own world!
4. Cut out 2 hand shapes from light colored or brown card stock and color in finger nails, sleeves, watches, etc.
5. Attach the 2 hands at the bottom of the plate to make it seem as if the world is in the hands.
6. If you wish, cut out a small rectangle from glitter foam sheets and attach onto one of the hands as a ring or bracelet.
Enjoy the worlds in hands below created by the children at the library!
After celebrating from Earth Day, it's a good time to learn about different creatures and their life cycles. What does a frog look like when it's a baby?
The life cycle of a frog book!
Supplies Needed: Construction paper, images of frogs, an image of a tadpole, an image of a frog let, an image of frog eggs, scissors, crayons/markers, glue/tape and stickers.
Instructions:
1. Cut out half of a sheet of construction paper and make sure the paper is a rectangle shape.
2. Fold the paper into 4 different zigzag sections. Now you have an accordion book. Decide which end of the accordion book you would like to use for the title. Using crayons/markers, write in a title of the book, such as "The Life Cycle of a Frog".
3. Cut out lily pads from green construction paper and attach to the sections of the book.
4. Cut out square shapes from blue construction paper and attach onto some of the pages if you wish to have some sections of water for the tadpoles to swim in.
5. Cut out an image of frog eggs or you can draw them too. Attach the frog eggs onto one of the sections at one end.
6. Attach an image of a tadpole and attach onto the next section.
7. Attach an image of a frog let and attach onto the next section.
8. Attach pictures of frogs onto the rest of the sections.
9. Using crayons/markers, color in the tadpole, frog let and frogs. Color in any fauna/flora or anything else in nature that you would like to include in the book.
10. You may embellish the pictures with stickers if you wish.
Enjoy the frog cycle books below created by the children at the library!
Let's decorate some eggs and create stuffed egg head puppets!
Egg Heads!
Supplies Used: Construction paper, Scissors, Crayons/Markers, Yarn, Glue/Tape and Cotton.
Directions:
1. Using scissors, cut out 2 egg shapes from construction paper of any light, Spring color.
2. Attach the 2 egg shapes together by the bottom using glue/tape. You should have an opening between the egg shapes on the top and sides.
3. Color and decorate one side of the egg using crayons/markers and anything else of your preference, such as cotton, stickers, etc. This will be the front of your egg.
4. Stuff some yarn or cotton into the top opening of the egg and push it all down so that the egg has some volume.
5. Close and seal up the rest of the egg using glue/tape.
6. You may add yarn or cotton at the top of the egg shape to resemble hair if you colored in a face on the egg.
7. If you wish, you may take a small strip of paper, bend it into a loop, attach the ends together and glue/tape the loop onto the back of the egg so that you can place your fingers through the loop. You can now hold your egg head as if it's a puppet.
8. Repeat the above steps if you wish to make more stuffed paper egg heads!
Enjoy the egg heads below created by the children at the library!
Happy Spring Holidays! Enjoy decorating your eggs!
Let's enjoy some peeps as well.
Does anyone have a peep in their pocket?
Peeps in a Pocket!
Supplies: Construction Paper, Scissors, Crayons/Markers, Glue/Tape and Cut-Outs of Bunnies and Chicks.
Instructions:
1. Using scissors, cut out 2 identical shapes in the form of a pants pocket.
2. Attach the 2 pocket shapes together along the bottom and bottom sides using glue/tape.
3. Using crayons/markers, color a design on your paper pocket.
4. Using scissors, cut out a few shapes of bunnies and chicks from light colored construction paper.
(You may cut from an outline of a bunny and chick from the Internet for the shape if you wish.)
5. Using crayons/markers, color in a face and any other design on each bunny and chick. (These will resemble the peeps candy.)
6. Glue/tape the paper peeps on the inside of the top of the pocket. Make sure that enough of the peeps are showing from inside the pocket.
Enjoy the peeps in a pocket below created by the children in the library!
Now that we have some peeps in our pockets to munch on, we can enjoy a visit to the Museum of Natural History and learn about a T-Rex! Perhaps a T-Rex has a tale to tell of its' own!
T-Rex Tale!
Supplies: Construction Paper, White Paper, Crayons/Markers, Glue/Tape, Scissors and Googly Eyes.
Instructions:
1. Cut out 2 T-Rex dinosaur shapes out of construction paper.
2. Attach the 2 T-Rex shapes together from at the top only! (Glue or tape the back of the heads, backs and tips of the tails together). The 2 dinosaurs should now be merged into one dinosaur that opens on the bottom
3. Cut out 2 small rows of triangles attached together and attach along the inside of the mouth of the dinosaur. Make sure the white triangles stick out to look like dinosaur teeth.
4. Using crayons/markers, color in the face and body of the dinosaur in any way of your choice.
5. If you wish, you may open up the dinosaur and write a small story (tale) inside or just draw pictures inside. Pictures can tell a tale too!
6. Attach a googly eye onto each side of the head where the eyes should be.
Enjoy the T-Rex tales below created by the children at the library!
It's been a nice day at the museum! Now it's time to go back outside! It's raining again! Let's enjoy some April showers that bring May flowers. Let's open up our colorful umbrellas!
Supplies Needed: Card Stock, Construction Paper, Scissors, Glue/Tape, Crayons/Markers, Cotton and Pom Poms.
Instructions:
1. Cut out a cloud shape from card stock (blue, white or gray card stock). Glue/tape pieces of cotton around the edge of the paper cloud. Now you have a cloud! Leave the outside of the cloud empty.
2. Cut out 2 strips of construction paper. Attach each strip to the bottom back of the cloud. Each strip should be hanging from the cloud at an angle or slant.
3. Cut out 2 small umbrella shapes from card stock of any color. Attach each umbrella shape onto the middle of each hanging strip.
4. Using crayons/markers, draw rain drop shapes along the strips and around the umbrellas to resemble rain.
5. Cut out 4 flower shapes from card stock. (Include the stems and leaves). Attach 2 flowers to the bottom of each strip. It should look as if it's raining on the flowers and umbrellas.
6. Write or type up the saying "April Showers Bring May Flowers" and attach that phrase onto the middle of the cloud.
7. If you wish to add texture or a touch and feel effect to the flowers, add pom poms to the round flower shapes for decoration and touch.
8. If you wish, punch a hole on the top of the cloud with a hole puncher and slide some string through. Tie a knot in the string and now you have a hanging Spring decoration!
Instructions:
1. Cut out a cloud shape from card stock (blue, white or gray card stock). Glue/tape pieces of cotton around the edge of the paper cloud. Now you have a cloud! Leave the outside of the cloud empty.
2. Cut out 2 strips of construction paper. Attach each strip to the bottom back of the cloud. Each strip should be hanging from the cloud at an angle or slant.
3. Cut out 2 small umbrella shapes from card stock of any color. Attach each umbrella shape onto the middle of each hanging strip.
4. Using crayons/markers, draw rain drop shapes along the strips and around the umbrellas to resemble rain.
5. Cut out 4 flower shapes from card stock. (Include the stems and leaves). Attach 2 flowers to the bottom of each strip. It should look as if it's raining on the flowers and umbrellas.
6. Write or type up the saying "April Showers Bring May Flowers" and attach that phrase onto the middle of the cloud.
7. If you wish to add texture or a touch and feel effect to the flowers, add pom poms to the round flower shapes for decoration and touch.
8. If you wish, punch a hole on the top of the cloud with a hole puncher and slide some string through. Tie a knot in the string and now you have a hanging Spring decoration!
Enjoy the April Showers and Flowers below created by the children in the library!
It's time to return home from the museum and to get out of the rain! Let's make some art work. How about designing a still life image of an umbrella?
Still Life with Umbrella Art
Supplies: Construction Paper, Cotton Balls, Tin Foil, Printouts of a Hand and an Umbrella, crayons/markers, glue/tape and scissors.
Directions:
1. Using scissors, cut out an outline of an umbrella and a hand.
2. Glue or tape the umbrella onto the construction paper. Color and decorate the umbrella.
3. Color the hand and glue/tape the hand under the umbrella handle. If you wish, you may bend some of the fingers around the handle and glue/tape the folded fingers down to make it seem as if the hand is holding the umbrella.
4. Glue/tape cotton balls around the top of the umbrella to resemble clouds.
5. Using scissors, cut out rain drop shapes from tin foil and glue/tape the foil rain drops around the umbrella to give an appearance of a rain shower.
Enjoy the umbrellas below that were designed by the children at the library! Enjoy the rain!
As we know, the earth needs some rain in order to have
healthy green grass, crops, flowers, etc.
We have to be good to the Earth! Let's Celebrate Earth Day!
Color My World!
Supplies: Construction paper, image of the earth, crayons/markers, scissors, glue/tape and stickers.
Instructions:
1. Download and print an image of Earth.
2. Color in the earth in any colors of your preference.
3. Glue/tape the earth onto a letter-sized sheet of construction paper.
4. Color and decorate on or around the earth using letters, symbols, stickers, any recycled material etc. (Ex. The heart shape can represent love for the earth.)
Enjoy the colorful worlds below created by the children at the library!
Let's create some Earth Day puppets from recycled paper to remind ourselves to be kind to our Earth!
Supplies Needed: Blue Card Stock, Green Card Stock, Googly Eyes, Foam Stickers, Yarn, Crayons/Markers, Glue/Tape and Scissors.
Directions:
1. Cut out a circle from blue card stock. This will be your Earth!
2. Cut out 4 small strips of paper from blue card stock. (If you wish, you may fold up the strips in a zigzag direction and then unfold them to create a bouncy, springy effect.)
3. Attach the 4 strips of paper along the sides and bottom of the circle so that the Earth has arms and legs.
4. Cut out small pieces of green card stock in the shape of blotches to resemble land masses or continents.
5. Glue/tape the green pieces of paper onto the Earth circle.
6. Attach googly eyes and draw a mouth for the face.
7. If you wish your puppet to have hair, attach yarn onto the top of the circle.
8. Attach foam stickers or any other stickers at the ends of the puppets arms and legs for a more visual effect.
1. Cut out a circle from blue card stock. This will be your Earth!
2. Cut out 4 small strips of paper from blue card stock. (If you wish, you may fold up the strips in a zigzag direction and then unfold them to create a bouncy, springy effect.)
3. Attach the 4 strips of paper along the sides and bottom of the circle so that the Earth has arms and legs.
4. Cut out small pieces of green card stock in the shape of blotches to resemble land masses or continents.
5. Glue/tape the green pieces of paper onto the Earth circle.
6. Attach googly eyes and draw a mouth for the face.
7. If you wish your puppet to have hair, attach yarn onto the top of the circle.
8. Attach foam stickers or any other stickers at the ends of the puppets arms and legs for a more visual effect.
Enjoy the Earth Day puppets below created by the children at the library!
When we are kind to the earth, the animals will be happy! The bunnies will love running around on the green grass!
Let's say hi to the bunnies at the farm!
Bunny Tube!
Supplies: One Toilet Paper Tube, Construction Paper, Card Stock, Pom Pom, Cotton Ball, Scissors, Crayons/Markers, Glue/Tape.
Directions:
1. Wrap a toilet paper tube in construction paper (any color of your choice) and fasten the ends of the paper together using glue/tape.
2. Using crayons/markers, draw a bunny face on the tube. (Eyes, whiskers, mouth, etc.)
3. Using glue/tape, attach a pompom onto the middle of the face for the nose.
4. Attach a cotton ball onto the back of the tube to resemble a cotton tail.
5. Cut out 2 small rabbit feet shapes and attach them onto the bottom front of the tube so that the rabbit has feet. (You can do the same thing for the front paws or you can just draw front paw shapes onto the front sides of the tube.) Your rabbit should now have 2 front paws and 2 feet.
6. Cut out 2 long, thin strips of card stock and make sure they are both the same length.
7. Bend each strip into the shape of a rabbit ear.
8. Attach the 2 bent rabbit ear strips together to make the shape of the letter "M". Attach the ears onto the top of the tube. (Each bottom end that is unattached will then be attached to each top side of the tube.)
1. Wrap a toilet paper tube in construction paper (any color of your choice) and fasten the ends of the paper together using glue/tape.
2. Using crayons/markers, draw a bunny face on the tube. (Eyes, whiskers, mouth, etc.)
3. Using glue/tape, attach a pompom onto the middle of the face for the nose.
4. Attach a cotton ball onto the back of the tube to resemble a cotton tail.
5. Cut out 2 small rabbit feet shapes and attach them onto the bottom front of the tube so that the rabbit has feet. (You can do the same thing for the front paws or you can just draw front paw shapes onto the front sides of the tube.) Your rabbit should now have 2 front paws and 2 feet.
6. Cut out 2 long, thin strips of card stock and make sure they are both the same length.
7. Bend each strip into the shape of a rabbit ear.
8. Attach the 2 bent rabbit ear strips together to make the shape of the letter "M". Attach the ears onto the top of the tube. (Each bottom end that is unattached will then be attached to each top side of the tube.)
Enjoy the pictures below of the bunnies created by the children at the library!
The library is a good place to build a haiku!
Perhaps we can write a Haiku about riding up in the blue sky on a hot air balloon!
Build-A-Hot Air Balloon Haiku
Supplies Needed:
A light blue legal-sized sheet of paper, crayons/markers, glue/tape, a few cotton balls, stickers, little pieces of white paper and access to a PC/Laptop.
Instructions:
1. Download and print out an image of people in a hot air balloon.
2. Cut out the image and color it.
3. Glue or tape the hot air balloon image onto the blue sheet of paper.
4. Glue or tape the cotton balls onto the blue paper around the hot air balloon to resemble clouds.
5. Draw a sun, grass and anything else you wish to embellish in the picture. Use stickers of your choice as well.
6. Either think of your own haiku to write or download one from online or through a poetry book. Hopefully, the haiku should pertain to riding a hot air balloon or the outdoors, the skies, etc.
7. Type out the Haiku in big bold letters in Microsoft Word or write the haiku down in large letters using markers or crayons.
8. Once your haiku is typed or written, cut out all of the words so that each word is its' own small rectangle.
9. Glue/tape the words onto the blue paper below the hot air balloon or around the hot air balloon together to reform the haiku.
10. Enjoy the haiku you built and here are some build-a-hot air balloon haikus created by the children at the library. See the pictures below!
The library has so many books with poems, that it is important that libraries stay open. Perhaps we can build new ones too!
Supplies Needed: A letter sized piece of construction paper (preferably a light color or white), a small piece of construction paper of a different color (either blue or green), crayons/markers, glue/tape, scissors, a small piece of tin foil scrunched up into a ball and stickers
Instructions:
1. Fold the legal sized piece of construction paper in half from top to bottom. Make sure that the folded part is on top.
2. The folded top part will be the roof of the library. You may use scissors to cut out some angles at each end to create a slant effect.
3. Somewhere on the bottom of the library, cut a vertical line upwards for about an inch and a half. Then at the top of the cut line and adjacent to it, cut a small line horizontally. (The cuts should resemble a perpendicular angle.)
4. Fold out the remaining leftover shape away from where you cut to make it seem like you have a door that is opening and closing.
5. Using crayons or markers, color and decorate your library as you wish. Draw different shapes for windows, bricks, trees, plants, flowers, etc.
6. Using another small piece of construction paper, cut out a book drop return box. Write the words "Book Drop" if you can. You may draw the book return slot onto the paper library itself if you wish.
7. Take the small tin foil ball and glue it onto the door that you cut out earlier to resemble a door knob. You may use a pompom if you wish or draw it on as well.
8. Feel free to use stickers to add to the exterior of the paper library.
Below are paper stand up libraries designed by the children at the library!
All libraries are open! Enjoy!
Now that we are in a library, perhaps it is a good time to learn and read about dinosaurs! What does a baby dinosaur look like when hatching out of an egg? Let's find out and create our own baby dinosaurs hatching out of eggs!
Baby Dinosaurs Hatching out of Eggs
Supplies: A paper plate, 2 cut outs of baby dinosaurs, white construction paper, crayons/markers, glue/tape, scissors, Easter grass and small pieces of tin foil.
Instructions:
1. Fold a paper plate in half.
2. Color the inside of the paper plate with any designs or scenery of your choice. For example, one half can resemble a sky and the other half can resemble grass or the ground.
3. Download pictures of baby dinosaurs from the Internet and print them out.
4. Cut out the pictures of the dinosaurs and color them in any color of your choice.
5. Draw two outlines of the bottoms of hatched eggs onto white construction paper and cut out the outlines. You may cut into each outline a zig zag pattern on the top to make it seem as if the bottom of the egg is broken from being hatched.
6. Draw 2 smaller outlines of the tops of hatched eggs with zig zig patterns on the bottom sides.
7. When everything is all colored in, glue/tape the egg pieces onto the bodies of the paper dinosaurs to make it seem as if they are hatching out of the eggs. The top parts of the eggs can be attached on top of the head of each dinosaur or scattered about on the plate, depending on your own preference.
8. Glue/tape the dinosaurs with the egg pieces onto one of the colored sides of the plate, preferably the part that's going to be the top part standing up.
9. Try to make the top part of the plate stand up.
10. Feel free to decorate the bottom side of the plate with Easter grass and pieces of tin foil scrunched in little balls for rocks.
Enjoy the baby dinosaurs below created by the children at the library!
It's time to check out books! Here is a basket that you can use to carry your books! This reminds me of Spring holiday baskets full of eggs, candies and goodies! Taking out books from the library feels just as nice as carrying a basket of treats!
Basket of Eggs Books!
Supplies: Construction paper, glue/tape, scissors and crayons/markers.
Directions:
1. Cut out a big basket shape from construction paper. (You can cut out an arch separately for the handles and attach them to the rest of the paper basket if you wish.)
2. Cut out at least 10 egg shapes (even number) from construction paper. (White or a light color is preferred).
3. Attach the egg shapes together in pairs (2 eggs each) by taping or gluing them together on one side. You should now have little paper egg books that open up.
4. Attach the paper egg books onto the paper basket.
5. Color and decorate the eggs and basket as you wish. Enjoy a basket of egg books for the Spring holidays!
Some of the books at the library have pictures of colorful bunnies in them! It makes me want to imagine how a rainbow colored bunny would look like!
Mosaic Bunny!
Supplies: Small square pieces of card stock, one sheet of construction paper, crayons/markers, glue/tape and 2 pom poms.
Directions:
1. Cut out small squares of card stock of different colors.
2. Draw or trace an outline of a bunny onto a sheet of construction paper.
3. Glue/tape the square card stock pieces inside the outline of the bunny shape.
4. Using crayons/markers, draw in extra scenery of your preference, such as a cloud, sun, grass, flowers, etc.
5. Use any left over squares to fill in the scenery, such as a cloud, sun, flowers, carrots, etc.
6. Attach a pom pom onto the nose part of the bunny and one onto the rear for the tail.
Enjoy your colorful bunnies!
After reading about dinosaurs and bunnies, it is time to walk home in the nice weather! Oooooh, I see some pink, wiggly earth worms in the grass! Let's collect some worms in a can and then we can plant some nice gardens!
Cans of Worms
Supplies Needed: One toilet paper tube cut in half to yield 2 halves of a tube, white or light colored construction paper or wrapping paper, pink construction paper, brown construction paper, green Easter grass, crayons/markers, glue/tape, scissors and small stickers.
Directions:
1. Cut one toilet paper tub in half.
2. Wrap each half of the tub in construction paper of any color of your choice, preferably, a light color for Spring.
3. After each tube half is wrapped in paper, decorate the outside of each tube using crayons/markers, stickers and anything else of your choice.
4. Cut 2 small square shapes out of construction paper of any color.
5. Glue/tape the bottom of the tube half onto a paper square and do the same for the other tube half.
6. Fill each tube half with pieces of cut up brown construction paper to resemble dirt/soil. Add some green Easter grass as well to resemble grass.
7. Cut out small strips of paper from pink construction paper to resemble worms.
8. Take each paper worm and draw a face on each one with eyes, nose and a mouth if you wish.
9. Stuff each tube half with the paper worms and have the paper worms stick out with the faces showing so that they can be seen.
10. Enjoy the cans of worms for the Spring season!
Enjoy the cans of worms created by the children at the library!
We are now heading into the month of May! It's time to do more gardening and it's time to get ready for Mother's Day!