

Welcome to the month of February! Is there still some snow outside? Would you like a box of chocolates for Valentine's Day? Is the groundhog surfacing from the ground? Will it see its' shadow? Is anyone going to catch the love bug on Valentine's Day? Which animal is the focus of the Chinese New Year? February is a great month to learn about these days and celebrations!
Let's go ice skating! Wow, there are some skating stars on the ice! Perhaps we can watch them or skate like them!
Ice Skating Stars!

Supplies: Card stock, scissors, white paper, crayons/markers, glue/tape and glitter foam stickers.
Instructions:
1. Cut out 2 star shapes from card stock.
2. Take half of a white letter-sized paper and fold it in half. Place the paper on a flat surface so that one side is standing up.
3. Cut out 4 small strips of card stock.
4. Cut out 4 small pieces of white paper in the shape of ice skates.
5. Attach 2 small strips of paper onto the bottom of each star. Now the stars each have a pair of legs.
6. Attach a paper skate onto the bottom of each leg. Now the stars are on ice skates.
7. Draw faces and designs onto the skating stars and attach the stars onto the top part of the folded paper so that the stars look as if they are standing up and skating together.
8. On the bottom part of the paper that is flat, draw an oval to represent a skating rink.
Enjoy the skating stars below created by the children at the library!


There is still some snow left from last months storm. Perhaps we can still go sledding!
Snow Sled!

Supplies Needed: One small cardboard tube, white paper, light colored card stock, string, crayons/markers, glue/tape, fabric and one hole puncher.
Instructions:
1. Wrap a small cardboard tube in white paper. This will be the snowy hill.
2. Using scissors, cut out a shape of a sled and 2 blades.
3. Color the sled and blades and then attach the blades to the bottom of the sled.
4. Cut out a paper doll and color a face, hair and winter outfit onto the doll.
5. Cut out a small strip of fabric (this will be the scarf) and another small piece of fabric into the shape of a hat.
6. Attach the scarf and hat onto the paper doll. Attach the doll onto the sled and bend the upper part of the doll in a vertical direction so it looks as if the doll is sitting on the sled.
7. Punch a hole into the sled and place a small piece of string through the hole. Tie a knot at the ends.
8. Attach the sled with the blades, doll and string onto the cardboard tube and make sure that the sled is slanted in a downwards direction so it looks as if the doll is sledding down the hill.
Enjoy the paper sleds below created by the children at the library!


Would you like a box of chocolates for Valentine's Day?


Supplies Used: Construction paper, scissors, tissue paper, glue/tape, ribbon, crayon/markers and foam stickers.
Instructions:
1. Cut out 2 heart shapes from construction paper in any color of your choice. Attach the hearts together by taping or gluing the tops of the hearts together. The hearts should now open and close like a vertical card.
2. Open the hearts and attach tissue paper onto the bottom heart.
3. Cut out small shapes from brown paper and white paper in the shape of chocolates. They can be squares, circles, domes, etc.
4. Attach the chocolate shapes onto the tissue paper. Draw designs onto the chocolates, such as swirls or fruit shapes.
5. Close the hearts and decorate the front of the top heart with foam stickers, ribbons or draw designs with crayons/markers.
Enjoy the paper heart shaped box of chocolates below created by the children at the library!


It's Groundhog Day! Let's see if the groundhog rises up from the ground and sees a shadow! Is the groundhog going to predict the weather? Let's create a paper groundhog puppet!

Supplies Used: One letter-sized piece of light colored card stock, fake grass, crayons, markers, glue/tape, one strip of paper bent into a ring shape, scissors and an image of a groundhog.
Instructions:
1. Using scissors, cut a slit into the middle of the letter-sized piece of card stock. The slit should be about 3-4 inches long.
2. Using crayons and markers, color in a background to resemble the outdoors. You may use fake grass or cotton for snow for the ground.
3. Color in your image of your groundhog or if you wish, you may print out or scan a colored picture of a groundhog and use that too.
4. If you wish, you may cut out a small strip of paper and bend it into a ring. Attach the ends of the strip of paper together using glue/tape to create a paper ring. Attach the ring on the back of the groundhog in a horizontal position so that you can easily place your fingers or hand through the ring and hold the groundhog as a puppet.
5. Slide the paper groundhog puppet through the slit in an up and down motion to simulate a groundhog moving in and out of the ground.
Enjoy the groundhog puppets below created by the children at the library!


Happy Valentine's Day! Did anyone catch the love bug? Perhaps we can create a lift-the-flap love bug and learn about Valentine's Day in the process!
Lift-the-Flap Love Bugs!


Supplies Used: Construction Paper, Pipe Cleaner, Crayons/Markers, Scissors and Glue/Tape.
Instructions:
1. Cut out 2 heart shapes from construction paper. Attach the 2 hearts together from the top of the hearts so that you have a heart that opens from the bottom. (Lift-the-Flap heart).
2. Cut out small circles for the head and face and attach them to the top back of the hearts.
3. Cut out 6 strips of construction paper for the legs and attach the legs around the back of the heart. Make sure the legs stick out on the sides. There should be 3 on each side of the heart.
4. Cut out 2 wings and attach them to the back as well.
5. Cut out six small hearts and attach each one to the end of each leg. (Optional)
6. Cut a piece of pipe cleaner in half and fold one piece into a "V" shape and curl the ends.
7. Attach the folded "V" pipe cleaner onto the top of the head of the insect for the antennas.
8. Using crayons/markers and anything else, color and decorate the lift-the-flap love bug in any way you like. If you wish, write a message or draw a picture on the bottom heart after lifting the top heart up.
Enjoy the lift-the-flap heart love bugs below created by the children at the library!


Happy Chinese New Year! It's the year of the sheep/ram! Let's count some sheep! Let's create some soft sheep to count!
Counting Sheep Craft


Supplies Used: Construction Paper, Fake Grass, Fabric, Cotton, Stickers, Crayons/Markers, Scissors & Glue/Tape.
Instructions:
1. Cut a sheet of construction paper in half. Discard the other half.
2. Fold the piece of construction paper that you are going to use into a zigzag pattern to create a zigzag paper book.
3. Cut out shapes from fabric to resemble the fleece or wool of sheep.
4. Cut out heads and legs from black paper.
5. Using glue or tape, attach each piece of fabric (sheep's wool) onto each section of the folded paper. There should be about 8 sections for 8 sheep, one sheep per section.
6. Attach a head and 4 legs onto or around the fabric to create the sheep.
7. Adorn each section with fake grass under the legs for the ground or cotton for snow and clouds. You may draw or color in a sun too and use stickers as you wish.
8. Using a white or light colored crayon, draw a face on each sheep's head and draw a number for each sheep too. (Preferably numbers 1-8.)
Now you can fold or unfold your book to display the different sheep!
Enjoy the sheep below created by the children at the library!


It's been a long day celebrating the Chinese New Year. After watching the parade, enjoying dim sum and counting the sheep, it's time to enjoy a treat! Let's go to the candy store!
Now it's time to enjoy some lollipops from the candy store!
Now it's time to enjoy some lollipops from the candy store!
Lovely Lollipops!


Supplies Used: Two paper plates, scissors, 2 wooden sticks (ice cream sticks), construction paper, crayons/markers, plastic saran wrap and glue/tape.
Instructions:
1. Using scissors, cut out the centers of 2 paper plates. Discard the cut away edges or recycle them for future use.
2. Cut out different shapes from construction paper that you want to use to decorate the paper lollipops. (For ex., heart shapes, circles, swirles, lines, etc.)
3. Color and decorate each plate center using crayons/markers, paper shapes and anything else of your choice.
4. Attach a wooden ice cream stick to the bottom of each plate center. Now each paper lollipop has a stick.
5. Cover the top part of each paper lollipop with plastic saran wrap to make it seem as if the paper lollipops are wrapped like real lollipops.
6. Cut out 2 bow shapes out of smaller pieces of construction paper and attach one to each lollipop. (They should be attached to the bottom of the top of the lollipop to make it seem as if the lollipop is tied with a bow.) You may also use string or ribbon if you like and tie that around the top of the stick below the head of the lollipop.
Enjoy the colorful paper lollipops below created by the children at the public library!


Happy Chinese New Year!
Let's Celebrate the Year of the Horse!

Enjoy the horses below created by the children at the library!


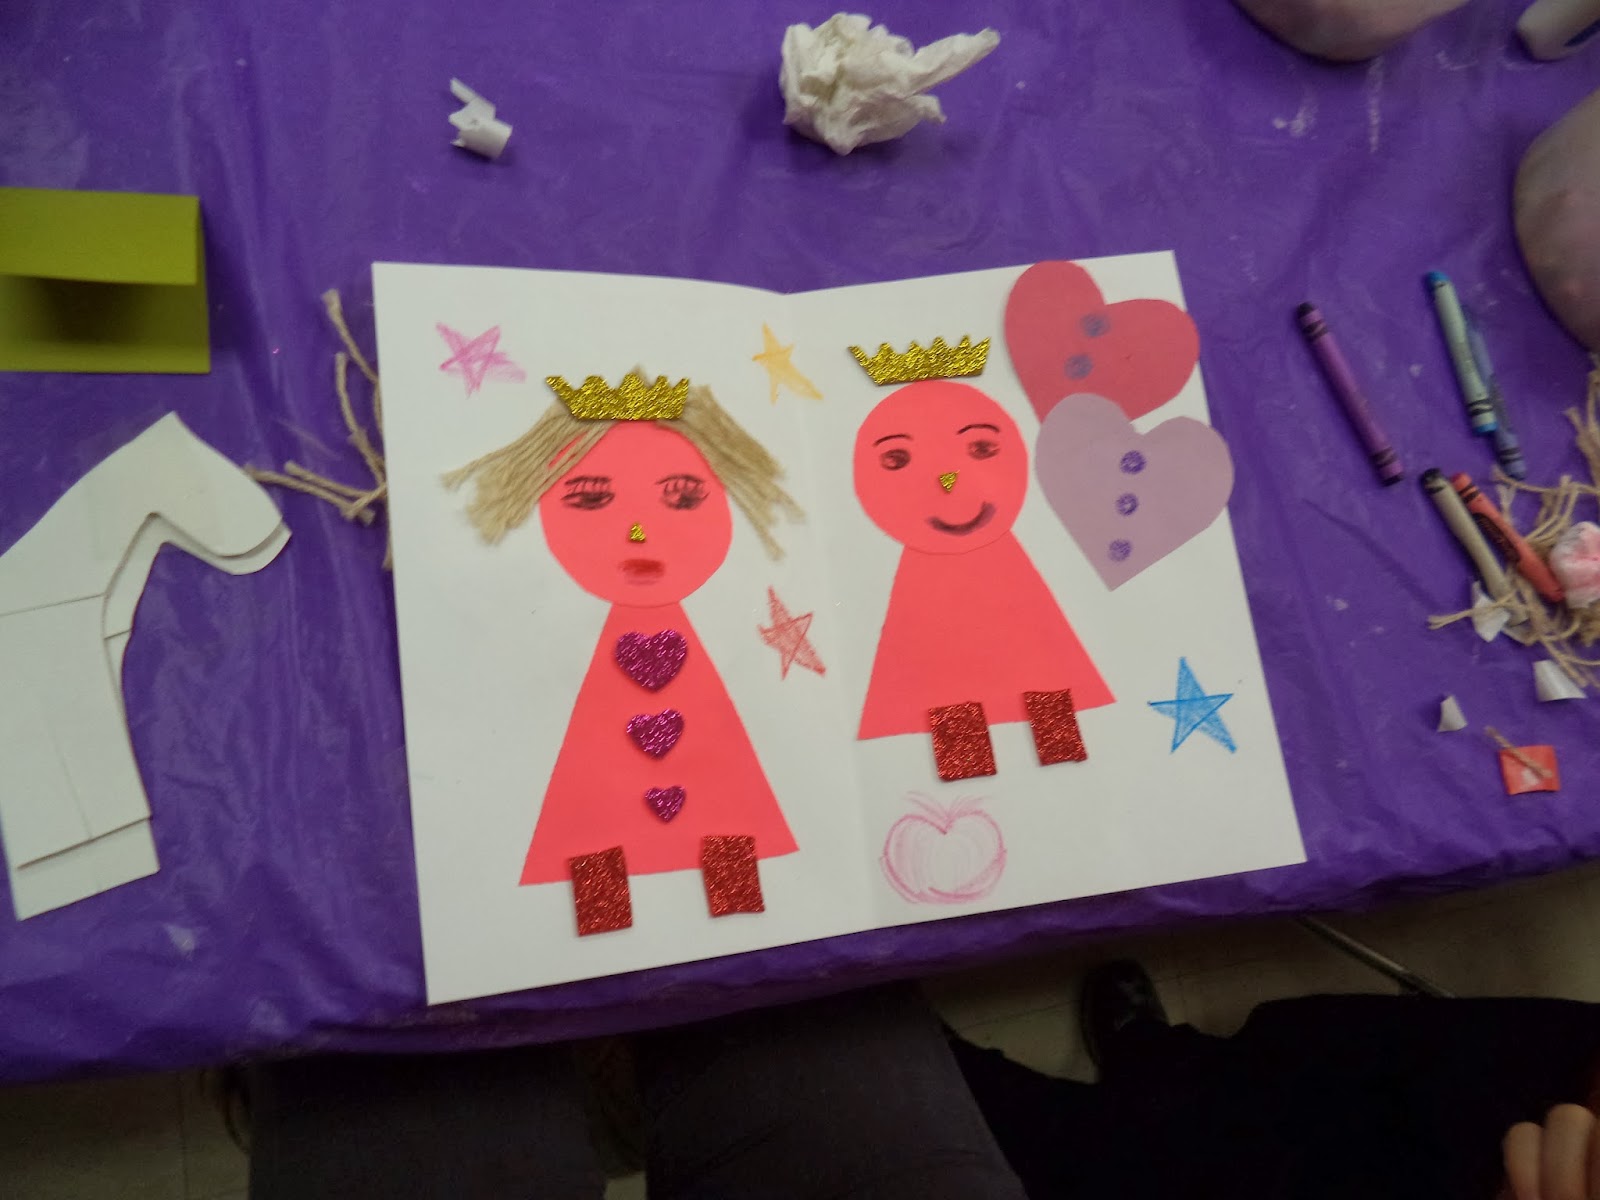
The King and Queens of Hearts Card!


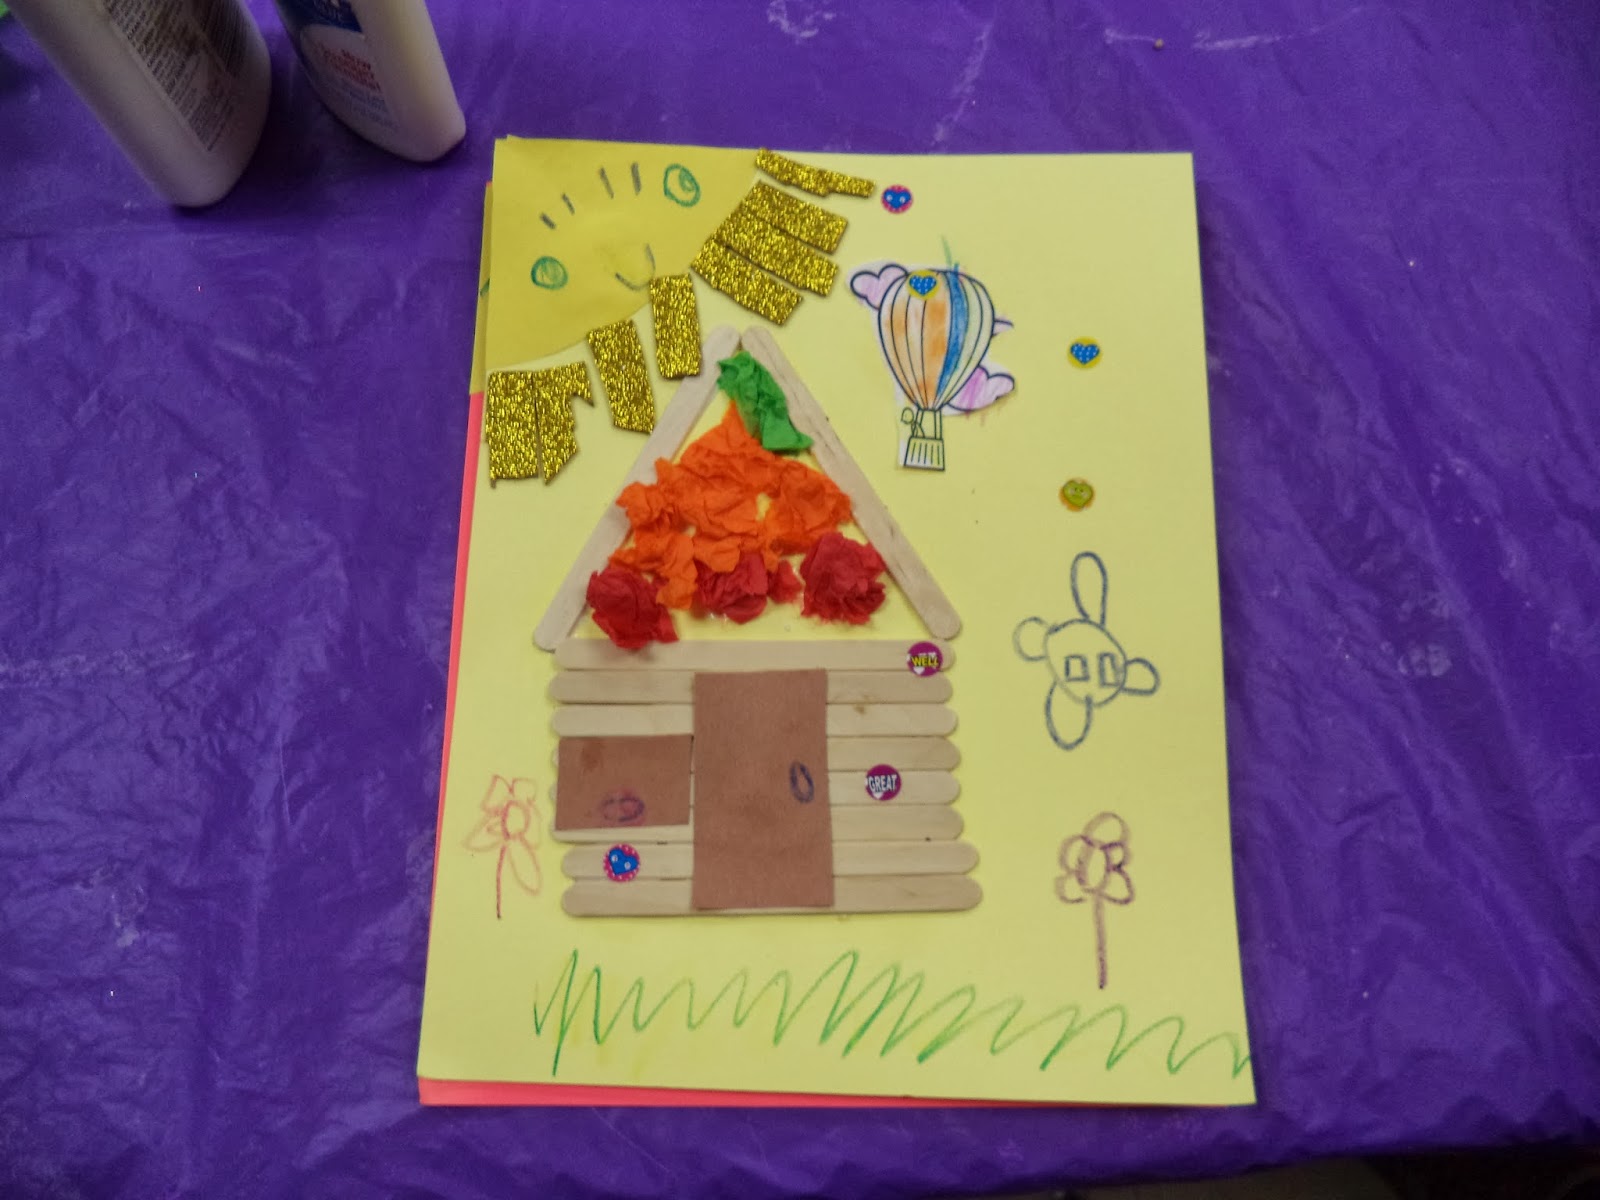
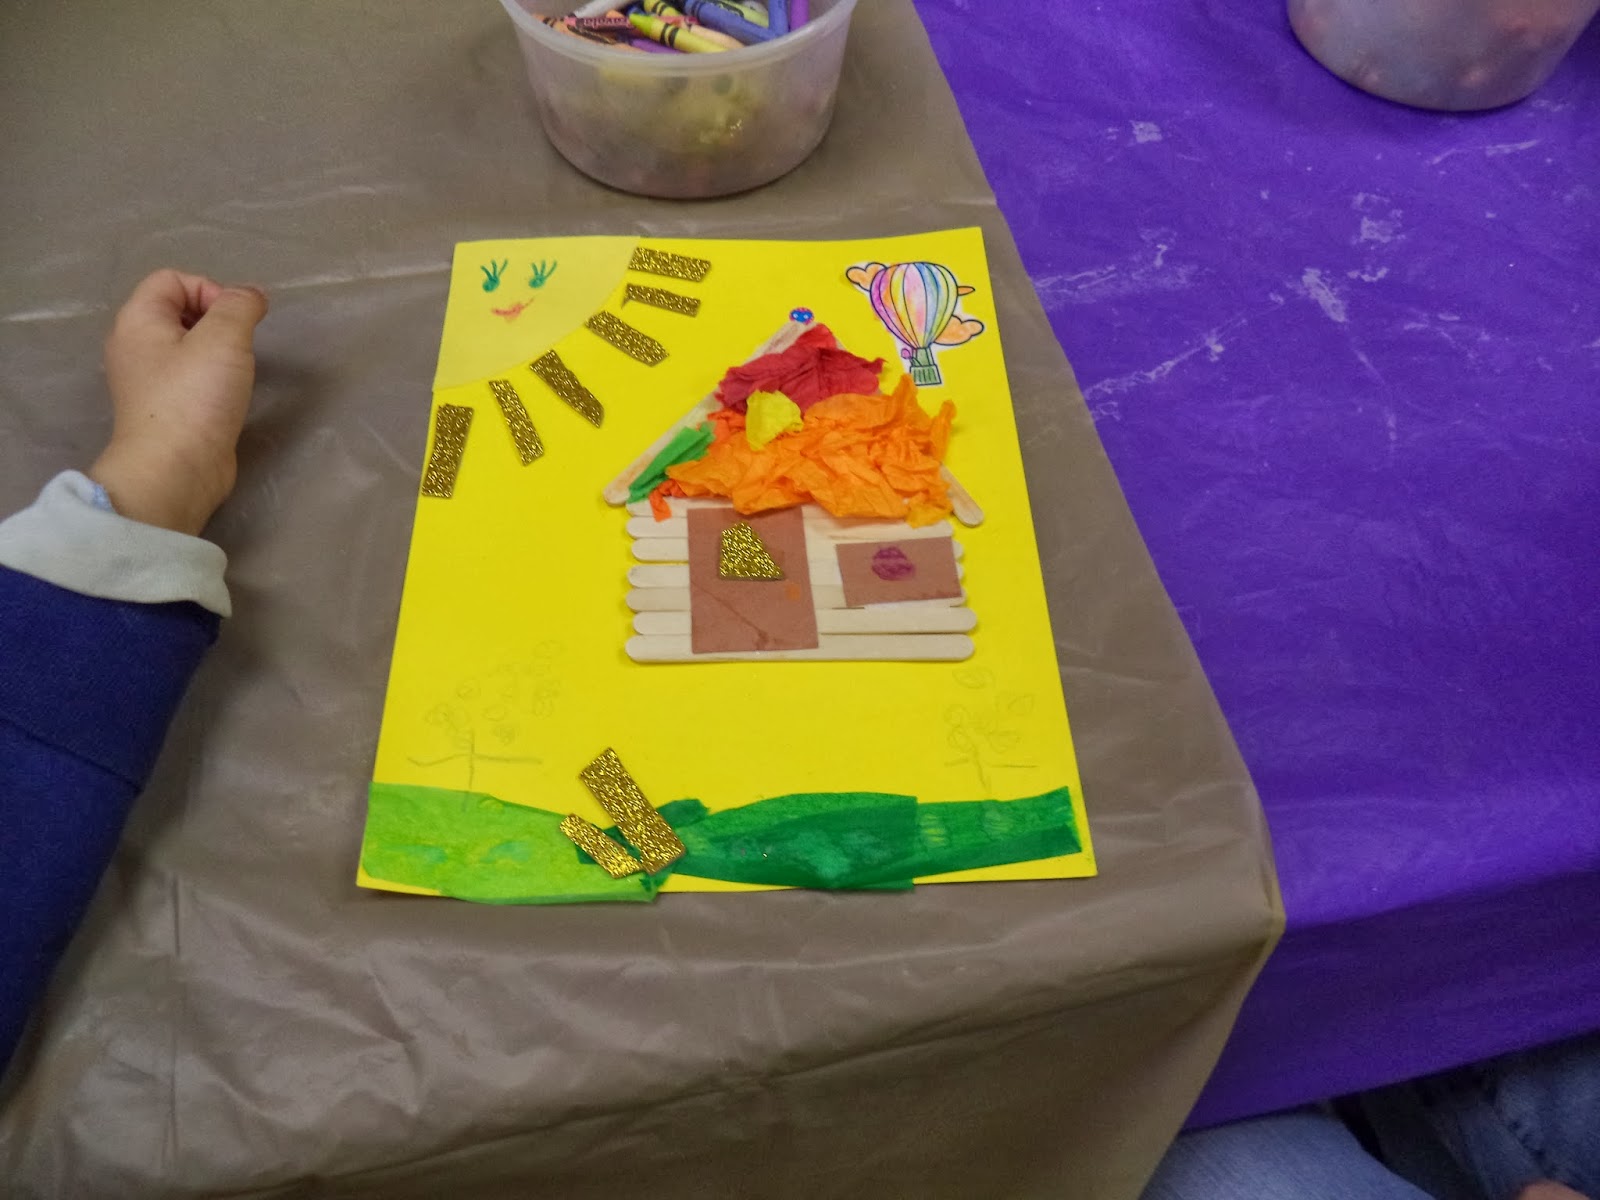
Now that we celebrated the Chinese New Year and Valentine's Day, Let's Celebrate President's Day as well. Let's build a log cabin in honor of President Abraham Lincoln!
Log Cabin Craft


Because February is Black History Month and there is President's Day, it is a good time to think of and celebrate superheroes and what a superhero is to you!
Here is a Superhero Doll! Super Silly!


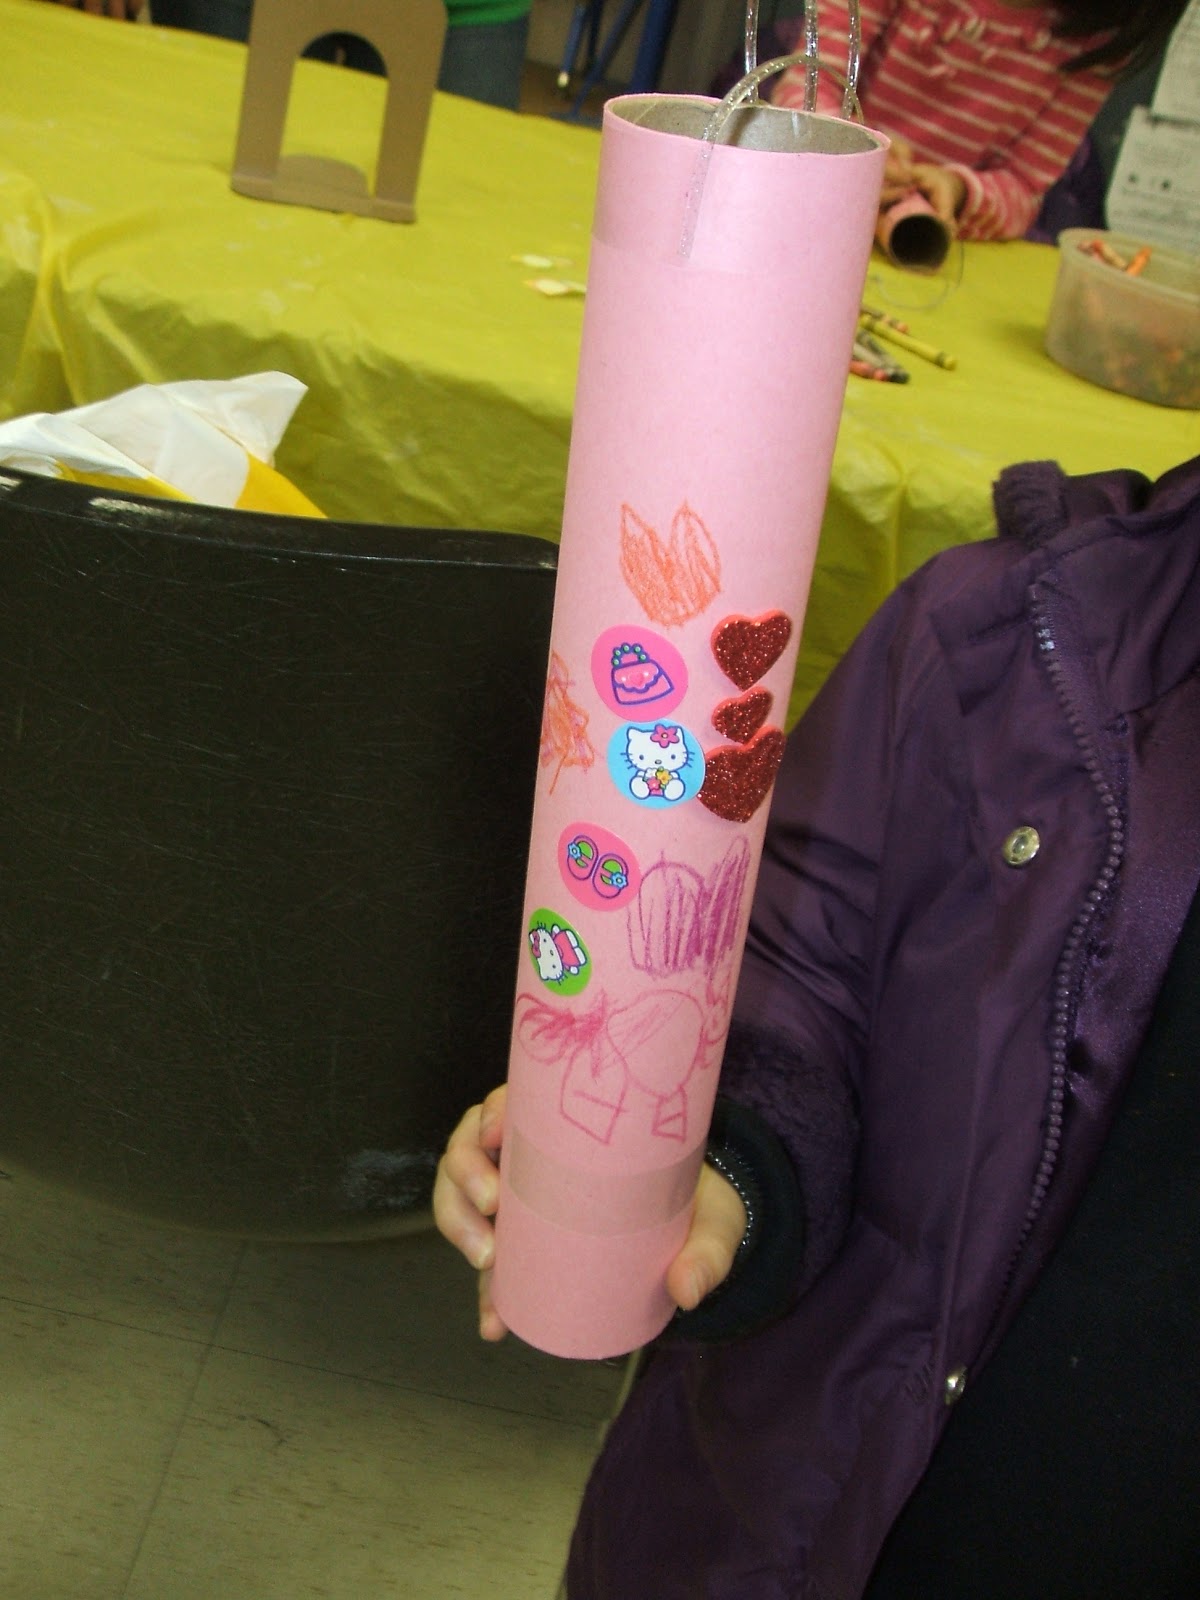
Peace and Love Pole
Let's Celebrate the Year of the Horse!
Supplies Needed: Construction Paper, Card Stock, Crayons/Markers, Glue/Tape, Scissors, Yarn and Stickers for Further Embellishment.
Instructions:
1. Cut out the outline of a horse from construction paper twice and then glue/tape the horses together along the tops of the horse's bodies.
2. Decorate the horse using crayons/markers, yarn for the mane and tail, stickers, etc.
3. If you wish, cut out a small rectangle from construction paper or card stock, fold the paper and place on the horse's back for the saddle.
4. Stand up the horse so that the horse is now in a standing position. Neigh!
The King and Queens of Hearts Card!
Supplies Needed: Card Stock, Crayons/Markers, Glue/Tape, Stickers, Yarn and Scissors.
Instructions:
1. Fold a letter sized piece of card stock in half. Open up the card stock.
2. Cut out 2 circles, 2 triangles and 2 hearts from card stock.
3. Glue or tape the circle and triangles together to form the head and body of the king and queen of hearts.
4. Decorate the king and queen using crayons, markers, stickers and yarn for the hair.
5. Glue or paste a heart near the queen and king so that it resembles the King and Queen of Hearts.
6. Fold up the card again and decorate the outside as you wish.
Happy Valentines Day and enjoy the King and Queen of Hearts cards pictured below created by the children at the library!
Now that we celebrated the Chinese New Year and Valentine's Day, Let's Celebrate President's Day as well. Let's build a log cabin in honor of President Abraham Lincoln!
Log Cabin Craft
Supplies and Instructions will follow later.
Enjoy the log cabins pictured below created by the children at the library!
Because February is Black History Month and there is President's Day, it is a good time to think of and celebrate superheroes and what a superhero is to you!
Here is a Superhero Doll! Super Silly!
Supplies Needed: One cardboard tube, pieces of fabric, crayons/markers, glue/tape, card stock, fake grass for hair and stickers.
Enjoy the superheroes below created by the children at the library!

Supplies Needed: Paper towel tube, crayons/markers, stickers, lanyard/string/ribbon, a sheet of construction paper and tape.
Directions:
1. Wrap a sheet of construction paper around a paper towel tube. (Tape the ends together to secure the paper in place around the tube)
2. Color and decorate with crayons/markers and stickers of your choice. (Glitter heart stickers were used on the example above.)
3. The decorations should resemble anything that represents peace, love, hearts or anything else that makes someone feel good.
4. If you wish, you can tape pieces of lanyard or ribbons or string on different sides of the tube and tie the ends together to make a bow.
5. Enjoy this craft for Valentine's Day or any other time of the year!
Peace and Love Poles Designed by the Children at the Library are pictured below!


Next Craft:
Now Let's Visit the Zoo of Hearts!


Supplies Needed: Cardstock (solid colors and patterned ones too if available), scissors, crayons/markers, glue/tape and stickers if you wish.
1. Fold a letter sized piece of solid colored cardstock in half.
2. Cut out smaller pieces of animal patterned and solid colored cardstock in the shape of hearts.
3. Glue/Tape the hearts together in the shape of animals of your choosing onto the folded cardstock sheet. (Each section may resemble a different animal exhibit at the zoo).
4. If you wish, use crayons/markers to draw limbs and extra features on the animals to make the heart shaped animals resemble the actual animals.
5. Feel free to use stickers to further enhance your zoo of hearts!
6. Enjoy this fun craft for Valentine's Day or the summer season.
Enjoy the zoos of hearts created by the children at the library posted below!


After visiting the "Zoo of Hearts", let's enjoy a nice cupcake!
Cupcake Craft


Supplies Needed: Cardstock, tin foil, tissue paper, a pom pom, glue/tape and scissors.
Instructions:
1. Download an outline of a cupcake shape. (You can draw your own cupcake outline if you wish).
2. Trace the outline or draw the outline of the cupcake onto a sheet of cardstock.
3. Glue/tape a piece of tin foil onto the bottom of the cupcake to simulate a shiny wrapper effect. (Make sure that the piece of tin foil is the same shape and size as the stump of the cupcake before gluing/taping it on.)
4. Glue/tape pieces of scrunched up tissue paper onto the top of the cupcake to create a puffy frosting effect. (You may use one color for the tissue paper pieces or several colors depending on your preference).
5. Glue/tape a small pom pom on the top of the cupcake to simulate a cherry or any other decoration for the top of the cupcake.
Enjoy a fresh batch of colorful paper cupcakes created by the children! The pictures are posted below!


After enjoying a nice, coloring treat, let's create a colorful checkerboard design so that someday you can play checkers if you wish!
Checkerboard Design

Supplies Needed: A letter sized sheet of card stock or construction paper, pencil, ruler, crayons/markers and stickers.
Instructions:
1. Fold a sheet of card stock or construction paper in half.
2. After folding it, unfold the sheet and lay it flat on a table in a vertical position.
3. Using a pencil, draw vertical and horizontal lines all the way across the sheet. Use a ruler to make sure that the lines are even and straight.
4. Using crayons or markers, color in the squares that you wish to color in. It is suggested to color in every other square to create a checkboard effect, but that depends on your preference.
5. Use stickers to decorate.
6. You may use this craft as a real checkboard for a game of checkers if you wish or else it can be used for decoration.
Enjoy the checkboards created below by the children at the library!


The weather outside feels warmer. It's time to look forward to the month of March!
No comments:
Post a Comment